Add IMPACT to Landscape Photos Using MASKS in Photoshop’s Raw Editor (VIDEO)
There are numerus ways to shoot and edit landscape photos depending upon the look you’re after. Sometimes you may want a dark and moody image, while other times the goal is to accentuate interesting atmospheric condition like fog, snow, or rain. Another common approach is to create vibrant images full of eye-catching color—even when shooting under flat light or in the shade.
This tutorial from the popular PHLOG Photography YouTube channel falls into the latter category, with a number of effective editing tips for getting the job done. While the lesson describes a complete edit from beginning to end, the emphasis is on using masks in Photoshop’s Raw editor to completely transform an uninspiring shot.
Before clicking the “Play” button be sure to download the sample image using the link beneath the video, so you can make the changes yourself as they are explained. German landscape pro Christian Mohrle is a very adept instructor, and he walks you through the step-by-step process from beginning to end.

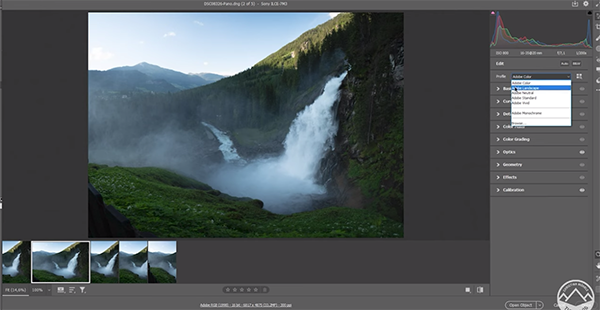
The lesson begins with several basic global adjustment to create a solid base image for the selective enhancements that follow. The process begins by changing the profile from Adobe Color to Adobe Landscape. This immediately boosts the overall saturation of the image. Next Mohrle turns to the Basic tab and adjusts color temperature to fix the unnatural blue cast of the photo.
Other preliminary enhancements include slightly raising exposure, dropping highlights to bring out detail in the bright waterfall and sky, opening up shadow areas, and raising the blacks. Mohrle also adds Texture and Clarity, reduces Dehaze, and pumps up Vibrance.
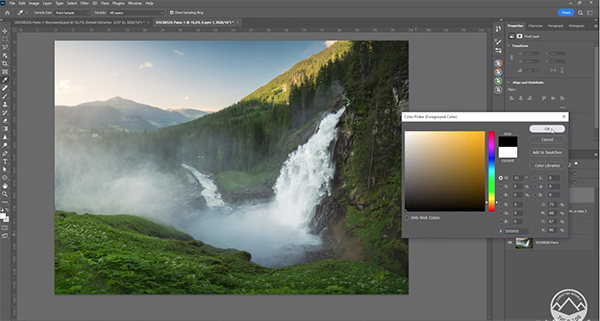
The image is now much improved with the global enhancements completed. Now it’s time for the real magic of the tutorial; namely selective modifications to different portions of the shot. These are accomplished with a few straightforward masks using both radial and linear gradients to complete the impressive transformation. And Mohrle demonstrates how easy this is to do.

You’ll watch him make further adjustments to perfect the sky, accentuate the foreground with more Clarity, and increase detail in the waterfall. When you compare Mohrle’s before/after images, the impact of his processing technique is readily apparent.
Mohrle’s instructional YouTube channel has much more to offer, especially if landscape photography is your thing. So be sure to pay a visit when you have time.
We also recommend watching the related tutorial we posted previously that explains how to shoot dynamic landscape photos with more depth and perspective.


