Add Simple Light Effects in Photoshop to Outdoor Portrait Photos & More (VIDEO)
We’ve all been in situations when shooting landscapes or outdoor portraits when the images we capture aren’t quite as dramatic as we would like. Sometimes that ‘s because lighting conditions could be far more interesting.
The quick tutorial below from one of our favorite image-editing specialists explains a straightforward Photoshop technique for adding simple “atmospheric effects” that will really boost the impact of images that need a bit more pizazz. This lesson demonstrates these tricks with an image of a pretty model, but you can use what you learn on all sorts of photos shot in the field.
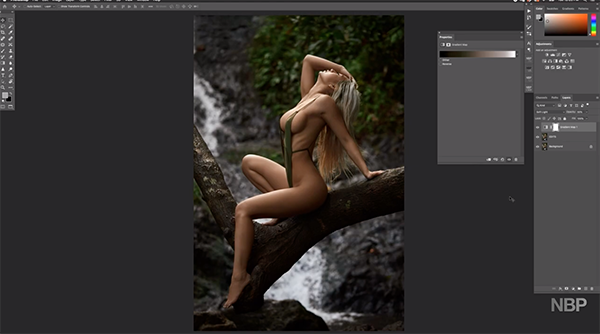
Nino Batista is an image-retouching specialist with an enthusiastic following on his YouTube channel. His demonstration image was made on a hazy day in Hawaii, and Batista has already completed most of the edit. What you see in this episode is often his final step; namely, refining and adjusting the shape and intensity of the light.

With enhancements like these it’s important to pay attention to the direction of the illumination in a scene, so the effect you add is a good match and creates a realistic look. In this particular shot the light was coming from above. Here’ the catch: adding a light effect in Photoshop may impact the earlier edits you made, so some minor adjustments may be necessary.
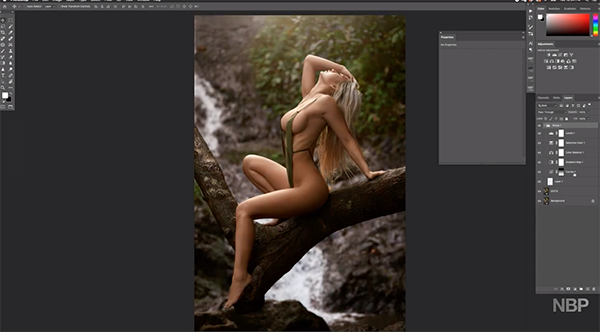
One such problem according to Batista is that certain atmosphere effects tend to reduce contrast in the image, so it may be necessary to bump that up. But as you’ll see, increasing contrast at this point can result in unappealing oversaturation and a shift in color tones that need to be addressed. You’ll learn how to easily compensate as Batista walks you through the process.
This is but one aspect of the step-by-step edit that Batista demonstrates in just 11 minutes that significantly improves his original photo. You’ll watch him throw some nice light into the scene and enhance colors in the jungle canopy—all without adversely affecting the perfect skin tones of his model.

Bottom line, the transformation looks great and retains a very realistic look. While watching the episode you may want to think about other ways you can apply these techniques when shooting in the great outdoors.
When you’re done, head over to Batista’s instructional YouTube channel where there’s much more to learn
And be sure to check out the tutorial we posted recently from another Photoshop expert, explaining how to use Layer Blending modes for more compelling photos.


