
CURVES: The BEST Photo-Editing Tool Photographers Don’t Use (VIDEO)
Curves are a fundamental component of Photoshop’s editing toolbox, and one pro says, “if you’re not using them you are seriously missing out.” These tools have the ability to significantly enhance dull photos, accentuate mood and drama, and fine-tune color balance with precision.
In this tutorial from The School of Photography YouTube channel, a leading source of education in the UK, you’ll gain a sold understanding of how Curves work in Photoshop to manipulate tonal values and breathe new life into your digital images.
Instructor Marc Newton says that once you understand Curves, and know how to use to use them, they’re really easy to employ. And by doing that, “your images will really sing.” While Newton uses Photoshop for this demonstration, Curves are also available in Lightroom and other popular post-processing software.
Newton demonstrates the power of Curves on both a landscape photo and a portrait image, and we think you’ll be impressed with the quick results he achieves. By the time you’re done watching this 18-minute lesson, you’ll be able to make equally significant enhancements yourself.
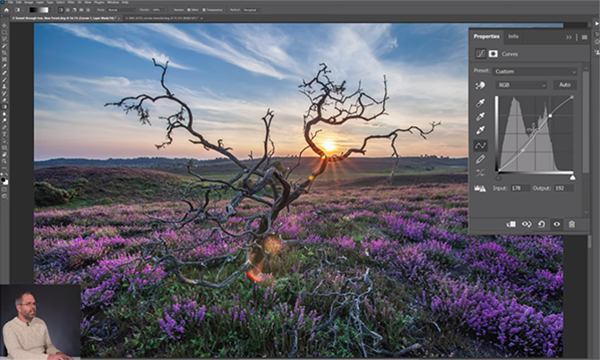
He begins with the landscape shot and explains why it’s best to use adjustment layers when working with Curves in Photoshop. That’s primarily because this approach is a “non-destructive” one that permits do-overs if necessary. Newton says the primary use for Curves is to give images more contrast. But by watching him work you’ll see that there’s a lot more this powerful method can do if you understand a bit about color.
Newton first demonstrates how the standard S-Curve works to easily adjust contrast, and then moves on to other important adjustments for enhancing the photo and giving it more punch. He also explains how to break Curves down into color channels and color-grade an image.
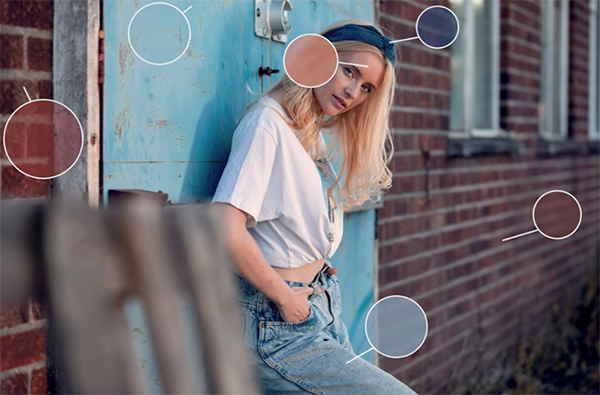
Newton then pulls up his portrait and walks you through the rehabilitation process, while explaining some of the finer points of using Curves. The “problem” with this shot is that the lovely model looks quite nice, but the light is rather boring. Or a Newton puts it, “the photo lacks a feeling.”
Once again, Curves adjustments come to the rescue. This time it’s the color grading, not contrast modifications, that make the biggest difference. And Newton walks you through every step of the straightforward process.
After watching the video head over to The School of Photography’s comprehensive YouTube channel where there is much more to learn.
Then be sure to check out the helpful tutorial we posted earlier, explaining how to install and use Photoshop Actions for a faster, more efficient photo-editing workflow.


