Tesco’s new F&F homeware launch is simple and stylish – has the supermarket finally cracked home decor?
Understated is clearly effective
Masking is a powerful method for enhancing outdoor photos by balancing the tones throughout a scene. Unfortunately, this transformative technique is overlooked by inexperienced users who consider it too advanced for their rudimentary skills.
Complex masking occurs when working on images that require multiple selections, each with their own adjustments. But as you’ll see in today’s straightforward tutorial from the PLOG Photography YouTube channel there are times when one simple mask is all you really need to turn a good image into a great one.
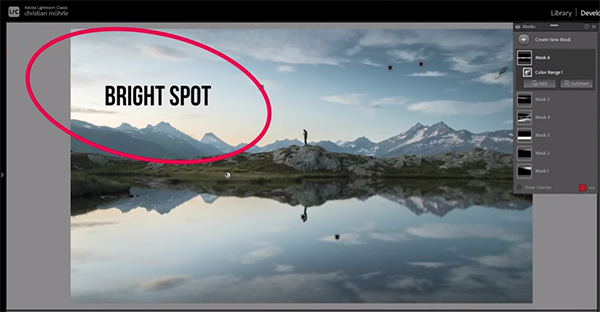
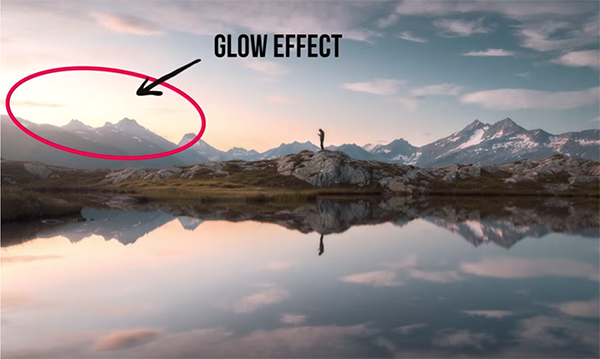
Today’s episode from German landscape pro Christian Mohrle demonstrates how easy it is to introduce an awesome glow/spill effect using a single Radial mask. We encourage you to download his sample Raw file with the link beneath the video so you can follow along and make the changes yourself as the simple steps are explained.

Mohrle’s edits always begin with a few global adjustments to create the best possible base image before turning to selective enhancements that create his final effect. This time he starts by changing the profile from Adobe Color to Adobe Standard which immediately lessens contrast.
Other preliminary steps include dropping exposure in the top left of the sky to bring out more detail where the glowing effect will be added later on in the process. He then brings down the shadows and increases the Whites to “spread the histogram, making sure to cover a nice tonal range from the darkest darks to the brightest highlights.”
After a few more basic adjustments the image is much improved, and now it’s time to open Lightroom’s Masking panel and gets to work. The glow effect is created with a Radial Gradient near the end of the process, and you can jump to the 7:40-minute mark of the video if that’s all that concerns you.

However, we recommended watching the preceding portions of the video where Mohrle applies optional selections that improve his image in other ways. Once the masking is finished with the glow effect in place, Mohrle completes the impressive transformation with thoughtful color grading and simple sharpening.
If nature and landscape photography are among your passions, be sure to explore Mohrle’s instructional YouTube channel where there are many more shooting and editing lessons to be found.
We also suggest watching the tutorial we featured recently with another Lightroom expert who demonstrates the difference between “Capture Sharpening” and “Output Sharpening” when editing soft photographs in Lightroom.
