
Fixing Underexposed Landscape Photos in Lightroom (VIDEO)
Landscape scenes often contain such a wide range of tones that it’s often difficult (if not impossible) to get the light right in the camera—and underexposed photos are a common result. Today’s Lightroom tutorial from the PHLOG Photography YouTube channel demonstrates an effective restoration,
Bright skies are often the culprit for images that are overly dark in the midrange and foreground of the frame. But as you’ll see, there are other reasons for underexposed shots too. That when it’s time to take advantage of Christian Mohrle’s advice for balancing the tones throughout a scene.
Mohrle is a German landscape photographer with plenty of experience behind the computer, and we encourage you to use the link beneath the video to download his Raw file so you can duplicate his adjustments as they’re explained. The transformation begins with a few basic global adjustments to prepare the image for the powerful selective enhancements that follow.
The first step is changing the profile from Adobe Color to Adobe Landscape which immediately increases Saturation and slightly brightens the darkest portions of the photo. He then uses a slider to increase Exposure until more details appear in the lower portion of the shot.
Other preliminary adjustments include bringing down the highlights because the sky has become even brighter. Mohrle then increases Texture, drops Clarity, and cuts Dehaze to preserve the soft sunset look he has in mind. After increasing Vibrance the base image is significantly improved and it’s time for Masking to adjust two specific area within the frame.
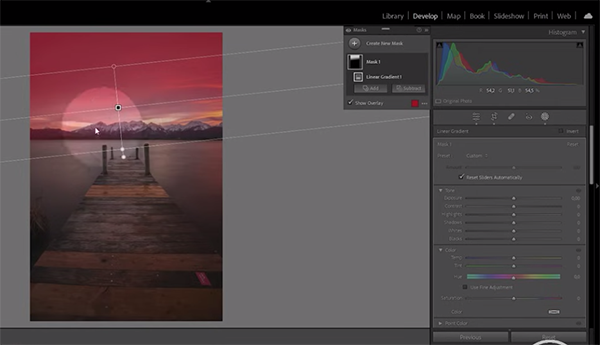
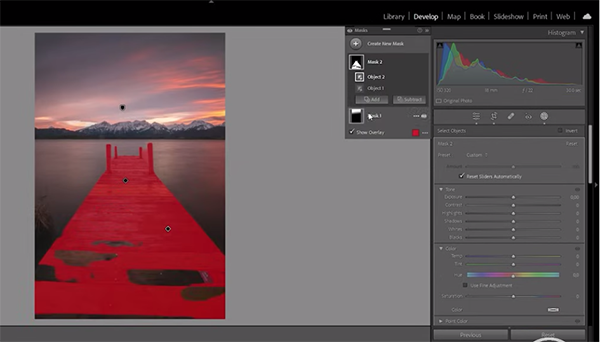
Mohrle places a Linear Gradient over the sky which he uses to make this area more dramatic, while being careful to avoid biasing the mountains in the distance. He then chooses an Objects Mask to select the jetty in the foreground and employs a brush to refine the selection. Now it’s easy to make a few simple adjustments to separate this important element from the surrounding water and create added depth.
The super-simple masking is now complete and color grading is the next step in the process. Here Mohrle uses Lightroom’s Color Mixer to work on the Hue, adding some red tones to the sky while removing an unsightly purple cast in the blues.
The color grading also includes a straightforward split-toning adjustment that tends to work really well when editing sunset photos like this one. Mohrle’s goal is a very warm effect and he walks you through the necessary enhancements.
Mohrle then moves to Lightroom’s Details tab to carefully boost sharpness. He demonstrates a quick tip so it’s easy to see exactly where the sharpening is applied. Now the image looks great except for one noticeable problem: the previous adjustments resulted in unwanted noise. This concern is quickly resolved by turning to AI Denoise.
There much more to learn on Mohrle’s instructional YouTube channel and in an earlier Lightroom tutorial we posted with some great tips for adding fog and mist to landscape photos to achieve a captivating “atmospheric” effect.


