
Generative Fill FAILS at Sky Replacement: Do This Instead (VIDEO)
With all the excitement over Photoshop’s Generative Fill Capabilities you’d think that these tools would do a great job at replacing a boring sky. But one of our favorite image-editing instructors says that Generative Fill fails miserably at this common task.
Instructor Anthony Morganti has been exploring Generative Fill since it was available in beta. In this episode he explains how to use Photoshop’s conventional sky replacement tools after demonstrating why Generative Fill does such a “horrible” job—even if all you’re trying to do is add clouds to an existing sky.
Morganti pulls up several landscape photos to illustrate his points, just in case you haven’t tried using Generative Fill for this particular purpose. While it’s really easy to do, the results are very disappointing. And here’s the weird thing: The more precise you are in typing a prompt, the worse job Generative Fill does.
In Morganti’s first try the clouds don’t look too bad, but the land on the horizon is pretty screwed up in all three variations he received. After multiple attempts with different prompts, here’s Morganti’s conclusion: “You can do this forever and you will not get anything that looks halfway decent. Trust me on that.” Ouch!
The bottom line is this: If your goal is to replace a dull, boring sky in Photoshop, you need to understand the conventional method for getting the job done without Generative Fill, and Morganti illustrates a straightforward method for achieving realistic and impressive results. He returns to the original image and walks you through the step-by-step process.
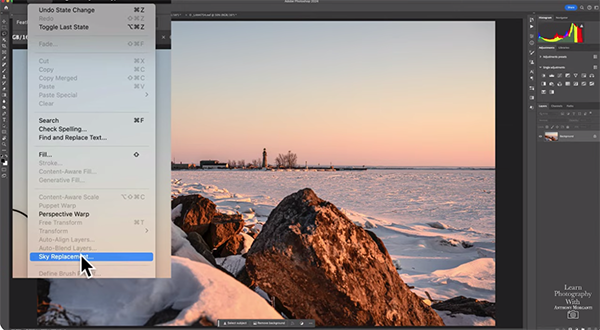
Photoshop does offer a standard sky replacement tool that is found by clicking the Edit tab atop the screen and choosing the Sky Replacement option in the dropdown menu that appears. Then you see a number of sky categories built into Photoshop, including Blue Skies, Spectacular Skies, and Sunsets. When you select one of these, Photoshop presenta several options to further refine the look you create.
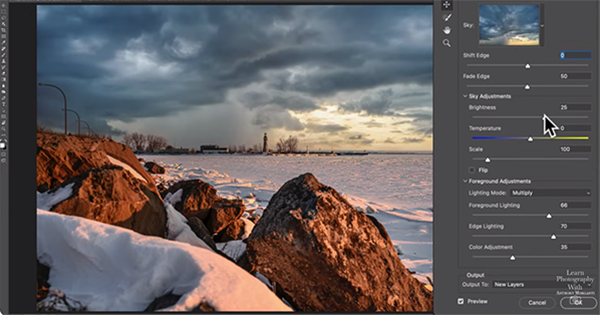
Morganti chooses Seriously Stormy Skies for his first transformation, explaining why selecting a sky that matches the light in your original photograph is the key to a natural looking swap. You’ll want to pay close attention to the quality, direction, and the color of the light.
One you’ve placed the new sky it’s easy to uses simple sliders to make adjustments to all of the important parameters. For his first example Morganti simply increases brightness and modifies Temperature for a warmer effect. Take a look at what he achieves and compare it to what Generative Fill provided and you’ll be convinced.
Morganti uses this conventional method with a few other images to demonstrate the superiority of this simple approach. In all cases the final images look really great. You can find more editing tips and tricks on Morganti’s popular YouTube channel, so be sure to take a look.
We also recommend watching the tutorial we posted recently from another imaging-editing who explains why Adobe’s DNG file format delivers the power of Raw without any complications.


