
How to Add Fog & Mist to Landscape Photos for an Atmospheric Effect (VIDEO)
Most experienced landscape photographers know that once in a while Mother Nature needs a helping if they want to create images with a compelling look. In the quick Lightroom tutorial below you’ll learn a simple edit for adding atmosphere and interest to make images stand apart from the crowd.
Instructor Michael Breitung is a German pro specializing in landscape and travel photography and he’s generous about sharing the secrets to his success. His superb images often owe their impact to the “atmosphere” he adds during the editing process, and after watching this nine-minute episode you’ll be able to do the same.
Breitung relies upon Lightroom Masks to imbue outdoor images with mist and fog in a remarkably realistic way. He reveals the best settings to use when employing one of Lightroom’s Brush tools, and how to fine-tune the appearance of your effect. You’ll also learn how to employ the Auto Mask feature of a brush to easily create convincing results.
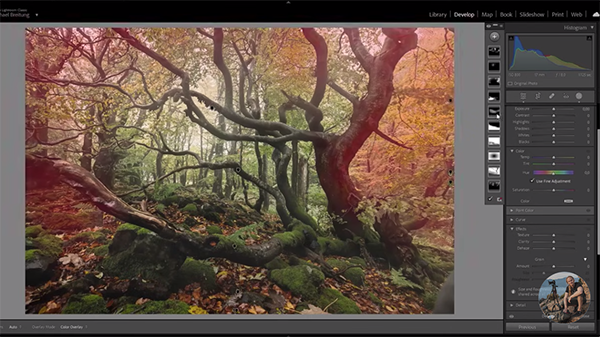
The demonstration image was shot on a gloomy day in the forest when a bit of mist moved in and out of the scene, but there’s no comparison between Breitung’s original shot and the far more dramatic effect he created with the tips you’ll learn in the video. His goal is to add more mist to create an ethereal look with significant separation between all the trees in the frame.
Breitung creates a few Masks to give Mother Nature a boost. Interestingly, the first thing he does after selecting a brush is to start brushing outside of the frame. A single click activates his mask, and then he demonstrates how to refine what comes net.
To create the fog Breitung increases the blacks quite a bit and reduces Contrast. Most importantly he significantly brings down Dehaze. Then he drops Clarity, cuts Exposure to accentuate the gloom, and reduces Saturation. He then modifies color temperature for the specific look he’s after.
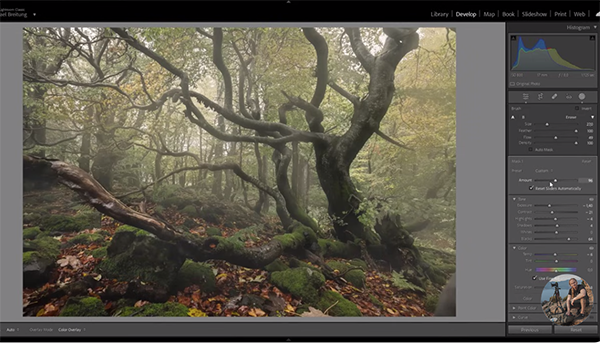
Breitung says he opts for a warmer effect if there’s some sun in the frame, otherwise he prefers a cooler appearance. At this point the added fog is uniformly applied throughout the scene, but that needs to be rectified because fog typically appears more dense in the background than it does in the foreground.
Therefore, for the sake of realism, Breitung clicks on Invert to temporarily make the atmosphere disappear. Then he selectively paints the fog back in—exactly where he wants it to be. For this step he uses a large Brush along with specific settings that enable him to carefully and gradually build up the effect.
There are a few most simple steps required to complete the transformation, but the final result is impressive, especially if you compare it to the original shot. There’s much more to learn on Breitung’s instructional YouTube channel, so take a look at what’s available whenever you have some time.
We also suggest watching an earlier tutorial we posted with five pro tips for making epic landscape and cityscape photographs.


