
How to Create Awesome B&W Landscape Photos in Lightroom (VIDEO)
Some landscape scenes look far more compelling when rendered in b&w, whether you captured the shot using your camera’s monochrome mode or do a conversion later during the editing process. In either case, some thoughtful processing is required for optimum results.
Today’s tutorial from the PHOLOG Photography YouTube channel demonstrates a straightforward edit for achieving epic b&w landscapes using Lightroom Classic. And this easy technique work wonders for virtually all forms of outdoor photography. As you’ll see, color adjustment can help, even with b&w Raw files.
Instructor Christian Mohrle is a favorite among Shutterbug reader because of his ability to simplify seemingly complicated tasks. In this episode he covers everything from cropping and other basic adjustments, to masking, sharpening, and more.
We encourage you to download Mohrle’s sample Raw file with the link beneath the video so you can make the adjustment yourself as they’re explained. Mohrle crops the image to eliminate unimportant areas in the frame, and then opens Lightroom’s basic panel to switch the profile from Adobe Color to Adobe Monochrome.
His basic adjustments continue with dropping exposure to create the “dark and grim” look he desires. He then increases whites while dropping blacks and shadows to create dramatic contrast. Paying close attention to the histogram during these steps proves very helpful.
Mohrle is looking for a sharp and clear image so he pumps up Texture and significantly increases Clarity. He also drops Dehaze to introduce the impression of fog. A few other quick tweaks and it’s time for the selective adjustments that really perfect the transformation.
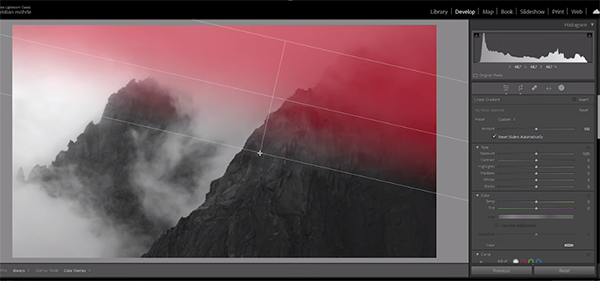
Here Mohrle begins with simple masking to create the look of light entering the scene from the top left of the frame, with the remainder of the image remaining rather dark. He does this by first applying a Linear Gradient to the opposite side of the image to further darken the top right of the scene.
There’s also a Linear Gradient over the foreground for a few adjustments there and a Radial Gradient over the top left portion of the frame that Mohrle uses to create the lighting effect mentioned earlier.
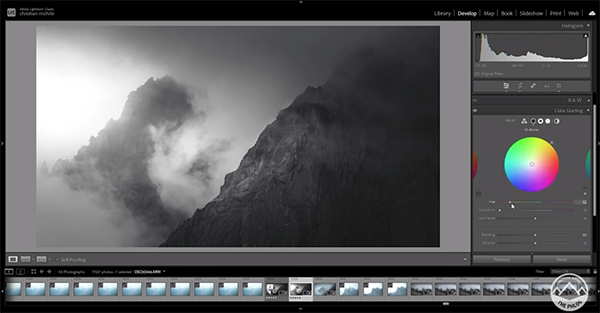
The final step in the b&w edit is a bit of color grading; yes, you heard that correctly. Mohrle turns to the Color Grading tab and adds subtle blue tones to the shadows and midtones of the image, because “I personally don’t like the basic black-and-white-look.” He also adds a slight bit of saturation to improve this effect.
Mohrle’s YouTube channel is full of great advice for landscape photography so be sure to take a look. And don’t miss the tutorial we posted last week, explaining how to use both positive and negative Clarity to enhance outdoor photographs.


