
How to Edit Photographs Using Adobe Bridge (VIDEO)
Adobe Bridge is an oft-ignored component of Photoshop, and it’s capable of much more than some photographers realize. In fact, it’s possible to do a full photo edit within Bridge as you’ll see in the quick tutorial below.
We regularly turn to instructor Anthony Morganti for quick and helpful advice on less-familiar image-processing techniques, and this eight-minute episode is for Photoshop users who want to streamline their workflow and get great results.
For those unfamiliar with Adobe Bridge, it has pretty much the same functionality as the Library module in Lightroom Classic. Because Bridge is essentially a Library module itself, it doesn’t have any editing capability on its own. Thus, Morganti says, “To edit with Bridge you have to use it in conjunction with Photoshop”—specifically Camera Raw which is part of Photoshop.”

If you have plugins on your system, you can use them with Bridge as well. In barely eight minutes Morganti walks you through the step-by step process for taking advantage of everything bridge can do.
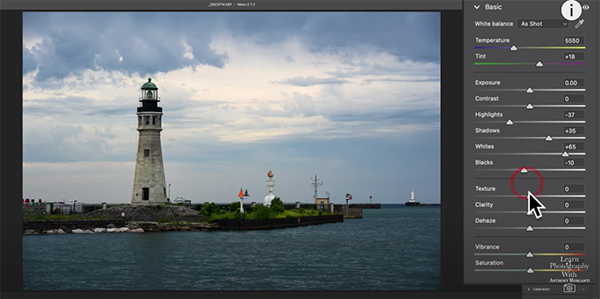
Morganti opens a seaside photo in Bridge, using the Filmstrip workspace he prefers. Like with Lightroom, the filmstrip appears at the bottom. The first step with this approach is to get the photo into Camera Raw. There are several ways to do this and Morganti demonstrates the two he uses most. One is to right-click on the image and select Open in Camera Raw from the dropdown menu. The Second is to simply double-click on the image in the filmstrip.
Now that you have everything set, it’s time to process the image, which is accomplished in a non-destructive manner. That means a re-do is always possible if you make a mistake or change your mind.
Morganti accomplishes the edit within the Develop module without a lot of explanation, because his adjustments are pretty obvious by watching how he moves various sliders in the panel. You’ll see him drop the Highlights, open up Shadows and Whites, and drop the blacks. He also bumps up Clarity, Texture, and Vibrance.
Because the image looks a bit too cool, Morganti turns to the Curves tool to add a bit of yellow to the blue Curve. A few more simple tweaks and the transformation is complete using an easy technique that you may want to try yourself.
After watching the video pay a trip to Morganti’s YouTube channel for more straightforward editing advice.
And check out an earlier tutorial we posted from another processing expert, explaining how to use what he says is “the best new Photoshop tool” (and it’s not Generative Fill).


