
How to Get OPTIMUM Results with GENERATIVE FILL in Photoshop (VIDEO)
Ever since the amazing AI-based Generative Fill capability appeared in beta form, this mind-blowing feature has been the talk of the town. Now that this tool is officially part of the new Photoshop 2024 update, we thought we’d take another look.
This tutorial from Anthony Morganti, one of our favorite image-editing instructors, isn’t a deep dive into everything Generative Fill can do. Rather, the seven-minute lesson is all about a few simple tricks that will enable you to achieve better and more interesting results.
Morganti says that ever since Generative Fill first appeared on the radar, “I’ve been having a lot of fun using it on my older lifestyle images.” As you’ll see below, one of his tricks was to take people out of his photos and drop them into fantasy scenes. He says that after several dozen attempts, “I think I found a couple things I can relate to you that will help you get better results when using Generative Fill.”

Keep in mind that the goal isn’t to pass off your creations as original photos, but rather to have some fun while creating eye-catching images. The first tip is actually a warning that may be obvious to some of you: “Don’t try to take people out of a scene and try to put them in a dissimilar scene.” He provides an example of one futile attempt that looked “horrible” despite Morganti’s impressive skills.
Morganti’s second recommendation is less apparent but equally important: “When you do a selection, feather it a little bit.” You’d be forgiven for assuming that part of Photoshop’s Generative Fill process that takes place under the hood does a good job of this automatically. But Morganti says that feathering the image yourself creates a much better blend.
He then demonstrates the simple process of making a rough selection, feathering it before inverting it. You’ll see the settings he recommends for getting optimum results. Now you can knock yourself out with Generative Fill and achieve more impressive images—as long as you drop your selection into a compatible scene.
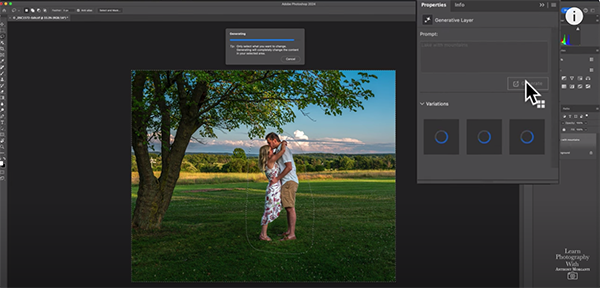
All the heavy lifting then takes place on Adobe’s servers, and once the magic is complete you’ll receive three variations. If you’re not pleased with any of the results, simply click on the Generate Again button and you may get something you like better.
Morganti demonstrates a few other tricks and solutions to potential problems that are very easy to follow. These may involve some input from you, but if you adhere to his advice, rather than going “full auto,” there’s a better chance you’ll be pleased with the results. One you’ve watched the video pay a visit to Morganti’s instructional YouTube channel where you’ll find more image-editing tips and tricks.
We also suggest checking out an earlier tutorial we posted that explains a simple and efficient method for organizing your photo catalog so you can the images you need ASAP.


