
How to Get Smooth Edges with Select & Mask in Photoshop (VIDEO)
Have you ever noticed when cutting elements out of an image that edges appear rough and imprecise? If so, this Photoshop tutorial from the Photoshop Café YouTube channel will set you straight in a hurry.
Instructor Colin Smith is an image-editing expert who specializes in straightforward techniques that anyone can master. In this episode he demonstrates how to achieve selections with smooth and clean edges, and the method takes barely seven minutes to explain.
This is the second installment of Smith’s two-part mini-series on masking for beginners and you can find Part 1, and other great tips by visiting his instructional channel. The topic of this lesson is unlocking the power of Photoshop’s Select and Mask capabilities, and he covers everything from manual controls, additional tools, and a variety of quick tricks for refining your results.
The problem can be particularly acute when cutting out objects with hard edges, like the car in Smith’s demonstration photo. He begins by choosing Select Subject at the top of the screen, while explaining why using the Cloud may deliver better quality. Even then, you’ll notice edges that need some work.
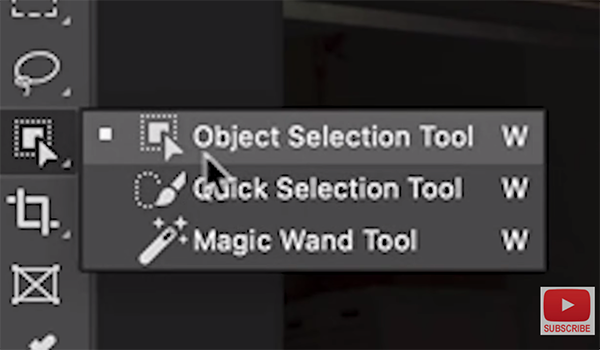
The next trick involves using the Object Selection tool to make a selection around the area(s) that the first step missed. This typically detects and repairs the offending edges. Then Smith grabs the Quick Selection tool and further refines the edges. He explains his approach like this: “I like to first make the selection in Photoshop because it enables me to take advantage of other tools before turning to Select and Mask.”
When Smith jumps into Select and Mask you can see there’s a bit more that needs to be removed from the rear corner of the car. Now he carefully examines the mask by tapping View and choosing the Back-and-White option. Once you do this any rough areas that need fixing are readily apparent. He selects a Brush and paints away the problems and reveals the settings he recommends.
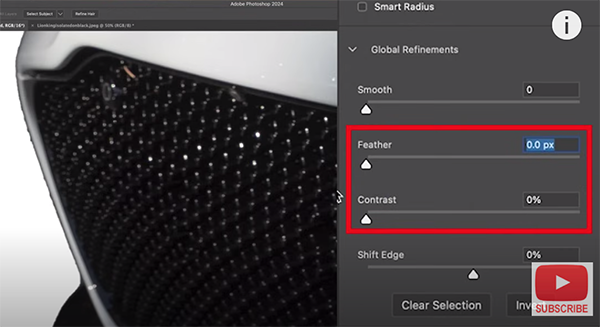
While the selection is much cleaner at this point, there’s still a few more steps if perfection is your goal. Smith walks you through a few global refinement tools, and demonstrates how Smooth, Feather, and Contrast adjustments contribute to the desired effect. The transformation concludes with a few additional tricks for accomplishing a perfect result.
Be sure to watch Part 1 of this lesson on Smith’s popular YouTube channel, and then explore the other helpful lessons that he has available.
We also suggest checking out the tutorial we posted earlier in which another post-processing expert demonstrates a unique, easy, and precise method for eliminating distracting shadows in Photoshop.


