
How to Install & Use Photoshop Actions for a Fast, Efficient Editing Workflow (VIDEO)
If you’re new to timesaving Photoshop Actions this quick tutorial is just what you need to get up to speed. In less than four minutes you’ll learn what Actions do, how they work, and an easy way to use them for a faster, more efficient photo-editing workflow.
Adobe provides this definition: “Photoshop actions are a series of recorded tasks or commands that you can play back and record on single or multiple files.” In other words, they’re similar to macros or shortcuts in that they enable you to automate frequently used edits.
Today’s instructor Nino Batista is an eclectic pro, specializing in standard portraiture, boudoir, glamour, and commercial photography. He’s also a very adept instructor who regularly posts helpful tutorials for photographers of all skill levels. By the conclusion of the episode below, Photoshop Actions will be a regularly used component of your Photoshop bag of tricks.
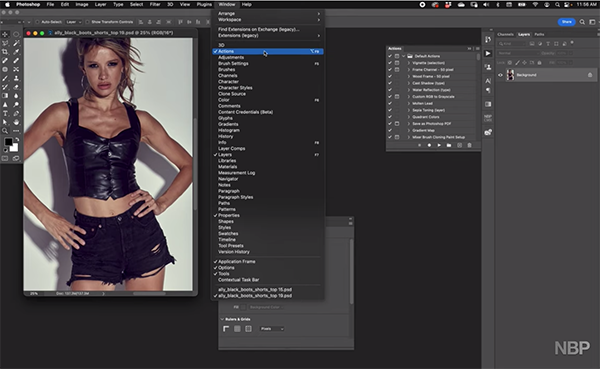
Batista covers all the “super basics” so you can start using Actions today. You’ll begin by clicking on the Window tab atop the Photoshop screen and choosing the Actions option from the dropdown menu. The first time you option the Actions panel you’ll find yourself in the Normal mode. Here you can choose one of the built-in Actions and use the buttons underneath to proceed. There are Play and Stops buttons and others that enable to make your own Actions as well.
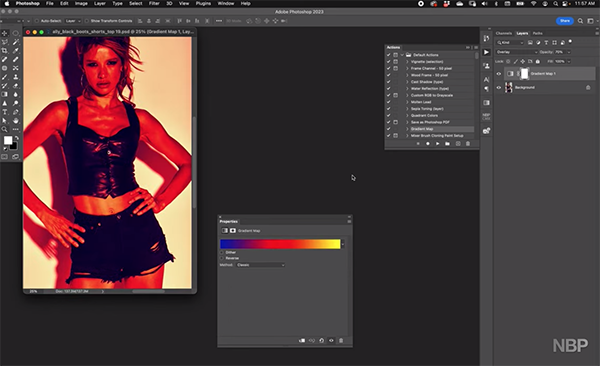
The lesson begins with the built-in options, and Batista chooses the Gradient Map as an example. He demonstrates how to activate Button Mode, in which all of your actions become single-click buttons that you can use without delay. Batista explains that “most of the time, when you’re not making an Action or using a complicated one, Button Mode is where you want to be.”
After this quick overview Batista demonstrates two common ways to install Actions. He explains the method he prefers and why it works more consistently that the other. You’ll see where to find Actions you’ve saved to the computer, and how to easily recognize them by the “.atn” suffix.
These can be Actions you’ve purchased, created yourself, or others you downloaded for free. They typically appear at the bottom of the Actions list, below the built-in options, but you’ll see how to rearrange everything to suite your needs. Now you’re ready to go.
There are a wide variety of imaging-editing lessons on Batista’s instructional YouTube channel, so be sure to take a look.
And check out the tutorial we posted recently, explaining why another image-editing expert says, “Photoshop’s new Gradient tool changes everything.”


