
How to Make Dramatic High-Contrast B&W Conversions in Photoshop (VIDEO)
Whether you’ve dabbled in b&w photography or always shoot in color, you’re likely aware that some subjects can be more impactful in monochrome. There are basically two choices if you want to give this a try: Set your camera to B&W or shoot in color and convert the image to b&w during the editing process.
This tutorial from the This Guy Does Photoshop channel is all about the later approach with a slight twist. Instructor Shawn Dolinski demonstrates one of the most compelling forms of b&w conversion; namely, those with a dramatic high-contrast look that really grabs attention.
This particular effect is created by using a variety of adjustment layers, Camera Raw filters and a bit of straightforward Layer Masking. This mouthful may sound rather complicated, but the method is actually easy enough for photographers of all skill levels. And the results are awesome.
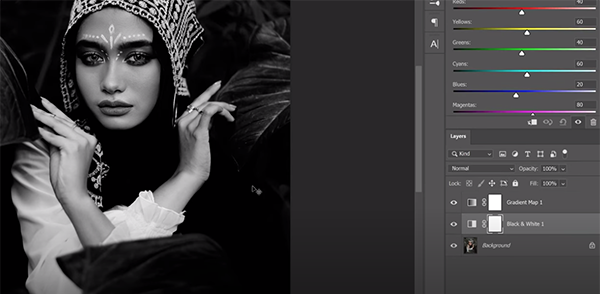
Dolinski demonstrates the technique using portrait photos, but this approach can work wonders for landscapes and other types of images. So think about ways you can put these tips to work while watching the video. The first step is to open an image in Photoshop and use a Gradient Map adjustment layer to convert the photo to b&w by following Dolinski’s simple instructions.
Dolinski then demonstrates how to employ a simple slider to adjust highlights, mid-tones, and shadows until you see what you like. Next comes another adjustment layer that initially sounds a bit strange. That’s because even though your image is already b&w, you’ll see sliders for various colors. These able you to adjust various tones based upon colors in the original image.
Once you’ve adjusted colors and tones to your satisfaction, it’s time to selectively enhance specific areas in the photo so they stand out—specifically in terms of brightness. With portraits, for example, that may mean the eyes and/or lips. This straightforward step involves the use of Curves in the manner Dolinski suggests.

With the conversion now looking pretty great, Dolinski now merges all the initial adjustments using the timesaving keyboard shortcuts provided. Now he employs Photoshop’s Level’s tool to create a subtle spotlight effect.
After a few final refinements the transformation is complete. If you compare Dolinski’s original color image to the high-contrast conversion, the drama will smack you in the face. You can find more helpful lessons like this one by paying a visit to Dolinski’s YouTube channel.
We also suggested watching the tutorial we posted from another pro, demonstrating five pro tips for shooting dynamic architectural photos (that often look awesome when converted to b&w).


