
How to Restore the Beautiful Colors You Saw in the Viewfinder (VIDEO)
So you photographed a gorgeous landscape scene with a great sky and beautiful colors throughout the frame, only to return home, view your “money shot” on the computer, and discover that the tones in the photo only vaguely resemble what you saw through the viewfinder.
There can be several reasons for this mishap. Perhaps you forgot to reset Color Balance after a previous shoot the took place under different lighting conditions. Or you missed exposure and the scene is grossly under- or overexposed.
Whatever the reason, it’ time to open Photoshop or Lightroom and get to work. The task of restoring color in Raw files is actually pretty easy if you follow the steps in the tutorial below from the popular PHLOG photography YouTube channel. This effective Photoshop method takes less than a dozen minutes to explain.
German landscape photographer Christian Mohrle provides a link to his demonstration image in the description beneath the video, so you can follow along and make the necessary adjustments as they are explained. As always, he begins with a few basic global enhancements to prepare the image for the selective masking and color grading that complete the impressive transformation.
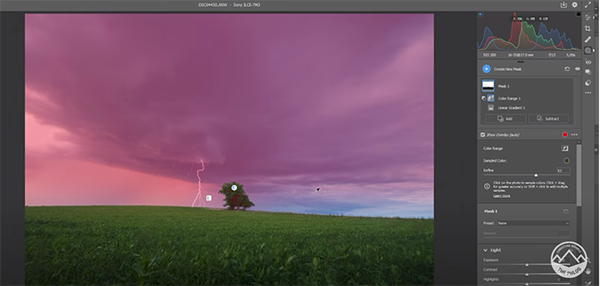
In this case Mohrle’s image is rather dark and colorless, so he begins the preliminary steps by changing the profile from Adobe Color to Adobe Landscape which immediately results in a much more saturated image. He then opens Photoshop’s Basic panel and increases overall exposure while slightly dropping the highlights so they’re not too bright—all the time keeping a close eye on the lightning strike in the shot.
After raising the blacks and increasing contrast, it’s time to push things further with selective masking to different areas in the scene. Mohrle first concentrates on the sky to accentuate the dramatic clouds. He adds a Linear Gradient covering most of the sky, and then uses the Subtract Color Range command to exclude a prominent tree from the mask.
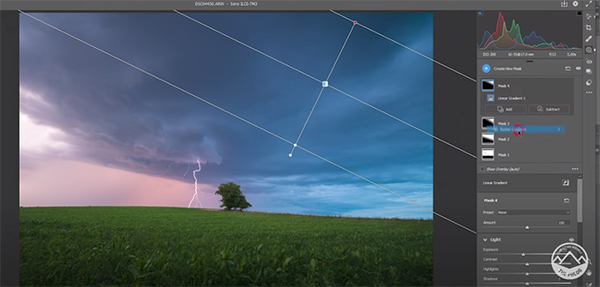
The next step is adding Clarity to bring out even more details in the clouds. Multiple Linear Gradients over the top right portion of the sky further refines the effect to Mohrle’s satisfaction without biasing the highlights. Once the masking is complete, Mohrle turns to color grading, careful sharpening, and a few final tweaks to complete the job.
You can find more great advice on shooting and editing landscape photos by visiting Mohrle’s YouTube channel at your convenience
We also recommend watching a tutorial we posted earlier that will help you determine if you’re using your tripod correctly for wildlife, landscape and nature photos. Hint: There’s more to it that you think.


