
How to Shoot Photos with Eye-Catching Sunbursts (VIDEO)
Are you looking for a quick and easy way to spice up your landscape photography? If so, check out this tutorial from the PHLOG Photography YouTube channel. In barely five minutes you’ll learn seven in-camera techniques for getting the job done.
Instructor Christian Mohrle is an acclaimed German landscape photographer whose lessons we post frequently. This one is different from those you’ve watched in the past, which typically involved editing images in Photoshop or Lightroom. Today it’s all about camera settings, framing techniques, exposure bracketing, and choosing the right lens.
Mohrle says sunbursts are “a great way to make an otherwise boring scene way more awesome—especially when conditions aren’t that spectacular.” Not only must the shot be properly exposed, but the sunburst should be a prominent element in the frame.
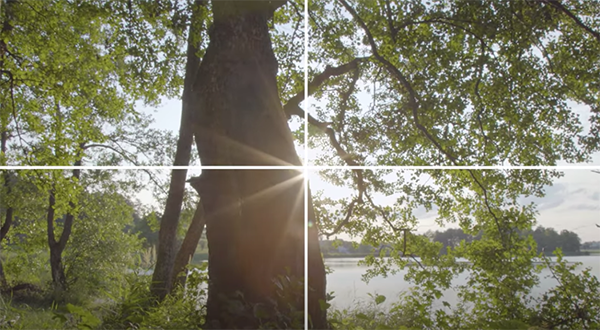
Because sunbursts are so bright, it’s essential to shoot with the right aperture. The idea is to expose the sunburst so it’s clearly defined, but if you shoot wide open you’ll end up with nothing more than a glowing blob. Mohrle says best results are usually achieved at f/16, and he warns that if you close down further the sunburst may look strange.
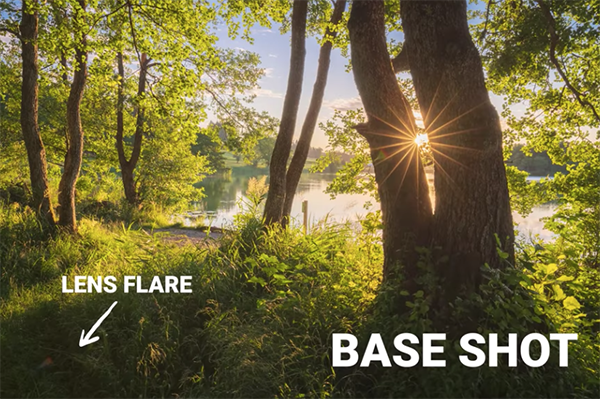
Another warning has to with lens filters. Simply put, “Don’t use them.” Mohrle explains that an extra layer of glass will likely result in ugly flare that spoils the effect. “Plus, if the filter is dirty, shooting against the sun will make tiny dust spots visible—resulting in a dirty-looking photo.” Another way to minimize lens flare is to try positioning the sun directly in the middle of the frame.
Good composition is important for all types of landscape photos and is critically important when sunbursts are your goal. One essential trick is to make sure that the sun is partially blocked by an object in the scene. This can be anything from a tree, the side of a hill, or even a flower.
As you may expect, landscapes with sunbursts typically involve a huge dynamic range. For this reason, and “to make your life easier,” Mohrle recommends exposure bracketing. His typical approach is to expose one shot for the highlights, another for the shadows, and a third in the middle. Then, if necessary, you can combine them for an HDR image.
Mohrle has more great advice on the above tips and others, so take a close look and give this effect a try. There’s much more to learn on his instructional YouTube channel, especially if you’re a landscape photographer, so be sure to pay a visit when you have time.
And don’t miss the tutorial we posted from another pro recently, explaining why you should shoot b&w landscape photos and how to do it right.


