
Landscape Edits: When to Use Contrast, Clarity & Texture (VIDEO)
OK, landscape shooters, do you really understand the “huge” difference between the Contrast, Clarity, and Texture sliders when processing images in Lightroom? If not, today’s video will settle the confusion and enable you to achieve the highest quality photos when editing your work.
According to landscape pro Christopher O’Donnell, some photographers confuse these important sliders because they often deliver similar results. But here’s the catch: “The quality and accuracy of these three adjustments can vary greatly and can give you damaged pixels or otherwise unwanted side effects.
One reason O’Donnell’s lessons are so effective is that he always explains both the why and how of the techniques in question, as he does in this eye-opening episode in which you’ll learn exactly what happens with each slider and the best way to adjust them to pull maximum detail out of your Raw files.
One major problem, according to O’Donnell is that many inexperienced Lightroom users “randomly adjust these sliders—moving them back and forth until the image looks pretty good.” But wouldn’t you rather remove all the guesswork with a purposeful, and predictable method every time?
In fact, Contrast, Clarity, and Texture are designed to be used together, but these adjustments should be tackled in a specific order. O’Donnell says that’s because each of these sliders take a different approach to controlling lightness values of certain pixels in a photo.
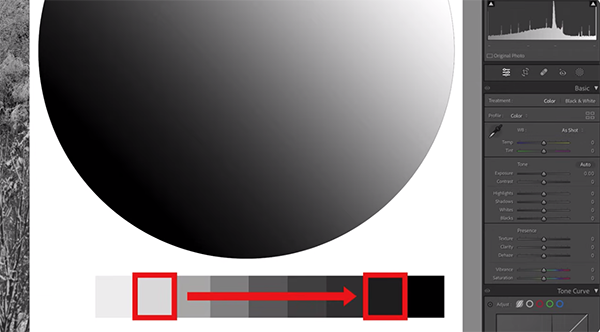
O’Donnell begins with the Contrast slider, explaining how this adjustment controls the tonal gap between one pixel and another. As you’ll see, increasing Contrast widens the gap between light and dark pixels, while reducing Contrast does the opposite within the “tonalsphere.”

The tutorial continues with a similar discussion of how the Clarity and Texture sliders work, while demonstrating practical applications and the correct sequence. We’ll leave it to O’Donnell to walk you through how all this works, but here are a couple quick points: “One difference between these three tools is how they isolate or choose what pixels to adjust.”
A second key difference is the amount of adjustment added when enhancing photos with these three sliders. At this point, all the modifications you’ve seen are global in nature, meaning that they affect the entire image as a whole, and sometimes this simple approach is all it takes to get the job done.
Other times, though, a photo requires a selective technique that only targets specific areas within the frame, and that’s what O’Donnell explains how to do with simple masking in the final portion of the video.
O’Donnell’s instructional YouTube channel is a great source of straightforward editing advice, so be sure to pay a visit when you have time. And if you want to achieve great edits in a hurry, check out our recent post with the 10 top Lightroom keyboard shortcuts for streamlining your workflow.


