
Level Up Your Wildlife & Nature Photos with 5 Easy Hacks (VIDEO)
So you just spent a day photographing birds or other forms of wildlife and returned home expecting to be impressed by the images you made. But low and behold, the photos you see on the computer aren’t nearly as compelling as you thought.
This experience isn’t uncommon and all it often takes is a bit of simple editing to transform a mediocre image into a money shot. In this tutorial from Matthew Cuda you’ll learn five straightforward Lightroom hacks that will immediately improve both the photos and your mood.
Cuda is an experienced nature and wildlife photographer with a popular YouTube channel geared toward helping other shooters level up their work. This episode reveals a handful of Lightroom tricks that he says, “I use every day to produce beautiful images.” Cuda promises that these simple techniques will revolutionize your wildlife photography in a hurry.

The lesson begins with Cuda’s approach to creative cropping, which he introduces like this: “So you have a great day of photography, get back home, and realize that the bird in your photo looks a lot further away than you thought.” Maybe that’s because the lens you used wasn’t long enough, or perhaps this was as close as you could approach. In either case, the problem needs to be fixed.
As you’ll see, creative cropping involves more than hacking off one side of the shot (or perhaps either the top or bottom). Cuda opens Lightroom’s develop module and demonstrates a more thoughtful approach for adjusting framing for maximum impact. In other words, he has a few tricks for “recomposing” an image during the editing process.
Tip #2 comes into play when the exposure of an image isn’t exactly what you want. Even if it’s not terrible, the simple adjustments that Cuda recommends can quickly transform a ho-hum photo into a captivating winner. Once again Cuda turns to the Develop module for some easy-to-follow adjustments using simple sliders in the panel. He also explains why you can’t always rely upon the histogram while making enhancements to images with multiple objects that reflect light in different ways.
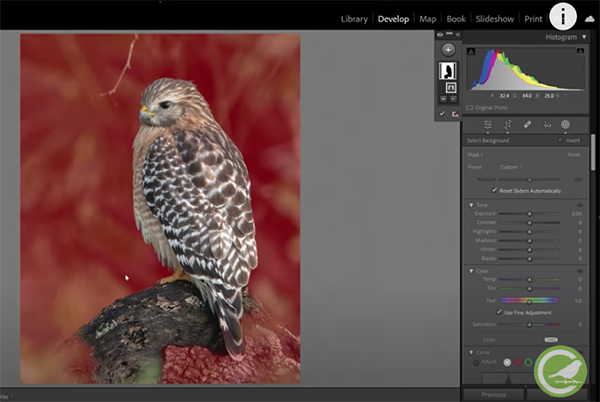
White Balance is another Lightroom tool that Cuda relies upon with regularity. He says this issue is rather common when White Balance is set to Auto, and why the other settings available on most modern cameras do a far superior job in certain situations. He illustrates how this works by rehabilitating a mediocre shot of a beautiful falcon to faithfully reproduce the birds natural colors.
We don’t want to be a buzzkill and reveal Cuda’s other to tips, so you’ll have to watch the video to see what they are and how to use them to advantage. Let’s just say that they are just as effective and straightforward as the three techniques he describes first. You can find more helpful advice by visiting Cuda’s instructional YouTube channel.
And don’t miss the tutorial we posted earlier from another pro, explaining why your nature and wildlife photos are unsharp and what to do about it.


