
Lightroom Timesaver: ONE-CLICK Batch-Edit Trick (VIDEO)
We all face a compromise when making multiple photos of the same scene. On the one hand, the more images you shoot the better the odds that you’ll capture exactly what you want. The flip side of the coin is that the time you spend during the culling and editing process increases dramatically when you just lay on the shutter button and fire away.
So what if we told you that there’s a little-known Lightroom tool that can save you hours behind the computer by batch-editing similar photos to give all of them an optimum exposure. While this concept sounds like a winner, there’s even more because you can accomplish this task with just one click! And the more images you shoot, the more time you save.
As you’ll see in the following tutorial from the popular Signature Edits YouTube channel, this method is ideal for processing similar images, and it works like this: You select all images from the sequence, identify one where you got the light just right, and then let Lightroom apply auto exposure to the rest without manually editing each image from scratch. Then all images from the batch are equally well exposed.
Instructor Ryan demonstrates the process in barely four minutes. The reason for selecting all photos from the same scene scene, even if some of are too dark or too bright, is because the ultimate shot may not be one with the best initial exposure.
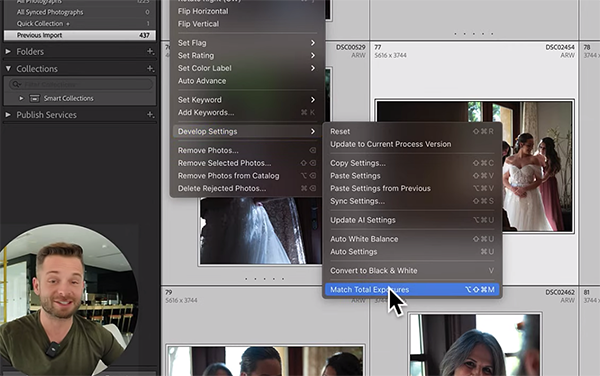
With your baseline image chosen, click on the Photo tab atop the screen, and then choose the Develop Settings option from the dropdown menu. Another dropdown will appear to the right, and the setting you want there is called Match Total Exposures (it’s the last one in the list).
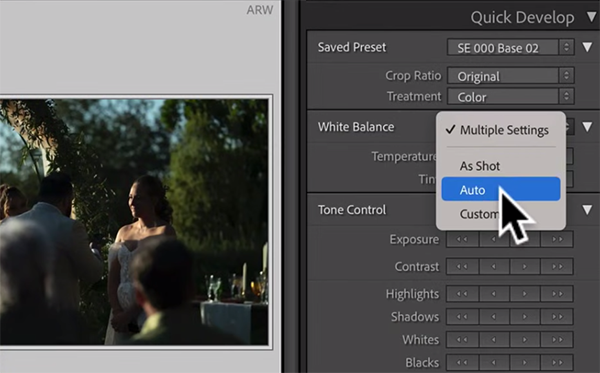
At this point Lightroom takes over and brightens dark shots, drops exposure of those that are too light, and now every image of your scene appears much closer to the overall exposure of the base image you chose.
Ryan admits that while this technique “works a lot of the time,” it’s not absolutely perfect. But as you’ll see, it’s easy to make quick refinements with the simple adjustments he suggests. Even if you have to tweak a couple photos to get them just right, this task requires but a fraction of the time that you’d spend editing all of the images individually.
Ryan’s YouTube channel is full of hands-on editing lessons for improving your Lightroom workflow, so be sure to pay a visit and explore what’s available.
We also recommend watching an eye-opening tutorial we posted recently from another processing expert, explaining a variety of common image-killing editing mistakes and how to fix them.


