
Lightroom’s Tone Sliders Work in Different Ways (VIDEO)
Most photographers rely upon the Tone panel in Lightroom or Adobe Camera Raw (ACR) when processing their images. But guess what? There’s a good chance you’re not using these important tools correctly. In today’s quick tutorial from the Photoshop Café YouTube channel you’ll learn what you may be doing wrong, and the proper way to proceed.
Instructor Colin Smith is a widely respected image-editing expert who kicks of the eye-opening video like this: “All sliders aren’t created equal and they shouldn’t necessarily be used the same way.” He notes further that there are two completely opposite functions that we can employ with the Tone sliders and you’ll see how all this works in barely five minutes.
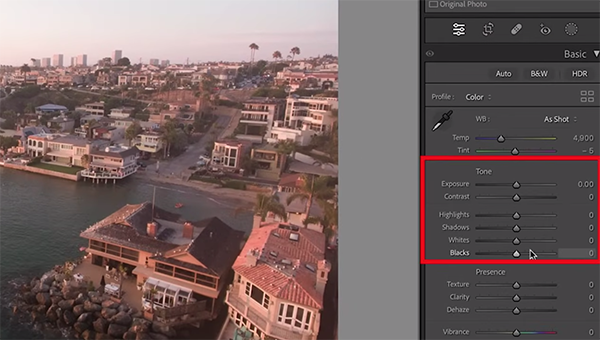
Smith pulls up the Tone panel and explains the difference between using the Highlight/Shadow sliders and those for adjusting Whites/Blacks. As we’ve mentioned before, it’s very important to make enhancements in the proper sequence. And this is what Smith recommends: “First recover detail, then stylize your photo.”
There’s also a cool trick that makes these adjustments easier and provides significantly more control. By clicking on the Tone panel and dragging it to the left, the sliders almost double in length. This means adjustments will be far more precise because you’re making them in finer increments.
As for the adjustments themselves, Smith’s first goal (as mentioned above) is bringing out as much detail as possible in both Highlights and Shadows while temporarily leaving the White and Black sliders alone. He refers to the former as “recovery sliders” and demonstrates what he says is the best way to get the job done.
If you can’t achieve enough detail and color recovery in a bright sky by dragging down the Highlights slider, it’s easy to refine the result with the Exposure slider until you see exactly what you want. He then demonstrates the process he uses to accentuate details in the dark areas of the shot. Slightly cutting Contrast will also reduce Dynamic Range.
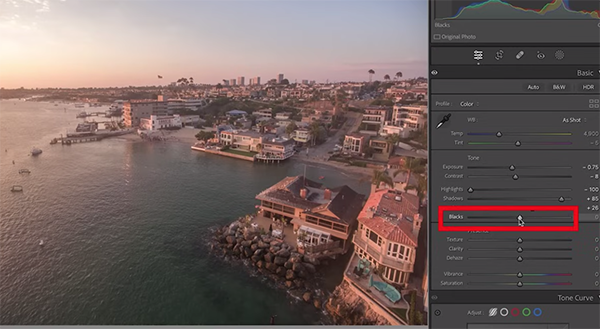
The next step in the straightforward process is what Smith calls “adding punch,” and this is where the Black and White Sliders come into play.” Once again he provides a helpful tip, this time for avoiding clipping as you adjust these tones.
The Whites look pretty good in Smith’s demonstration image, so he focuses his attention on the Blacks to really punch up the shot. The technique is super simple but makes a big difference as you can see by examining the before/after examples.
Be sure to check out Smith’s instructional YouTube channel, once you’re done watching, where you find more tips and tricks for editing images to perfection.
We also suggest looking at the earlier tutorial we posted from another processing expert who explains how he enhances landscape photos by adjusting light, texture, and skies in Lightroom or Photoshop.


