It began, as these things often do, with a small act of organisation that unravelled spectacularly. I went to lock away the passports and cash in the cabin safe. They weren’t there. They were, as it turned out, enjoying an extended stay at our previous hotel. Which is less than ideal when your next stop was not another hotel, rather a luxury motor yacht, gliding past the limestone karsts of Vietnam’s Ha Long Bay. And there we were with no documents, just a rising sense of administrative dread.
What followed, however, tells you rather more about Vietnam than the mishap itself. A quick call to Linh Nguyen — the redoubtable boss of A Travelmate who’d arranged our cruise — triggered a chain of events of almost comic efficiency. His friend collected the passports from Cat Ba, our former island base, ferried them across the island by motorbike, handed them to another accomplice with a speedboat, and two hours later, they were delivered directly to our cabin. Total cost: £18, including a tip. Try getting that level of service out of a European concierge.
It was both the worst moment and, oddly, the best part of the trip — a journey that took in Hanoi, Cat Ba Island (the largest island in the Ha Long Bay area), a cruise along Ha Long Bay, a week on Phu Quoc, a couple of nights in Da Lat and a couple more in Ho Chi Minh. And if there’s a single, overriding takeaway, it’s this: Vietnam runs on warmth, resourcefulness and a quiet determination to get things done.
Guides, drivers, through to the hotel staff and just about anyone you meet, be they the maître d’ of a Michelin-starred restaurant or the elderly woman offering street food, are genuinely friendly. Most people speak English, and everyone is ready with a smile and humbling charm.
So, here are ten insights you might not know about Vietnam, but should.
Traffic carnage but it just works
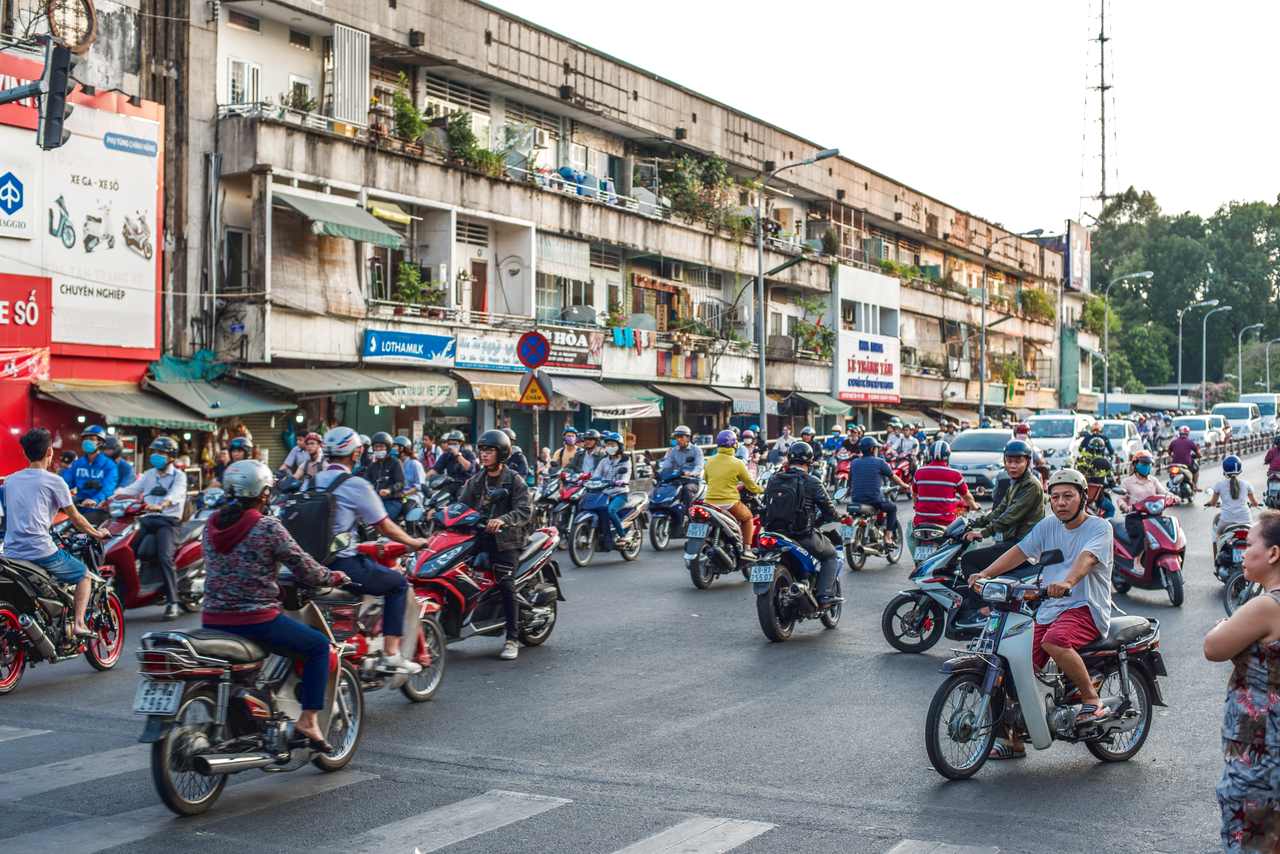
Roads are thronged with motor bikes
In Hanoi, we climbed into a rickshaw for a tour of the French Quarter and a lap of Hoan Kiem Lake. Our driver, pedalling gamely in 34-degree heat, adopted the local driving philosophy — which, at several points, involved steering us directly into oncoming streams of motorcycles. It was, at the very least, invigorating.
Traffic appeared less governed by rules and more by mutual understanding and optimism. Mopeds, scooters and cars swirl together in a kind of high-speed negotiation, miraculously avoiding contact through instinct, etiquette, and what looks suspiciously like luck. Traffic signs are close to redundant.
Crossing the road is a potentially terrifying experience; in two weeks, we never witnessed anything close to an accident. Maybe that’s because the national temperament is more given to politeness than road rage.
Two beers, two cocktails and a view for less than £6
The cost of living in Vietnam comes as a welcome surprise. Given that £100 comes out at over 3.5 million Vietnamese Dong, becoming a millionaire has never been so easy. But the cost of things repeatedly comes as a welcome shock. A 40-minute taxi ride from the airport to the centre of Hanoi costs a little more than a tenner, a can of beer is around 20 pence and a decent meal for two can be had for around £12.
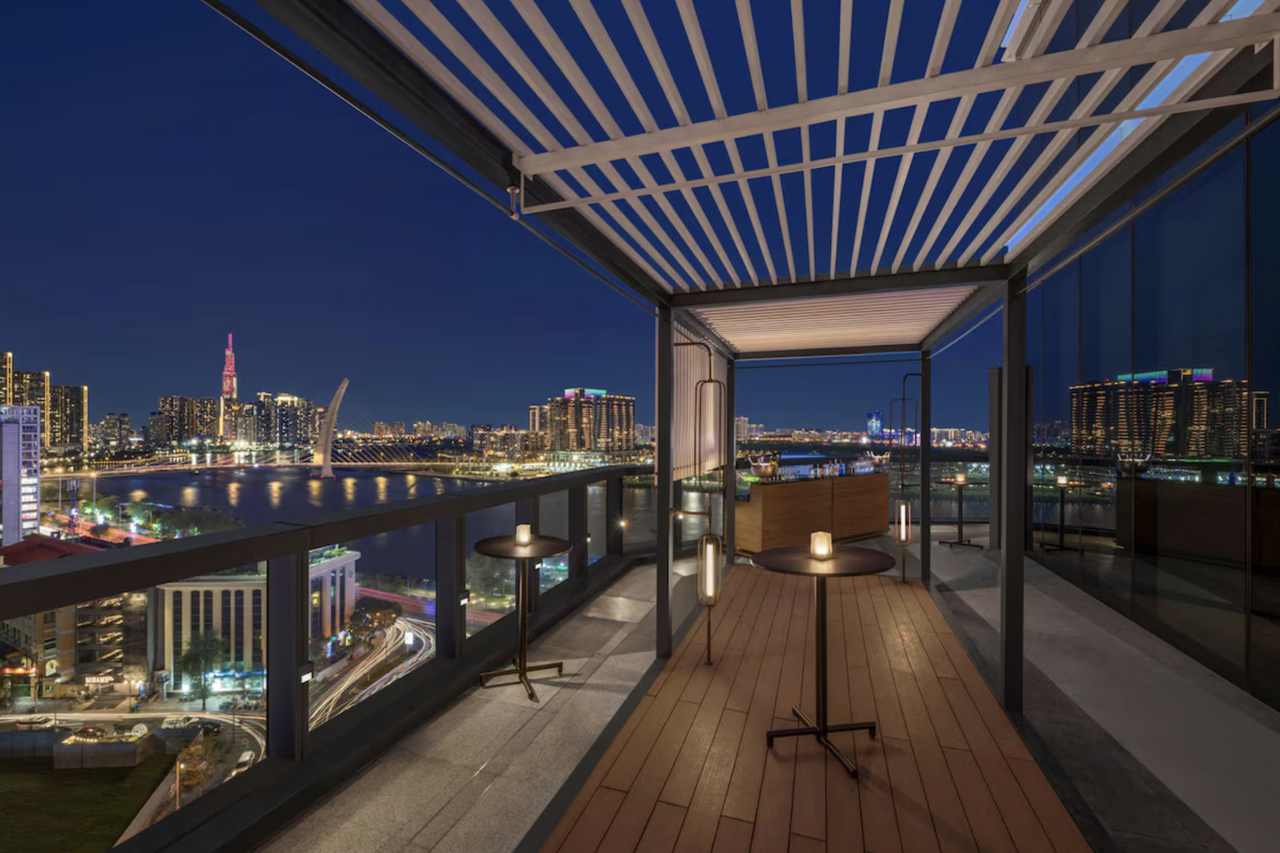
Hilton Bar Ho Chi Minh
And, if you want to push the boat out, you’ll find you don’t have to push it too far. A drink at the bar on the 40th floor of the Ho Chi Minh Hilton hotel is well worth the Happy Hour experience. Go between the hours of six and nine, take in a breathtaking view of the Saigon River and the city beyond and enjoy two beers, two cocktails, and you’ll be charged less than six pounds.
The hills of Da Lat
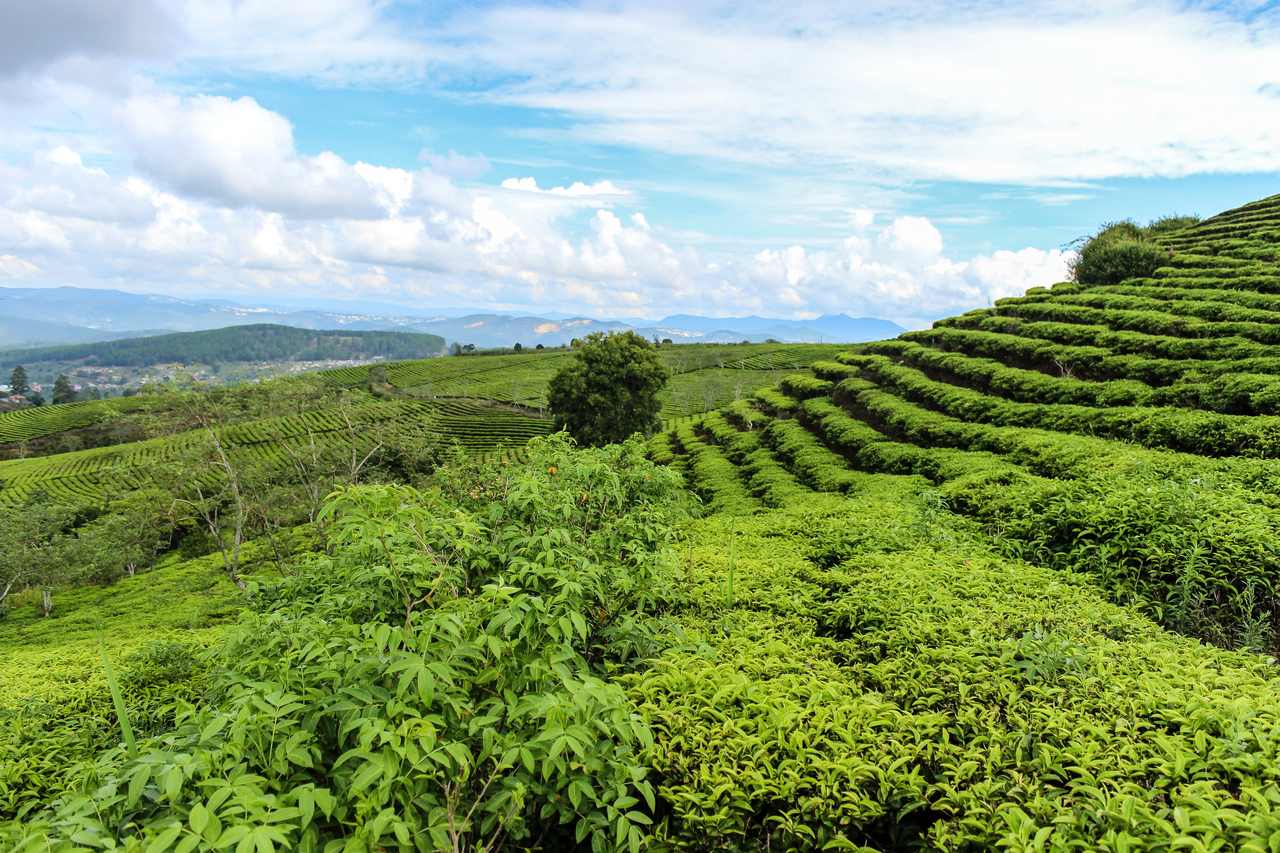
Hills of Da Lat
Hanoi and Ho Chi Minh City are busy, colourful and hectic, but between the two cities, Vietnam is a country of stunning scenery. We stayed a couple of nights in the hills of Da Lat – just one of several we could have visited.
Da Lat, a genuine, unspoilt tropical paradise, is just a 50-minute plane ride from Ho Chi Minh. Up in the hills, we rose at sunrise to watch clouds chase through the valleys. We explored some of the greenhouses which help produce around 2.4 billion flower stems annually, a number which makes whoever named Da Lat “The City of a Thousand Flowers” sound like a bit of a pessimist. The flower industry is worth £168 million to the city’s economy.
Phu Quoc is a must
Phu Quoc is an island just off the south-west coast. It’s unspoilt, but they are already building a second airport terminal and luxury hotels like the Intercontinental and the Regent have staked a claim alongside the broad sandy beaches, so it might be an idea to get in quick.
Stay at the incredible Sailing Club, a Signature Resort featuring a variety of private villas, each with a private pool. We were stunned by the luxury on offer – from the pool and secluded garden, to the living room, a few steps below a kitchen featuring every labour-saving appliance known to man.
 Upstairs were two huge bedrooms, each with en-suite bathrooms and walk-in wardrobes. There were two tables set for six, one inside, the other beside the pool.
If the restaurant does not appeal, a chef is available to cook at your villa. This is one of the most luxurious stays I have ever enjoyed, and all for £3,000 for the week. That’s incredible value even if you don’t share the cost with another couple. The only difficult part is securing a booking.
This part of the island is quiet, the sea is warm, the beach is palm-fringed, and the prices, whilst reflecting the five-star surroundings, are still reassuringly low.
War Museum that pulls no punches
Vietnam has a storied history, perhaps dominated by the Vietnam War, which the people here call the American War. Ho Chi Minh City hosts the War Remnants Museum. The exhibits pull no punches, featuring aircraft, weaponry and some brutal photographs. The war resulted in around 1.1 million North Vietnamese and Viet Cong military deaths, an estimated 3.8 million lost their lives, two million of them civilians. Some say the tone of the exhibits is anti-American. Given the data, that might be seen as understandable.
The incredible Cu Chi Tunnels
It’s worth a two-hour trip out of the city to experience the Cu Chi Tunnels. The Viet Cong carved out the tunnels using simple tools, ventilating them with bamboo sticks and used them to frustrate the enemy, emerging from nowhere to mount their attacks. They built booby traps, covering them with vegetation and trapping American soldiers on spikes – some revolving in cylinders, others aimed at the poor victim’s armpits.
Soldiers would fall into them and onto spikes, which had been daubed in animal manure to spread infection. Worse, their cries for help would alert their companions, and as soon as they gathered, the Vietnamese would emerge from the ground and lay waste to them.
Today, you can experience the sweltering heat and jungle landscape, see the weaponry and even drop into a hole in the ground and disappear under a trap door covered in foliage. Then come through the tunnels themselves. Not for the claustrophobic or anyone in need of a diet — the experience is a little frightening and the heat so intense you can only marvel at how the defending forces managed to spend so much time underground.
Vietnam cuisine – what a joy!
Vietnam’s cuisine is a total joy for travellers — fresh, vibrant and full of flavour without feeling heavy. In Hanoi, dive into fragrant phở and smoky bún chả from bustling street stalls.
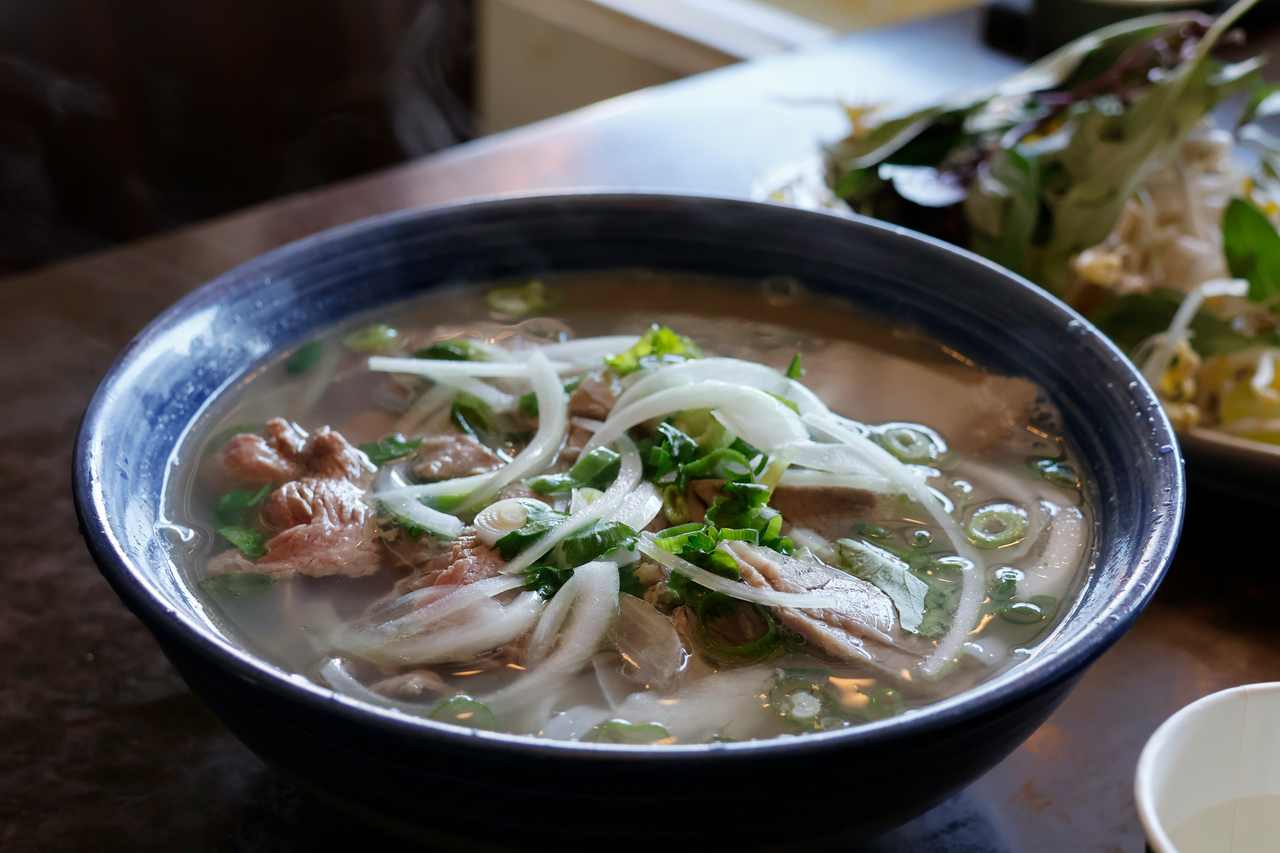
Fragrant Pho
Ho Chi Minh City offers excellent bánh mì, herb-packed fresh spring rolls and lively night markets, while Phu Quoc impresses with grilled seafood and coconut-infused dishes. Everything sings with lime, chilli, mint and fish sauce, and you can enjoy superb meals for just a few pounds.
Da Lat brings its own highland touch with fresh strawberries, avocados and cooler climate specials alongside classic Vietnamese fare. Vegetarian options are easy to find, and the iced coffee is addictive.
Stick to busy stalls, and you’ll eat safely and happily — the bright, herbaceous flavours often become the most memorable part of the trip. And the bonus is that the diet is so healthy that we both lost weight.
The historic hotel bars Ho Chi Minh City
It’s difficult to do justice to the cultural riches of a country in just a couple of weeks — so I’ll settle on just one spot: Ho Chi Minh City (Saigon) — and the hotel bars which abound in history.
We watched the sunset from the roof of the Caravelle Hotel, which served as a hub for correspondents reporting on the fall of Saigon. A few hundred yards away is the Rex Hotel, where American military officials gave daily, often contentious, briefings to journalists — sessions that became known as the “Five O’Clock Follies.” The rooftop bar was a popular hangout for journalists and soldiers alike. And it’s easy to imagine how life was back in a momentous time in world history.
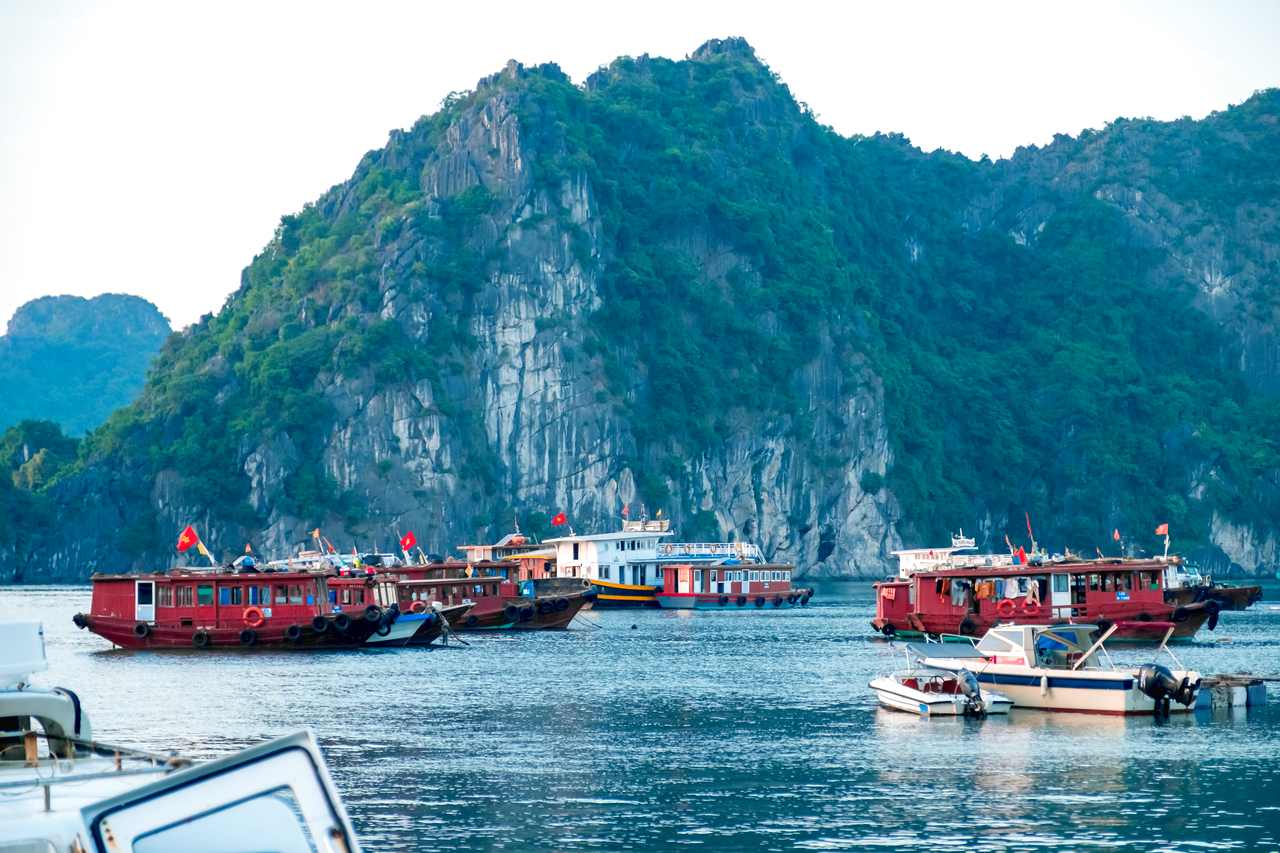
Take a 24-hour cruise around Ha Long Bay
It’s a two-hour drive to Cat Ba Island, followed by a transfer to the Tulip motor yacht for a 24-hour cruise through Ha Long Bay. For roughly £280, we had meals included and a generously sized stateroom with a bath, view, the lot — drifting through one of the world’s most striking natural landscapes. A 24-hour cruise around Ha Long Bay will leave a lasting impression. It’s a popular excursion, and it’s worth spending the extra to secure a berth on a luxury boat.
Try Weasel Coffee
Vietnam produces around £4.3 billion in coffee exports — a figure second only to Brazil. And the biggest earners are the beans passed out by civets. Or weasels, as they are more popularly known.
Weasel coffee is among the most popular and expensive coffees in the world. In Da Lat, we took a trip to see the civets, watched the beans being washed and then ground them into a morning cuppa. Luckily, weasel coffee doesn’t taste like what it actually is, but it seems that feeding the animals coffee beans enhances the beans’ flavour. Apparently, there’s something about a civet’s digestive tract that changes the chemical composition and taste of the coffee bean. And I’d love to know how someone worked that out.
GETTING THERE:
Vietnam Airlines offers the only direct flights from London, which makes the trip easier and quicker. The Business Class offering frequently wins best value awards. We travelled back in Premium Economy — it’s 50–100 per cent more than Economy but delivers 70–80% of the comfort improvement for roughly half the price of Business Class. The food mirrors economy fare, but the seats are big, recline a long way and the service is as good as you will experience throughout the country.
The post Vietnam – 10 Travel Insights appeared first on The Travel Magazine.


