PURO hotels were inspired by Rune Askevold, a Norwegian with a passion for Poland. This chain does not have a common theme but instead reflects the culture and history of the town in which it is based.
Here, in Poznan, the Puro has actually incorporated sections of the old city wall in the purpose-built building. These ruins are a backdrop to one of the hotel’s meeting rooms and illustrate its affinity with historic centre of the town, the Old Market Square, which is just around the corner.
This hotel is also close to the town in other ways as it encourages locals to come and use their working spaces on the ground floor. It also promotes local artists and artisans by displaying their work around the hotel and in the bedrooms.
Who for
PURO Poznań is the ideal place to stay when visiting the city, whether as a solo traveller, a couple, a family, a businessman, the organiser of a conference or celebrating a wedding or other special occasion.
Accommodation
As the hotel is modern and purpose-built, it has been designed to ensure all the bedrooms are flooded with natural light. All the rooms are well-designed, comfortable and well-equipped.
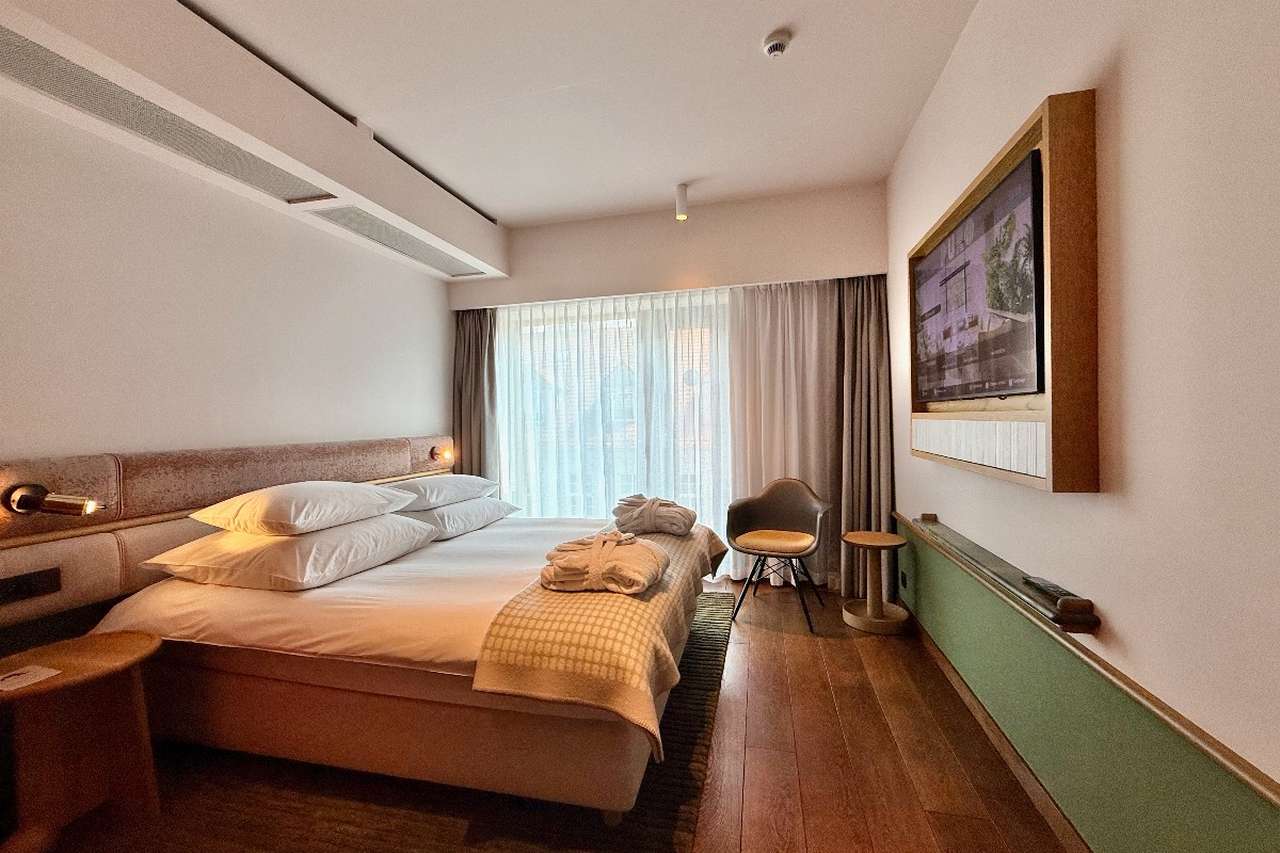
Classic Bedroom at the Puro Hotel in Poznan
Its 135 rooms are divided into five categories: Classic Room, Classic Plus Room, Junior Suite, Junior Suite Plus and the Executive Suite. All the rooms feature a Smart TV, desk, free WiFi and a tablet to control heating and light (as well as traditional controls). The suites all have a lounge area and the Executive Suite has two bedrooms, two bathrooms, a separate living area and terrific views of the city.
Food & Drink
Nifty has an open, large area on the ground floor that functions as a restaurant, café and bar. The café and restaurant are open all day, serving breakfast, lunch, and dinner during the day.
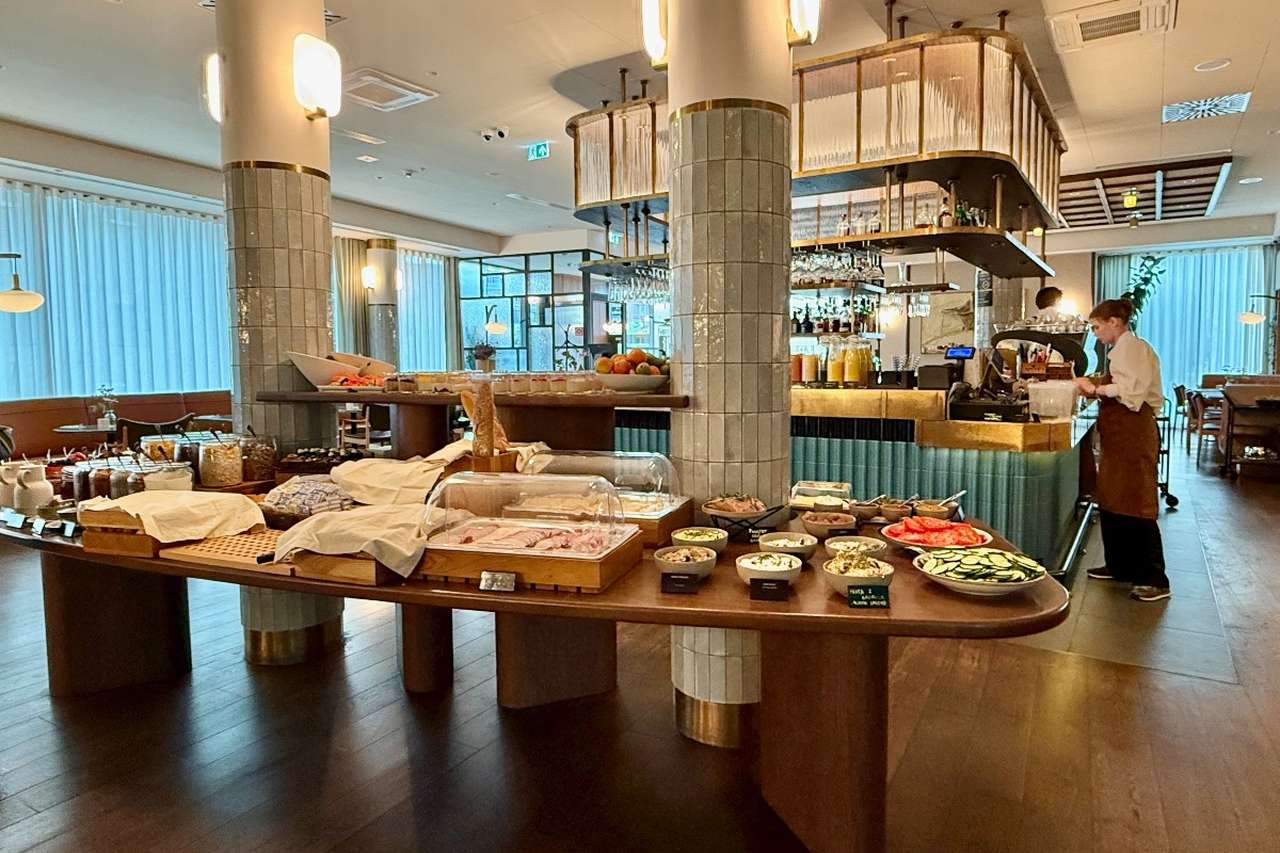
Breakfast Buffet at the Puro Hotel in Poznan
The bar is open until late and offers a good range of classy cocktails. Nifty offers a modern mix of worldwide cuisine as well as some traditional Polish dishes. Sunday roasts are a favourite here. An extensive breakfast buffet also features a hot breakfast menu including egg-based favourites.
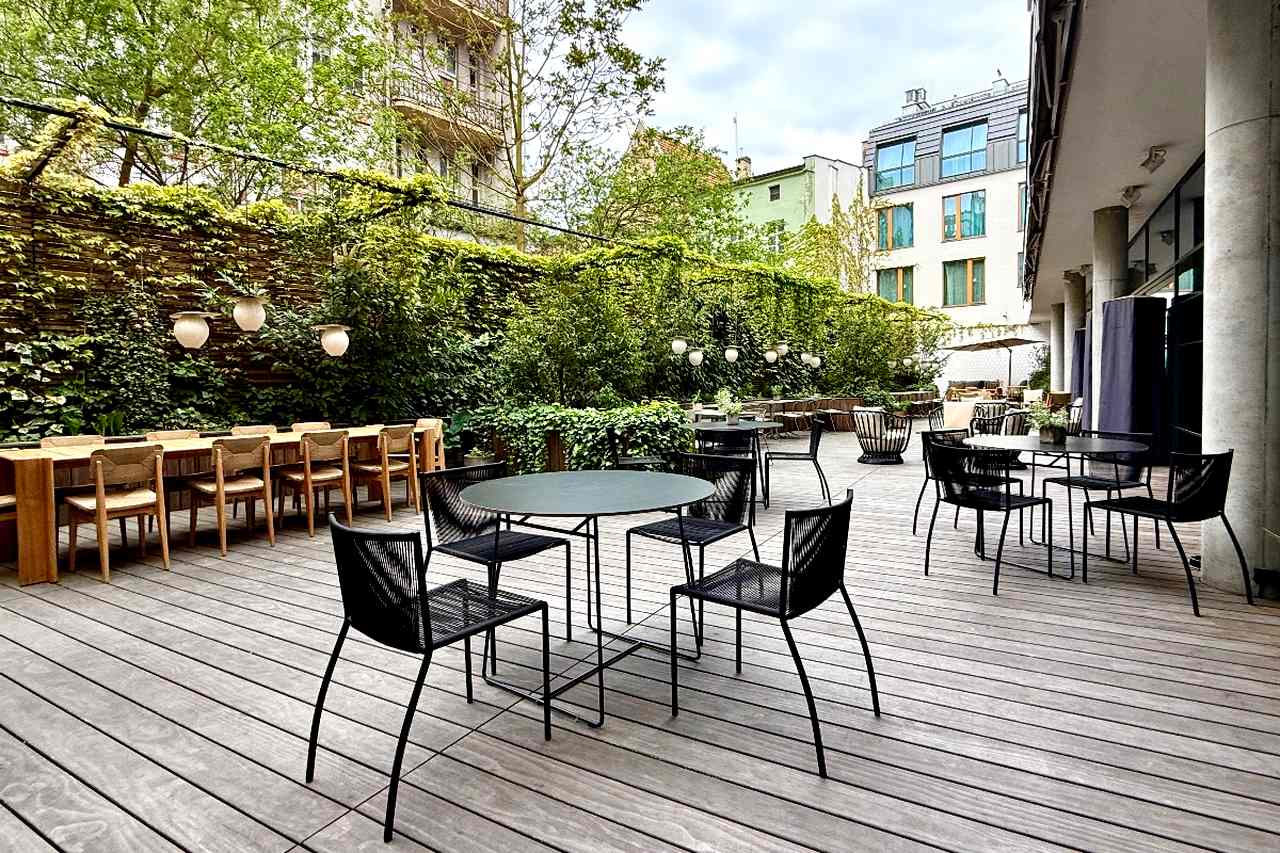
The Patio at Nifty outside the Puro Hotel in Poznan
Outside the restaurant area is the Patio at Nifty, a paved and hedged terrace where guests can enjoy a quiet drink. It is also an entertainment venue featuring a weekend programme, Tu Patio, featuring live music (Friday) a film screening (Saturday) and book reading (Sunday). These events are free to everyone.
The hotel also has a programme of weekly events that are free for its guests:
- Every Saturday Discover Poznań 11:00 am Walking tour with guide
- Every Monday Energetic Shots 5:00 – 7:00 pm Energetic shots in the lobby
- Every Wednesday Tea And Cake 5:00 – 7:00 pm Tea and cake in the lobby
Facilities
Facilities include a gym, a sauna and several well-equipped meeting rooms. These meeting rooms vary in size from the two smallest, with a capacity of 12 people, to the largest, which can accommodate up to 80 people.
Guests, visitors and locals are all welcome to use the spaces on the ground floor. These include a restaurant, lounges, and a work area. This creates the sense of being part of the city rather than an exclusive area for guests only.
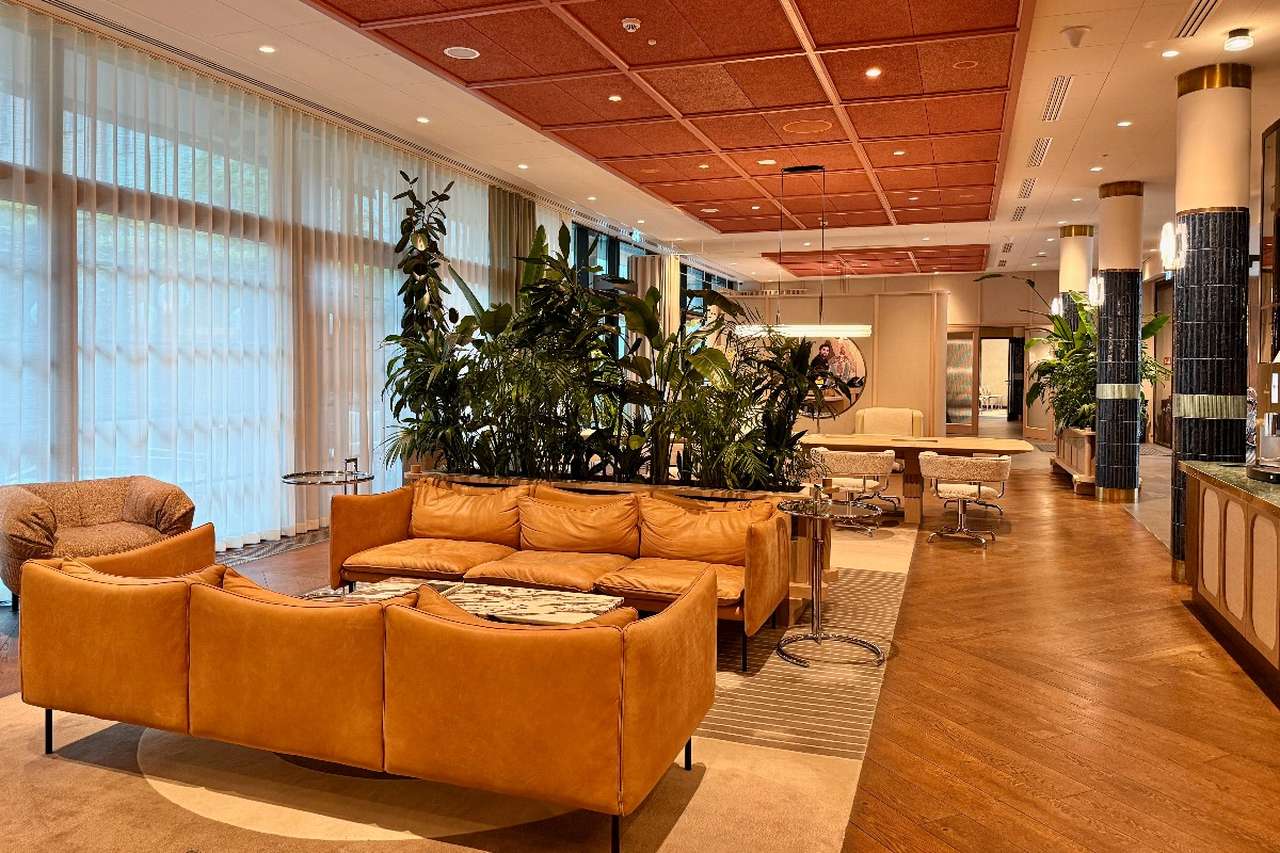
Lounge and Work Area at the Puro Hotel in Poznan
There is a coffee station in the lounge and work area dispensing hot drinks day and night. The hotel also offers bikes for guests to use free of charge.
How much
Prices start from £72 per night based on two adults staying in a Classic Twin Bedroom (breakfast not included). Check the hotel website for special discounts.
CHECK AVAILABILITY
What’s nearby
The Puro Hotel is within easy walking distance of two of the main attractions in Poznan, Cathedral Island (Ostrów Tumski) and the Old Market Square. Cathedral Island lies between the River Warta that runs through the town and one of its tributaries, the River Cybiną. This is where Poland was first established as a state during the tenth century. It is also the site of its Gothic cathedral dedicated to St Peter and St Paul, but commonly known as Poznan Cathedral. Other religious buildings are found here, and the interactive Poznan Gate Exposition. This is a good place to start a visit to the island to learn more about the history of the island before walking around the island.
The Old Market Square is just around the corner from the Puro Hotel and, apart from its historical buildings, offers a good range of cafés, bars and restaurants. It features a row of colourful merchants’ houses (post-war reconstructions), elegant Regency houses and the sixteenth-century Town Hall. This stunning building features a large clock, and above the clock, the famous butting Poznan goats emerge when it chimes midday and 3 pm. Other attractions just beyond this square include the Imperial Palace, the Enigma Museum and the daily fruit and vegetable market.
VERDICT:
For whatever reason you are in Poznan, the Puro Hotel is the perfect place to wind down and enjoy some quality time after a busy day.
The post PURO Poznan in Poland, Hotel Review appeared first on The Travel Magazine.


