
PERCEIVED SHARPNESS: Why Sharp Photos Look Soft & an In-Camera Fix or an Edit (VIDEO)
We repeatedly discuss the concept of sharpness because it’s such a critical component of all really good images. But there’s an oft-ignored concept that you may not have heard until now; revealing why some sharp images appear soft to you and the viewer .
This important consideration is known as “perceived sharpness” and it differentiates between images that are truly sharp but appears soft, and those where accurate focus wasn’t obtained. The tutorial below deals with the first problem and demonstrates what to do, both in the camera and during post-processing to avoid this issue in the future.
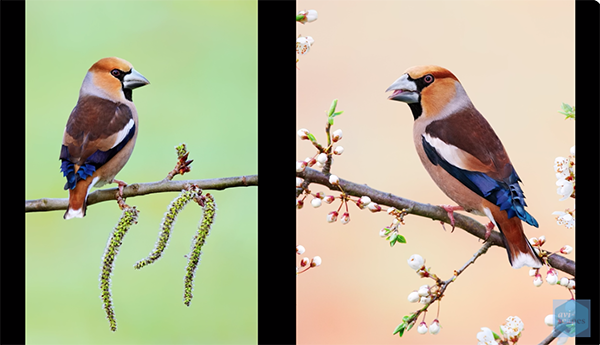
Jan Wegener is a noted German wildlife photographer and a very adept instructor. He illustrates the problem with several examples of sharp photos that appear soft and provides straightforward methods for a quick rehabilitation that make a big difference.
Wegener says sometimes the culprit is a cluttered background, unusual light falling on the subject, or clashing colors. In the latter case he demonstrates how eliminating an unwanted color cast makes an image appear much sharper without any sharpening adjustments during the editing process. In fact, he says he typically avoids adding any sharpness when editing his work.
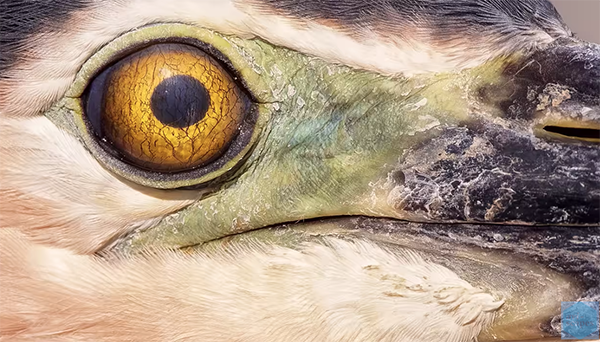
One in-camera trick for conveying the precise focus of a shot is to photograph the subject against a plain or soft background, whether that’s a featureless sky or a scene devoid of distracting elements like bushes, tree branches and the like.
Much of what Wegener discusses has to do with simple adjustments in post-processing to rectify various problems, including how to eliminate the aforementioned color casts. This is particularly helpful when photographing at Golden Hour when warm light will bias tones in white birds and in any water within the scene.
Simply fixing these inaccurate colors reveals the true sharpness of his image of a bird in the water. For this task Wegener improved color balance by adding a bit pf blue and cyan. He also used HSL tools to drop saturation and increased brightness with the Lightness slider. Then Wegener selected the background and employed Selective Color to restore the water to its natural blue tones.
The resulting image is a huge improvement over the muddy original. It now looks really sharp with realistic colors in the bird and the background. And all this was accomplished without any adjustments to sharpness itself.
Wegener runs through a similar process for bringing out the sharpness captured in other photos. There are a few other techniques of note that are worthy of attention. You can find more straightforward lessons like this on Wegener’s YouTube channel, so be sure to pay a visit.
We also urge you to watch the very important tutorial we posted earlier this month, explaining why another pro says: “change these settings now on every camera you own.”


