
Photos with Ideal Color: 2 Lightroom & ACR Sliders Get it Done (VIDEO)
Accurate color grading is an essential editing task regardless of the type of images you shoot, and there’s a variety effective technique—some more complicated than others. This tutorial from the Photoshop Café YouTube channel explains a fast, easy, and effective method for getting the job done.
Photographer Colin Smith is an Adobe expert, educator, and prolific author who has a knack for simplifying seemingly complicated Photoshop and Lightroom techniques. In today’s episode you’ll learn how to achieve precise color by using two oft-ignored Lightroom/ACR sliders that only take nine minutes to demonstrate.
Smith does much more than explain how the Balance and Blending sliders work, as he also illustrates how to employ all the settings in Adobe Camera Raw (ACR) and Lightroom’s Color Grading tools. There’s also some “secret sauce” for preparing tasty colors in several different types of photos.
You’ll find the Color Grading panel inside Lightroom’s Develop module, while Photoshop users can get there by clicking the Filter tab at the top of the screen and selecting Camera Raw Filter from a dropdown menu that appears. What you’ll learn today works the same regardless of which approach you take.
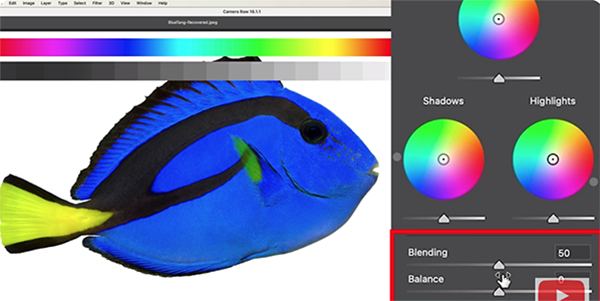
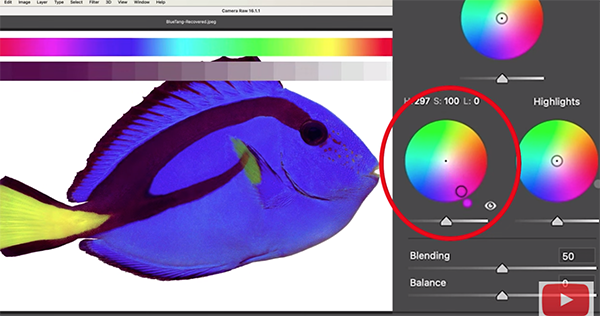
Once in the panel you’ll see sliders under three color-grading wheels—one for midtones, another for Shadows, and the third for targeting Highlights. You can work on these regions individually by clicking on the appropriate button above each wheel, and there’s also a way to make global adjustments if you prefer.
The video then moves on to Hue, Saturation, and Luminance enhancements, again using the color wheels. Here, as you pull outwards from the center of a wheel, more and more Saturation is applied. Then you can drag around the outer edge of a wheel to change the Hue. There’s also a slider for brightening or darkening the effect.
Smith provides detailed examples for adjusting Balance and Blending, with interesting examples of coloring shadows and blending colors across highlights. He wraps up this eye-opening video by applying a “cinematic” color grade to achieve a unique effect.
There’s much more to be found about all things Adobe on Smith’s popular YouTube channel, so be sure to pay a visit when you have time.
And don’t miss the recent tutorial we posted from another image-processing expert, with a very helpful guide to becoming “a master of noise reduction” in barely even minutes.


