
Photoshop Basics: Content Aware Fill Made Easy (VIDEO)
The image-editing needs of less-experienced photographers often enable them to side-step complicated tools and techniques. Other times there are seemly seemingly advanced tools than can make a big difference in an edit, and these can be greatly simplified for Photoshop novices so that everyone on can get in on the action.
Instructor Barry Beckham specializes in demystifying important editing techniques and puts it like this: “You can’t become in accomplished photographer without image-editing skills, but we can make it easier and a lot more fun to develop those skills.” This quick episode is a prime example.
Today’s topic is Photoshop’s Content Aware Fill capabilities that Beckham defines like this: “As the name suggests, it will fill in parts of the image using other parts as a reference.” His demonstration shot is one you may recall from an earlier lesson on adjusting vertical and horizontal lines. And it’s a perfect example for what you’ll learn how to do today.
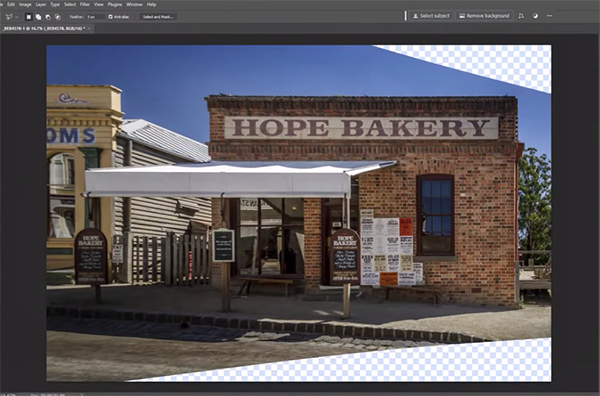
For this episode Beckham took his previous geometric adjustments to the extreme, and you’ll see that by doing so the upper and lower right corners of the photo are now devoid of content—making the repair a perfect job for Content Aware fill. Beckham starts by giving Photoshop “some guidance on what we want to repair.”
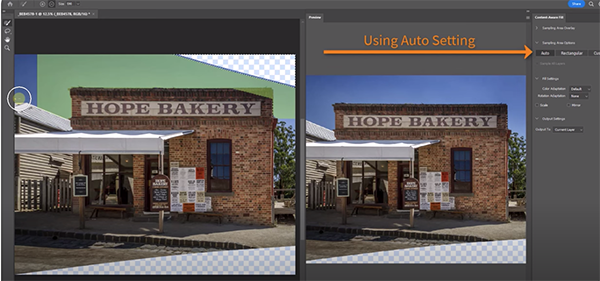
To do that he uses Photoshop’s Polygonal Lasso tool to make a quick selection of the empty upper-right area of the image. He then clicks on Edit atop the workspace and selects Content Aware Fill from a dropdown menu that appears. As you can see, the screen splits in half, with the left side showing an area in green where the repair is drawn from.
The right side of the screen displays a preview of the fix that’s being done. Without any input on your part the settings are set to Auto, and in this instance the repair already looks perfect. So as Beckham says, “If it ain’t broken, let’s not fix it.” He also demonstrates a few ways to output the repair, depending upon how you want to proceed.
Like other Photoshop tools, Content Aware Fill doesn’t always nail the job to perfection automatically, especially when working on more complex images. And that’s when it’s time to make a few simple refinements to complete the transformation
During the remainder of this lesson Beckham walks you through such scenarios and quickly demonstrates the simple steps required with each of his examples. He also provides several helpful keyboard shortcuts for accelerating the process. After watching the video pay a visit to Beckham’s instructional YouTube channel, where you’ll find more helpful episodes designed for beginners.
We also recommend watching the earlier tutorial we posted in which another expert explains how to achieve clean and smooth edges with Photoshop’s powerful Select and Mask tools.


