
SIMPLIFY Your Photo Editing Workflow in Lightroom and Photoshop (VIDEO)
So here’s a common problem that may sound familiar: You come home from a day of shooting in the field, review your images on the computer, and feel really discouraged because you don’t know whether to toss the files in the trash, or where to beginning fixing them with the software of your choice.
But guess what? The photos you shot may not be as bad as you thought, and the real issue could be that your editing workflow is just far too complicated. That’s when it’s time to take a deep breath, and spend a few minutes streamlining your approach. The tips in the 14-minute tutorial will help you undertake this task and will simplify your workflow from now on.
Instructor William Patino explains a highly effective processing workflow for editing landscape photos in Lightroom or Photoshop that’s simple enough for everyone to use. Even experienced photographers will appreciate the degree to which Patino’s approach will save them considerable time and effort.

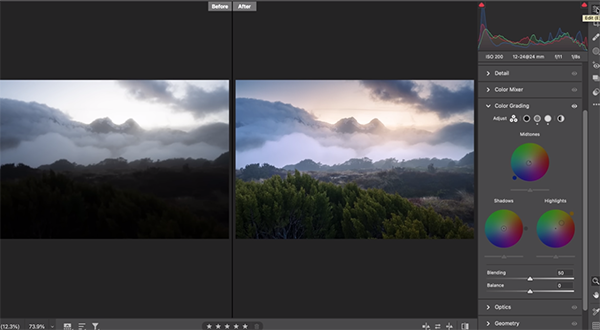
Patino says there are only a handful of tools he uses in his workflow and there’s no reason for anyone to complicate things further. The demonstration image is one that he says, “is about as difficult as it gets.” It’s a backlit landscape photo captured at sunrise—with blown-out areas in the sky and crushed shadows in the bottom half of the frame. And the colors are really drab.
One goal is to correct the exposure and open up details throughout the shot. Another is to accentuate the dull, muted colors in the image, and effectively lead the viewers eye through the shot from the foreground to the mountain peaks in the background. The first step is changing the color profile from Adobe Color to Adobe Landscape, which straightaway opens up the dark tones and adds much-needed vibrance to colors.
Patino next turns to the Basic tab (it doesn’t matter if you’re in Lightroom or Photoshop) and uses simple sliders to make several quick global adjustments to Temperature and Exposure—taking particular care to go easy when modifying Highlights and Shadows. Lastly he adjusts both Vibrance and Saturation.
With the basics out of the way, Patino demonstrates a straightforward approach to a few local adjustments for further enhancing the sky and other problems areas in the frame. As he says, “this is where you’ll make up a lot of ground” without unnecessarily complicated enhancements.
At this point you’re only partway through the lesson and the last 10 minutes are equally important and effective, so be sure to watch until the end. Then head over to Patino’s instructional YouTube channel where there’s much more to learn.
You’ll also want to check out the tutorial we posted recently in which another pro says discusses three “essential plugins” every landscape photographer needs for editing in Lightroom or Photoshop.


