
Struggling with Night Photography? Edit the Photos Like This in Lightroom (VIDEO)
Nighttime photography can be a real challenge for a variety of reasons, not the least of which is arriving at a correct exposure. Other problems include specular highlights, color casts caused by streets lamps of varying temperature, and important subjects lurking in the shadows.
As a result of these issues and others, sometimes you just don’t get it right in the camera and post processing is required to get the results you desire. In this tutorial from the North Borders YouTube channel you’ll learn how to use Lightroom to get the job done.
Instructor Hayden Pedersen is an Australian photographer/filmmaker whose imagery conveys a strong sense of visual storytelling. In this 10-minute episode he walks you through a step-by-step process for transforming an image he recently shot on the streets of New York.
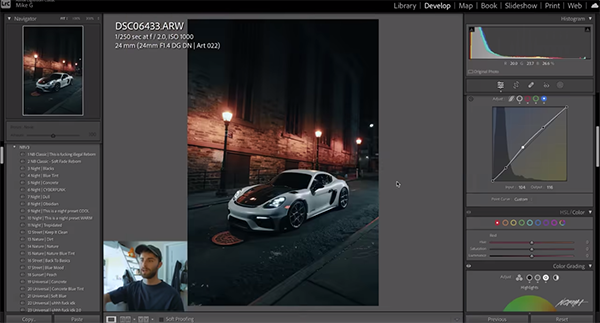
Pedersen’s photo is a perfect example for this exercise because it includes everything from deep shadows in the foreground and background to a white automobile illuminated by bright streetlamps that could easily bias the tones of the car. He begins the edit with basic adjustments and then goes back for a few final tweaks.
He first increases exposure “just to see what we’re working with” before determining his strategy—a unique approach that works well for all sorts of dark images. He then removes most of the Vibrance and boosts Saturation, explaining that this helps him better blend colors with the enhancements that follow.
Now he’s ready to color grade the image, concentrating first on the shadows. He then modifies highlights and midtones toward the reds and demonstrates how to use Curves to add a bit of “punch.” The next step involves adding a bit of fade and slightly dropping the blacks.
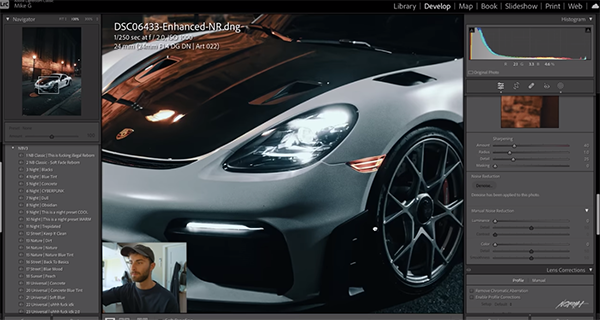
Pedersen moves on the RGB adjustments in the Tone Curve to blend the colors he added earlier. Here he urges you to take a subtle approach because “very minimal adjustments are needed when using the Tone Curve and you’ll be surprised what a big difference they make.” In fact, like with most editing enhancements, a heavy-handed approach runs the risk of spoiling the photo.
As you’ll see, the car is really easy to edit because its satin matt white finish reveals most of the details. And the soft illumination from the streetlamps bounces nicely off the car. Pedersen notes that It almost looks like it was shot with sophisticated studio lighting.
The edit proceeds with a number of HSL adjustments that are a matter of personal taste, enabling you to modify the look in any way your desire. After several more straightforward enhancements the transformation is complete. The key to what you see here is a very natural looking result.
There’s much more to learn on Pedersen’s instructional YouTube channel so be sure to pay a visit. We also recommend watching the earlier tutorial we posted with another accomplished pro, with a simple editing technique for restoring the beautiful colors you saw through the viewfinder when your outdoor photos look a bit dull.


