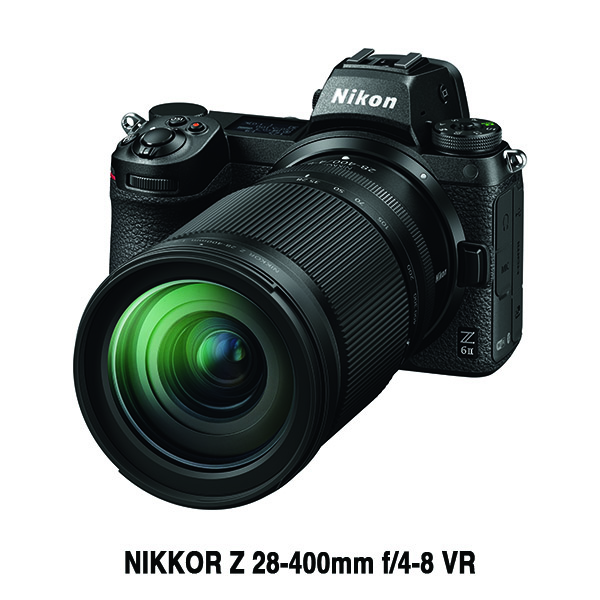
Nikon just announced their newest Z-series lens – and their first ultra-wide entry in the Z DX lineup. It’s the Nikon Z 12-28mm f/3.5-5.6 PZ VR, a lens that was first added to the roadmap in September of 2022. Here’s what we know about the lens so far.
Over the past few months we’ve been paying far more attention to Luminar NEO as photographers are increasingly making the switch with from Lightroom or Photoshop. In fact, it was only a week ago that we ran a storing explaining what’s new in the recent NEO update 1.8.0.
Now one of our most trusted instructors says he just made the transition from Lightroom to NEO, and he explains why in the quick tutorial below. As he explains, “There are five reasons why Luminar NEO is better than Lightroom.”
Toma Bonciu is is a professional Romanian landscape and adventure photographer, and a very popular educator. So when he makes a bold claim like the one above, we stop and pay attention (and you should too). Every photographer has their own editing style, favorite software, and a workflow that works best for them, so keep that in mind while listening to Bonciu describe his preference for NEO.
Bonciu says “I was pleasantly surprised by the new version of Luminar NEO and in some ways I think it’s better than Lightroom because it offers functionalities that I’m used to having in Photoshop.” He also prefers the manner in which NEO’s various tools work.
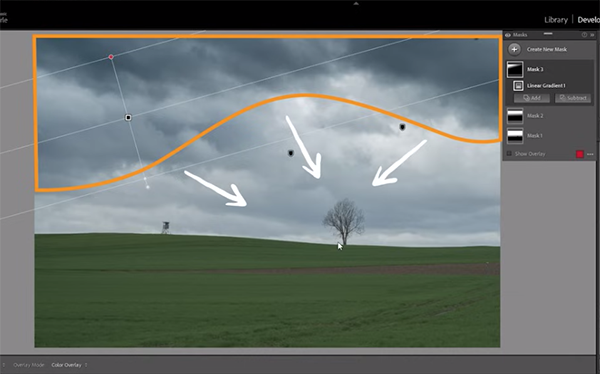
The biggest advantage NEO has over Lightroom in Bonciu’s view is the ability to create a mask when using any tool. It is important to note, however, that once you create a mask and make adjustments, “NEO doesn’t let you go back and change the mask.”
Another reason for Bonciu’s preference over Lightroom has to do with how NEO organizes layers in a manner similar to Photoshop. He says that, “With this type of layering you have perfect control, and you know for sure that a modification can affect an entire image. Again, there’s a drawback that Bonciu’s is willing to overlook for the reasons he explains.
There are three more reasons for Bonciu’s claim that Luminar is better than Lightroom, and he explains each is a very clear, straightforward manner. So if you’re thinking about making the switch, you’ll want to watch this lesson from beginning to end.
The shooting and editing tutorials we post typically come from long-time pros, because the vast knowledge they share is a great way to up your game. But every so often it pays to listen to accomplished amateurs who are still in touch with their formative years and what they learned along the way to improve their skills.
Waseh Ahmad is an evolving landscape and street photographer who is quickly refining his work, and today he presents “the top four skills I learned in my first year of photography.” Following his straightforward advice is a great way to shorten your learning curve.
Ahmad begins with this important note: “The last thing you want to do is spend hundreds or thousand of dollars on a trip, and end with bad photos because you weren’t prepared, conditions weren’t right, or you chose a poor destination.” So listen up, because you’ll learn straightforward tips for avoiding these pitfalls in barely 11 minutes.
Skill #1 is pretty obvious for experienced photographers, but for beginners not so much. Put simply, once you get out in field it’s important to make a mental shift and start observing the surroundings like a photographer, rather that how you look at the world when you’re a “normal person” going about your daily life at home.
By doing the above you’ll begin to notice key factors like effective compositions, areas within the frame with the best light, and distracting elements that might spoil an otherwise great shot. In other words, you have to wear a different hat when there’s a camera in your hand.
Another important skill that’s worth developing as soon as possible is what Ahmad calls “taking more keeper photos.” At first this sounds obvious until you understand what he means. In short, forgot about your camera’s burst mode, hoping that one shot in the sequence will be a winner. This involves slowing your roll, taking a more thoughtful approach, and shooting better rather than more images.
Tip #3 is one you may have heard before,. but it bears repeating, and that’s the simple fact that careful planning dramatically improves your odds of success. This involves more than choosing a picturesque destination and knowing the most favorite spots in the area.
You’ll also want to check weather conditions, what time of day offers optimum light, and understanding the type of subjects you’re likely to confront so you can bring the most appropriate gear. The fourth skill Ahmad describes is equally valuable if you want to make the most of your excursion.
For the past few weeks we’ve been bringing you installments of an ongoing free Lightroom Masterclass from the PHLOG Photography YouTube channel. The lessons cover everything the basics to more involved tasks, and we have a new one for you today.
The episode in the video below is Part 5 in the series, demonstrating the most effective way to sharpen photos and reduce noise. The goal of instructor Christian Mohrle is to make these adjustments in the proper sequence of your workflow and obtain natural looking results.
As with all Mohrle tutorials, we urge you download his example Raw file using the link in the description beneath the video so you follow along and make the adjustments yourself in real time. Mohrle explains why sharpening is usually the last thing he does.
The sharpening process begins in Lightroom’s Details panel that includes three different sections. One displays a preview image that can be adjusted for a specific portion of the shot, ideally one with clearly defined edges. Next is the sharpening section that provides several options, and finally there are the important noise reduction tools.
The lesson begins with sharpening and Mohrle walks you through the straightforward method he prefers. As you’ll see, is easy to change the amount, radius, details, and masking as you proceed. Mohrle suggests the best settings to use and explains how each of the sliders work to precisely regulate the adjustments you make.
Mohrle takes the same step-by-step approach to explaining noise reduction techniques. Here you’ll learn the basics of the process, as well as how Luminance Noise reduction and Color Noise reduction interact for a great final result
You can find earlier episode of this series on Mohrle’s YouTube channel, along with a wide variety of other tips and tricks.