
How to Make Photo Subjects Really Stand Out on Gloomy Days (VIDEO)
Every great photo needs a compelling subject to capture the viewer’s attention but achieving this goal this be quite challenging when shooting on flat or gloomy days when everything in a scene seems to blend together.
Thoughtful editing is required under these circumstances if you want to make a subject stand out from surrounding areas and transform a lifeless photo into a winner. The tutorial below from the PHLOG Photography YouTube channel demonstrates how easy this is to accomplish in barely 12 minutes.
Instructor Christian Mohrle is a German landscape pro with a portfolio of stunning images, thanks in part to his formidable image-editing skills. His goal for this tutorial is to significantly accentuate a small boat in the middle of a dim lake, while enhancing surrounding areas in the shot.
As always you can download the demonstration Raw file using a link beneath the video and make the adjustments yourself as they’re explained. It’s a long-exposure image that’s really dark. Hence, Mohrle begins with a few basic global adjustments before turning his attention to the boat and applying selective enhancements that really make it “POP.”
The initial step is changing the Profile from Adobe Color to Adobe Standard. This takes barely a second and slightly brightens up the darkest parts of the photo. Now it’s time to take things further with a few easy exposure adjustments to the overall image. Mohrle suggests keeping a close eye on the histogram so you don’t take things too far and introduce overexpose in the brighter portions of the scene and lose details in the sky.
As you’ll see, the histogram is also useful for neutralizing any unwanted color casts. Other basic adjustments include adding Texture and dropping Clarity and Dehaze—with the last two modifications intended for retaining the soft effect that Mohrle desires. He also boosts Vibrance for more Saturation.
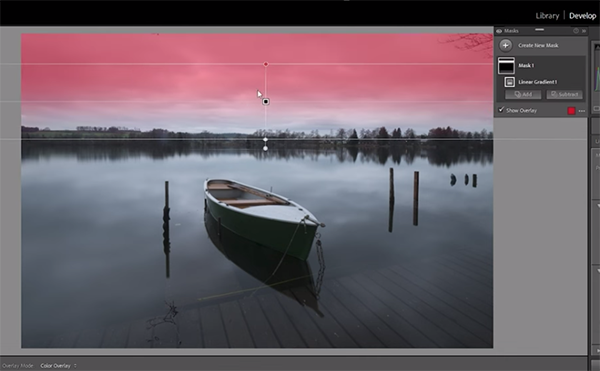
Now the image is much improved, but the boat still blends in with the rest of the shot, and it’s time to correct that with localized masking, beginning with a Linear Gradient at the top of the scene. This enables Mohrle to apply several selective adjustments to make the sky more dramatic and bring it into balance with the rest of the photo.
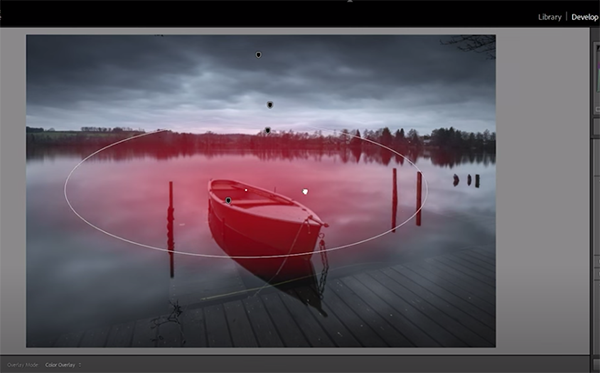
Another Linear Gradient is used to enhance the foreground by “pumping it up all the way” with Clarity and a couple other tools. Now the reflections in the water are readily apparent and add much more interest to the shot. A Radial Gradient over the boat completes the masking.
All that’s left to finish the transformation is some straightforward color grading, sharpening, and a bit of cleanup. A quick look at the before/after images illustrates the effectiveness of this edit. There’s much more to learn on Mohrle’s instructional YouTube channel and we strongly recommend taking a look.
We also suggest watching a tutorial we posted earlier, explaining how Lightroom Mobile lets you edit photos on a phone or tablet—just like you do on the computer. This one will come in very handy when you’re traveling without a laptop.


