Above photo by OSPAN ALI on Unsplash.
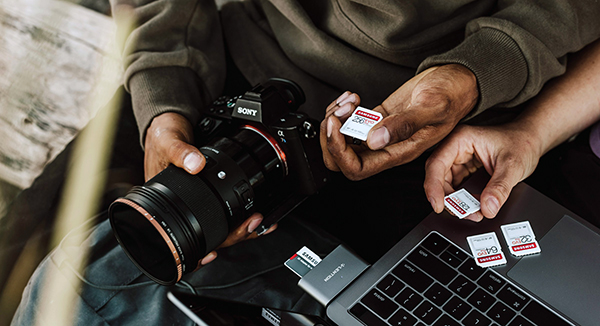
When we consider the bonehead blunders photographers unwittingly commit, we usually think about gross mistakes that result in fuzzy or poorly exposed images. But the error in this story produces SHARP images that we want to abort at all costs. The tragic bungle we’re identifying is sharing a memory card that has not been properly and thoroughly wiped 100% clean.
You sell a camera, smartphone or GoPro you no longer use. You’re a nice person so you throw in the aging 16GB memory card that was in the camera last. You format it first, so you feel safe, and you feel good because you did a friendly thing, no?
If this is you, here is information that will punch you square in the gut.

The Memory Card Data Gut Punch
Selling or sharing a memory card potentially means sharing every image, video and other file that’s ever been saved to it. Maybe not all of the data, but definitely substantial chunks of it.
The same applies to USB thumb drives, hard drives, SSDs and other recording media.

Formatting a memory card does not magically “erase” the images. Deleted images do not “go away.”
Frightening? Damn straight! But you can protect yourself and your personal imaging history.

How Data is Stored
Think of a memory card/hard drive as a parking garage that runs on the honor system. Drivers inform the attendant when they arrive. The attendant assigns a space(s) to them and records the location. When the vehicle leaves, the motorist likewise informs the attendant who immediately marks the spot they were parked in as “available.” But no one ever confirms whether or not the car actually left.
When an image is deleted from a memory card or other storage media, the space that the image file physically occupied as digital data is marked “available” and new data can be written to that space. Formatting a memory card does little more than mark ALL of the space available.
Deleted image files do not fully disappear unless they’re completely overwritten by other files or deliberately scrubbed, i.e., purposefully obliterated by special software. Similarly, the Format command tells the firmware in the card that it’s totally okay to write new files anywhere, including over the files that already exist. Neither Delete nor Format remove the existing files.
This is a safeguard that’s intentionally built into the card’s architecture. If this were not the case, accidentally deleting a file it would render it gone forever. This system also makes the Formatting process much faster.

The Danger
Snooping scoundrels deploy readily available recovery software that searches every corner and crevice on the media and restores every byte that looks like data. Malefactors might be able to view the images you thought you deleted from your memory card. Even though the images are completely innocent, do you really want to provide them to a stranger?
Protect Your Data — Wipe Cards Clean
SanDisk RescuePRO Deluxe is a potent data salvage app that features an option to wipe cards 100% clean by replacing the data with randomly sequenced 1s and 0s. It’s primary function is to resuscitate images and other files that have been inadvertently deleted. It’s easy to use, and from what I’ve seen, the best you can buy.

SanDisk bundles a link to a free 2-year subscription to RescuePRO Deluxe with their premium level memory cards (license key or serial number required). I highly recommend that you download it before you actually need it so you can put it to work without panic when an accidental deletion occurs. If you don’t use SanDisk media, download a free trial version of RescuePRO Deluxe from the software publisher, LC Technology International.

Another way to render a card neutered and inert (short of melting it on the barbecue grill) is to format it and then take pictures of the sky, ground or your feet until the card is full. With a mega-large capacity card, this could take weeks. Really. And don’t take pictures of your housecat; Cat’s are way too duplicitous.

A Tip For Those As Clumsy as I Am
If you perform a Delete or Format operation unintentionally, stop shooting immediately. If you continue shooting, the new images may overwrite the ones you want to restore. It’s never 100% guaranteed that data can be resurrected, but the odds are in your favor to recover at least part of it with SanDisk RescuePRO or similar recovery software.
—Jon Sienkiewicz


