
The BEST Effects Plugin for Lightroom & Photoshop (VIDEO)
There’s a vast array of plugins from third-party vendors for augmenting the capabilities of whatever image-editing software you use. In the tutorial below you’ll discover what one expert calls “the best” choice for both Lightroom and Photoshop.
Anthony Morganti is a post–processing impresario, and in this episode he explains why ON1 Effects is his favorite, and he demos how to use it for faster, more effective editing. There are two links you should check out in the description beneath the video; one for more details and purchasing options on the ON1 site, and another with a 20% discount code courtesy of Morganti.
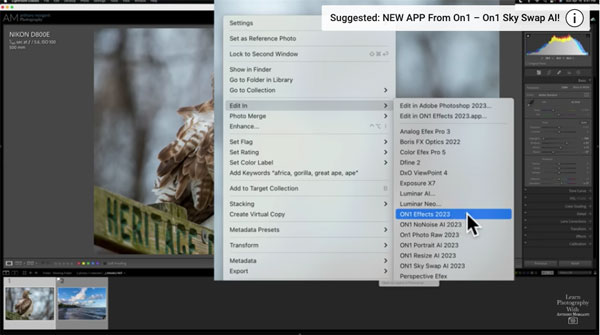
Some of you know that ON1 Effects is a component of ON1 2023, and it’s been a part of Photo Raw from the beginning. What Morganti discusses today is that you also can purchase ON1 Effects, all by itself, as an affordable standalone application—and when you do it will also work as a plugin for Lightroom Classic and Photoshop.
In today’s 14-minute lesson Morganti demonstrates how to use this powerful plugin in Lightroom Classic to quickly and effectively enhance two different images that need a bit of work. One is a wildlife image of a majestic hawk, and the other is a somewhat dark and uninspiring seascape shot.
He begins with his photo of the Red Tail raptor perched upon a sign, and gets to work. His goal is to use plugin “to make the bird stand out a little more.” As soon as he opens ON1 Effects, a dialogue box pops up suggesting he create a copy of the photo. That’s because he’s working with a Raw file and the plug-in requires that the image be a JPEG, PSD, or a TIFF.
Once the copied image opens you’re presented with a huge choice of interesting effects. Hovering over each of the effects provides a brief description and thumbnail representation of what it does. That way you’ll know if it meets your needs and have a pretty good idea of what to expect.
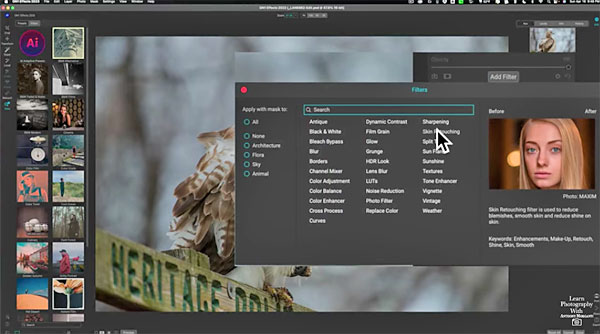
There are also a bunch of thumbnails for presets and filters on the left of the screen. After describing all the details Morganti then demonstrate how to greatly enhance the hawk photo with a few of the options. He then does the same with his seascape photograph.
Morganti’s popular YouTube channel contains many more helpful lessons like this one, so be sure to take a look.
And don’t miss the tutorial we posted recently from another post-processing expert, explaining an easy way to create your own timesaving Lightroom presets for a more efficient workflow.


