
This is Lightroom’s MOST POWERFUL Tool for Wildlife & Landscape Photos (VIDEO)
One of the biggest mistakes photographers make when processing photos is limiting their edits to global adjustments. In other words, all of their enhancements apply to the image as a whole—regardless of brightness and color differences through the scene.
There’s obviously a better approach, which is what you’ll learn in the quick tutorial below, and it will make a huge difference in yours results. Instructor Simon d’Entremont is a professional landscape and wildlife photographer who says, “I’m going to show you the amazing new features in Lightroom that allow you to make adjustments to just certain parts of an image.”
This technique all about new AI masking capabilities, including the Subject, Background or Sky, and Object selection options. In some cases all it takes is a single click, and in barely 10 minutes you’ll greatly step up your game when editing just about any photo you shoot outdoors.

Simon insists that the new AI masking feature is “Lightroom’s most powerful too by far,” enabling you to make targeted (otherwise known as “selective”) adjustments with precision and ease. He demonstrates how all this works using an image of an owl on a fencepost in the snow.
The problem with this particular shot is that the lack of direct light results in a flat-looking image with very muted colors. Simon does some cropping to turn the vertical photo into a horizontal and gets to work, demonstrating the importance of editing different portions of the scene differently.
There are three elements in this photo—the bird, the background, and the fencepost. He begins by going to Masking and choosing the Select Background option. As you can see, a perfect mask then appears. Now he can quickly accentuate the snow using the Contrast slider. A bit of judicious Texture, Clarity, and Noise Reduction really helps too. He also warms up the image using the Temperature slider.
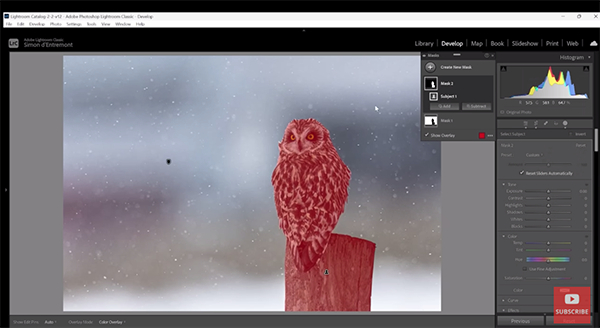
The next steps involve using the Object selection option to enhance the bird and the fencepost. His initial mask incudes both elements, but since his goal to deal with each separately he removes the post with the Subtract button. He then uses a brush to refine the selection, and now he can limit all his enhancements to the owl.
The final step in the transformation is returning to the Object selection tool to create a mask of the fencepost and, again, using a brush for some fine tuning. He makes this object really pop by using the Texture slider to bring out interesting details in the wood. He also enhances the light hitting the left side of the post and makes few other tweaks, so the fencepost has an almost 3D look.
You can learn how to make other impressive transformations like this by paying a visit to Simon’s YouTube channel, so be sure to do that when you have time.
We also recommend watching the earlier tutorial we featured with another powerful pro tip, explaining how to improve outdoor photographs by adding depth and dimension in Lightroom.


