
Use Photoshop’s TONE CURVE as the LAST Step in an Edit (VIDEO)
Photographers experienced with Photoshop know that using the best tools for a task is only part of the equation when editing their images. Another very important consideration for achieving optimum results is making adjustments in the correct order.
With all that in mind, the tutorial below explains how to harness the power of Photoshop’s Tone Curve to improve the look of an image, and why this should be the last step in an edit. So in essence, this lesson does double duty in barely 16 minutes.
Tutorials from German landscape photographer Christian Mohrle are among the most popular we post, partly because of the great images he uses to demonstrate his tips and tricks. Today he provides step-by-step instructions “to make use of Photoshop’s Tone Curve to add final post processing adjustments to landscape photos.”
Mohrle’s demonstration image for this episode is a pretty, but somewhat dark, outdoor scene with beautiful reflections in the small foreground pond. His goal for the transformation of this sunrise shot is to accentuate its soft, dreamy colors.
The first task is making several basic adjustments in Photoshop’s Raw editor. The image is underexposed because Mohrle metered for the highlights. He starts by changing the profile to Adobe Standard which immediately brightens up the darkest portions of the scene.
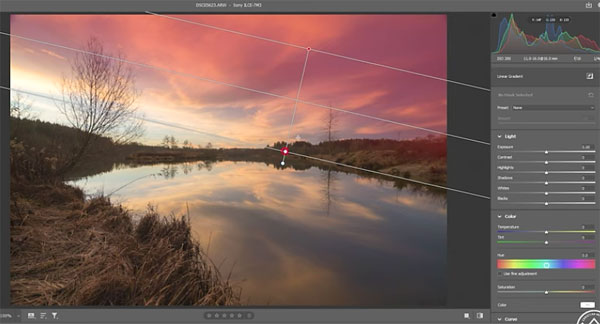
Other quick adjustments include modifying White Balance to neutralize a slight yellowish cast, bumping up exposure to open up shadows, dropping highlights, and pumping up contrast and texture. Next he places a linear gradient in the right corner of the sky, to help make it stand out with adjustments to Saturation and Clarity.

Mohrle then does some simple sharpening and color grading before turning to the final Curves adjustments. With all that out of the way it’s time for the meat of the tutorial, and Mohrle demonstrates exactly how it’s done.
There’s a wealth of powerful tips and tricks on Mohrle’s instructional YouTube channel, so pay a visit often and see what’s in store.
We also suggest you check out another tutorial we posted, explaining how to use Photoshop’s simple Selection tools for clean and precise results.


