
Using Photoshop’s Depth Blur Neural Filter for Photos with Shallow Depth of Field (VIDEO)
Shallow depth of field is a popular technique for all types of images because it accentuates a main subject and separates it from the background. This effect can be achieved in the camera with careful focusing and wide aperture settings, but today you’ll see how to get it done in Photoshop with a minimum of work.
Instructor Dave Kelly is a successful professional photographer who is generous about sharing the secrets to his success, with straightforward shooting and editing tutorials for shooters of all skill levels. He says, “I love shallow depth of field, and today I’ll show you how to use Photoshop’s Depth Blur Neural Filter to create shallow depth-of-field effects.”
Kelley uses two photos to show how to get the job done. One is an environmental portrait and the other is a tight nature shot of flowers. He begins with the former by clicking on Filters at the top of the Photoshop screen and choosing Neural Filters from the dropdown menu. He then selects the Depth Blur option in the subsequent window and clicks on the toggle switch to activate the filter.
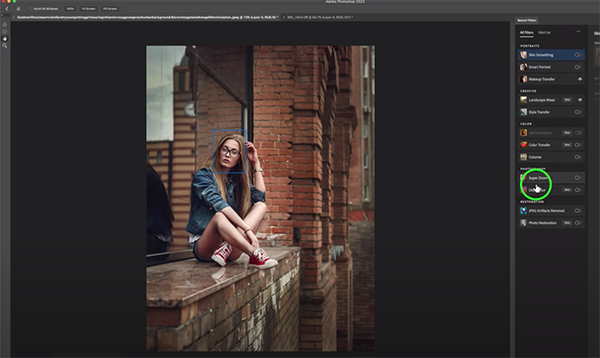
As you’ll see, Photoshop begins processing the image immediately, and the transformation is really fast. His model remains sharp while both the foreground and background are significantly softened. You can also click on a Depth Map button that converts the image to different shades of gray and depict the various levels of focus in the effect that was created.
As you’ll see, there are several sliders available for refining the effect. Smith explains which of these he finds useful and why he tends to ignore the others. He also demonstrates how he employs the sliders to get the exact look he’s after—typically concentrating on the eyes in a portrait shot.
Once he’s happy with the portrait Kelly turns to the floral shot that was photographed with an iPhone. Here too, the image will greatly benefit by carefully limiting the depth of field. By clicking on Focus Subject, the Neural filter immediately focuses on the three flowers closest to the camera, while those further away now have a nice soft appearance.
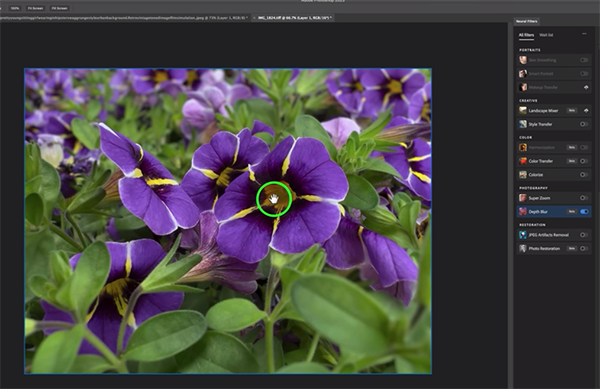
As you’ll see, the Depth Map option makes this really clear. As with his first shot, Kelly demonstrates a few quick adjustments to refine the effect. Bottom line: Photoshop’s Depth Blur Neural Filter works wonders, and it does so really fast
Kelly’s popular YouTube channel has a lot of great tip like these, so make sure to pay a visit when you have time.
And if you want to save some cash, don’t miss a recent video we posted with the best free alternative to Adobe software in 2023.


