Using Photoshop’s Hidden Undo Sliders to “Take a Half Step Back” (VIDEO)
Every so often we all take things too far when making adjustments in Photoshop, and some photographers cancel the enhancement and begin again. But what if we told you there are “hidden undo sliders” that enable you to backtrack your steps incrementally rather than starting over?
In this tutorial from the globally popular PiXimperfect YouTube channel you’ll discover five easy methods for taking a partial step back to modulate the heavy-handed adjustments you just made. Or as instructor Unmesh Dinda puts it: “take a half step back.”
Dinda has over five million subscribers to his channel, and he’s a favorite among Shutterbug readers who appreciate the thorough-yet-concise manner in which he imparts his wisdom. If you never realized you had access to a handful of undo sliders, this episode will quickly bring you up to speed.

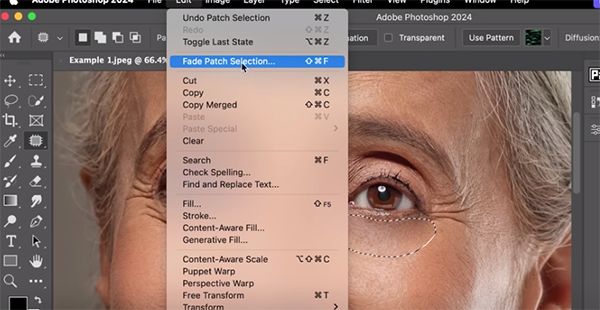
The first method Dinda reveals involves using Photoshop’s Fade command to dial things back when editing a portrait photo. And like with his other four tips, he provides keyboard shortcuts that accelerate the process. The problem with this shot occurred when Dinda used a selection to remove bags under the subject’s eyes, but his initial adjustments were excessive.
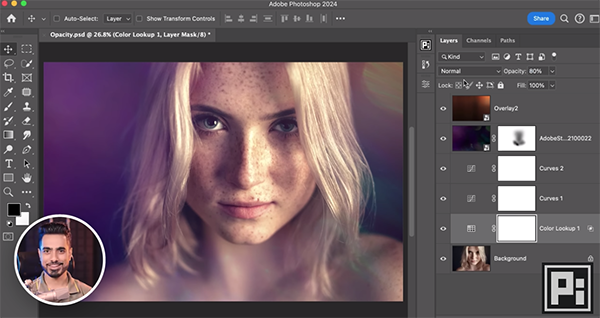
Another technique, applied to a different portrait image is simply reducing Opacity, and this method works great when you go overboard with color grading and overlays. Here Dinda hovers over the Opacity tab and drags it to left the until the effect looks really good. He also explains the settings required for this particular task.
Adjusting Smart Filter Opacity is another effective method when you want incremental control over reducing various enhancements instead of starting over from scratch. This technique sounds similar to the previous one, but as you see it’s quite different. He uses this method to quickly and efficiently perfect adjustments he made to his shot of a bulldog in the forest.

The are two remaining methods described in the video; one using Mask Density and the other employing Reconstruct in Liquify. All five techniques will save you plenty of time by backing off adjustments that smack you in the face.
Once you’re done watching pay a visit to Dinda’s instructional YouTube channel that contains a treasure trove of lessons on powerful image-editing techniques.
And on a related note, be sure to check out the tutorial we posted from another post-process expert ho demonstrates why excessive post processing can ruin images with an unrealistic result, and how to do things properly from the get-go.


