
Using the Eyedropper for Precise Curves Edits in Lightroom (VIDEO)
Most photographers understand why the Curves tool is so effective for achieving optimum tonal adjustments with just about any photos you shoot. Today we’ll let you in on a little secret that enables users of all skill levels to employ Curves to the max for quick and precise results.
This straightforward method relies upon the Eyedropper to set points on the Curves you want to change, and the points you want to leave as they are. This way you can limit the impact of the Curves to specific tones that need work.
Pro Landscape photographer Scott Davenport is also a very adept instructor with an uncommon ability to simplify image-editing tasks that often seem difficult. In this episode it only takes him five minutes to demonstrate the advantages of the oft-ignored Eyedropper tool when working with Curves.

Davenport uses Lightroom to demonstrate this effective trick, but the technique also works with ON1 Photo Raw, On1 Effects, or any other editor with both a Curves tool and an Eyedropper. He provides an overview of the powerful Curves panel, just in case it’s not part of your current workflow, so you can begin using it today.
His sample image is a seascape photo with a lot of potential, and he walks you through the simple step-by-step procedure for turning it into money shot with a little help from the Eyedropper. His goal is to emphasize rock formations in the foreground by leaving shadow areas alone while accentuating midtones.
Texture and Clarity are also part of the equation, but all the heavy lifting is quickly accomplished by selectively targeting the rocks with Curves—specifically by clicking in the Dropper to get the job done. So what does he want to change? “In this case I want to raise the Luminance and increase the brightness of certain tones.”
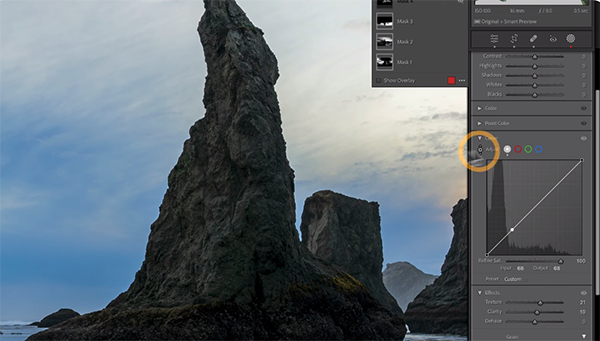
But here’s the key: He also wants to “protect” other areas of the scene without sacrificing detail throughout the frame. You’ll see how he samples various tones, and then select a specific tone (or tones) that need adjustments.
Of equal importance is understanding how to select other tones that you want to protect, i.e. those you don’t want to change—like the dark, lowest portion of the large rock formation closest to the camera. You can also use this method to protect highlights if that’s what’s required for an image at hand.
Davenport sums up the lesson like this: “It’s a very powerful technique that’s not hard to do. Use the Picker, work visually, and have fun.” After watching the video take a look at his instructional YouTube channel where you’ll find many more straightforward tips and tricks.
And don’t miss the earlier tutorial we posted from another image-editing expert who demonstrates a simple Lightroom Spit-Toning technique that can transform good landscape photos into great ones with better colors and contrast.


