
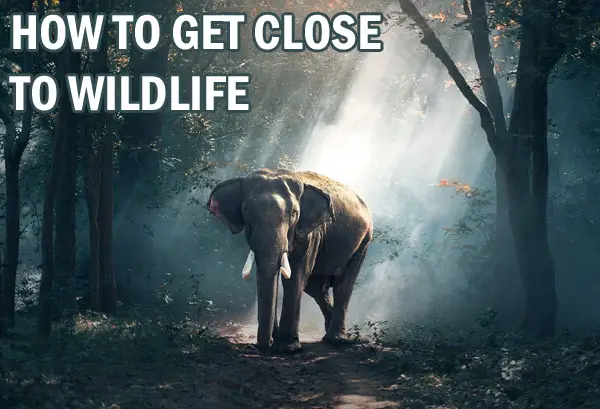
What Techniques Do Wildlife Photographers Use to Get Close to Their Subjects?
Are you looking for techniques that can help you get close to wild animals? You’ve come to the right place. Wildlife photography is one of the most exciting and beautiful forms of nature photography. It needs a lot of patience and hard work, though.
This article discusses the techniques wildlife photographers use to get close to their subjects.
To get close to wildlife, photographers study their subjects habits and locations, camouflage themselves and use blinds, use specific tele lenses and converters, high resolution cameras, tripods and monopods and remote shutter releases. They use techniques for approaching animals and at times leave their cameras. Drones are also used. Read on for specifics.
Finding Locations
Do you want to know how to find places to take pictures of wild animals near you? Lakes, parks, botanical gardens, natural habitats, and forests are some of the places where you can photograph birds and wild animals.
Do online research. There is a lot of information out there what species can be found where. Besides websites about national parks etc, there are forums where you can find out first hand from people. There are also pamphlets available at welcome centers and tourist information centers once you get to your destination.
Raccoons and squirrels can be found in urban and suburban areas. And forests are home to hundreds of wildlife species, from reptiles and amphibians to birds and mammals. Find a secluded area in the forest, and observe silently.
The animals will show up when everything is silent. However, moving about will probably frighten the animals before you even see them. Are you an early bird? You can increase your chances of seeing the wildlife by getting up early in the morning.
Freshwater habitats like ponds, lakes, and rivers are home to over 100,000 animal and plant species. Find out which kind of animals are present, and when they are most active.
Natural habitats or protected areas offer habitat to several wild animals. In fact, they are vital to prevent the loss of threatened or endangered species. Natural habitats are one of the best places for you to get up close to the wildlife.
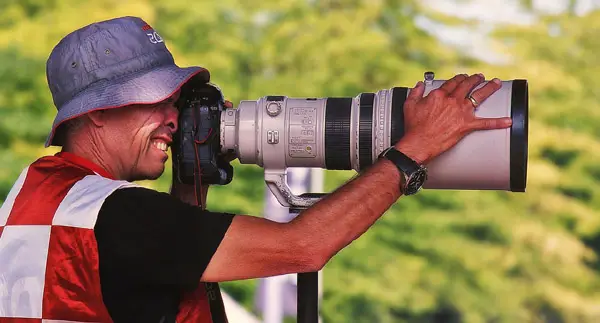
Telephoto and Zoom Lenses
Telephoto lenses have longer focal lengths and are great for bringing distant animals nearer. As a matter of fact, they make subjects appear much nearer than they actually are, some allow you to view the beautiful details of a bird which is just a dot with the naked eye. Telephoto lenses between 70 mm- 200 mm are very popular for wildlife photography but they can go much much higher.
Keep in mind as you try to head out with a long lens to capture some amazing wildlife photos that you will a) be likely more visible because of the large object b) will tire more easily if its a heavy lens c) will likely be noisier when approaching animals than with a small compact lens.
Many wildlife photographers are a fan of zoom lenses. Why? Because they allow for flexibility and give you a range of different focal lengths to use. Unlike a zoom lens, a prime lens gives you a single focal length. However, prime lenses are lightweight and tend to be more compact than zoom lenses. Additionally, they have a bigger maximum aperture, which allows faster shutter speeds and lets more light in.
A lens focal length, which is measured in millimeters, determines the view angle and the magnification. It usually ranges between 8 mm and 800 mm. If you have a long focal length, the magnification will be higher and the view angle will be narrower. And if you have a short focal length, the magnification will be lower and the view angle will be wider.
This makes it much easier to spot and follow an animal, especially a fast moving one like a bird, with a shorter focal length lens and much more difficult with a long focal length lens. But the latter one will get you closer to the animal more safely, whether its a dangerous animal like a leopard or you are shooting across a canyon and cannot walk any further to the edge.
You have to practice using very long focal length lenses before you head out, try it in a city where there are many small moving objects to focus on, or a sporting event. You can also limit yourself to a shorter focal length. Sometimes that 800mm heavy long less is overkill for the animal you are trying to capture, especially larger animals.
Tele Converters
Also known as extenders, teleconverters are gadgets that are mounted between a photographic lens and the camera body to enlarge the image made by the lens. Their purpose is to extend the reach of your lens and get nearer to birds and animals. As a matter of fact, these optical accessories increase your lens’s focal length by a factor of 2.0x, 1.7x, or 1.4x. A 2.0x extender will extend the focal length of a 300mm lens to 600mm.
Keep in mind that there is likely to be light loss with these as they add more glass so be careful what lens you use with them and the light your are shooting in.
Camouflage and Blinds
Blinds and camouflages are great tools that let wildlife photographers stay out of sight. Photography catalogs and magazines carry advertisements of several ready-made blinds. Some of these blinds are easy to assemble and light in weight. Camouflage clothing can help you get closer to animals. The best thing about camouflage clothing is that it is affordable and enables wildlife photographers to move as they want.
You can also purchase a ghillie suit, which is a kind of camouflage outfit made to blend with the background environment such as sand, leaves, or snow.
It is extensively used by hunters, snipers, and wildlife photographers because they have to get close to wildlife without disturbing them. In addition to photography stores, you can check out hunting stores like Cabelas.
It is not easy to take photos of animals from a close range. They could get scared and leave the area. However, you can blend with the environment around you and click photos from a close range by using a ghillie suit. The garment comes in four camouflage patterns: Leafy Green, Mossy, Woodland, and Desert.
Camera Resolution
Resolution is measured in megapixels (one million pixels) and pixels and it is the total amount of pixels that your digital camera can capture. It determines how big an image can become without becoming vague. And if you’re wondering what a pixel is, it is a small square portion of the digital picture.
The megapixel count and pixel information will determine the quality of your photos.
The greater the number of pixels in a picture, the higher the resolution will be. You can buy 50 megapixel cameras these days and even 100 megapixel ones, which will give you a larger digital photo. As a result, you will be able to crop more of the photo and still get enough detail on a small object in the photo, like a bird.
When buying a high-resolution camera, keep in mind that not all pixels are created the same, and some high megapixel cameras do not produce the same quality picture as others. This will affect what you can distinguish in a blown up cropped picture. Do your research before buying. Here is the popular Nikon D850 for example.
Tripods
The tripod is one of the essential tools in wildlife photography. It helps photographers stabilize their lens and camera and it is one of the best ways to decrease the blur in pictures caused by the movement of the camera.
If you are shooting with a teleconverter or in dimmer light, or with a long heavy lens, a tripod will do wonders in capturing that small faraway animal. For long heavy lenses, the lens, not the camera is actually attached to the tripod to keep the camera/lens combo balanced, and you will likely need a special gimbal tripod head such as this one.
The majority of tripods are usually made from aluminum or carbon fiber. Carbon fiber is light in weight, long-lasting, and resistant to rust. Aluminum may not be as light but its a little more durable, and much lighter than steel or iron.
Some of the factors you should consider when buying a tripod for nature photography are weight, size, construction material, load capacity, stability, height, and price point.
Keep in mind that as you will be taking pictures from different angles and in different conditions, the tripod you choose should let you shoot from high and low levels. The best tripods are easy and fast to set up, compact when folded, and light in weight. You do not want to be fussing around with your tripod as your subject animal comes into view, nor when a dangerous one approaches too close.
Even a monopod will give you some stabilization even for a heavy long lens.
Here are some of the best tripods for wildlife photography:
Other Equipment
Binoculars
Binoculars are a quite useful piece of equipment for wildlife photographers. By improving awareness, binoculars help you find subjects you want to take pictures of quickly, as they are small and can be hanging around your neck. However, without binoculars, there are chances to overlook crucial details, particularly in dense environments.
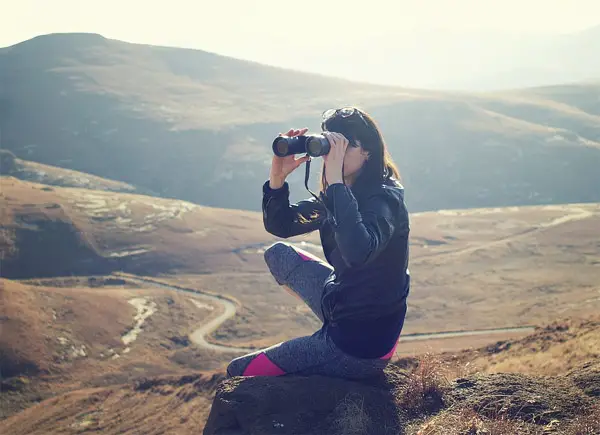
Make sure to go through the owner’s manual when you purchase a pair of binoculars. Follow the maker’s instructions prior to using them.
Here are some of the best binoculars for wildlife viewing:
Bushnell PowerView 2 Binoculars
Celestron – SkyMaster 25×70 Binocular
Nikon Monarch HG 8×42 Binocular
Zeiss Victory SF 32 Birdwatching Binoculars
Gimbal
A gimbal is a handheld device that stabilizes your digital camera using sensors and motors. It is available for smartphones, mirrorless cameras, and digital single-lens reflex cameras (DSLR). So, the gimbal you choose should support your DSLR camera.
It is another way to keep your camera steady which will prevent blurry photos due to shaking, similarly to a tripod. Here is a good one.
Headlamp
Wild animals and birds are usually more active late in the evening or early in the morning. It almost means that wildlife photographers will spend some time in low light conditions. Therefore, they should essentially carry a headlamp with them. A headlamp is an essential piece of equipment for finding your way around the landscape at night. It does a fantastic job of lighting up your surroundings when you are walking at night.
It will also keep your hands free to work with your photo equipment and check your maps. Headlamps usually come with different brightness modes including a red more which will make you less detectable while still giving enough light to see what you are doing.
If you are looking for a good headlamp, here is one.
Remote Shutter Release
A remote shutter release is an extremely useful accessory, particularly for wildlife photographers. It lets photographers trigger their camera shutter from a distance without touching the camera. This means they are able to hide away from the camera in the bushes or behind a boulder. Yes, you have to be clever to get the best wildlife photos.
A remote shutter release is affordable costing between $5 and $20.
These devices come in many varieties:
a) Specialized camera triggers: Depending on your photographic requirements, specialized camera triggers can be wireless or tethered. Motion detection, lightning trigger, and intervalometers are some of the features of these camera remotes.
b) Infra-red remote shutter releases: These remotes are cheap, reliable, and easy to use. The downside is that they need batteries and have a limited range. Before you buy an infra-red remote shutter release, ensure your camera has a built-in IR receiver.
c) Wireless radio shutter releases: These devices have a broader range than infra-red remote shutter releases. Some remotes can release the shutter from an incredible distance.
d) Smartphone-based remotes: They work with most cameras that come with Bluetooth or Wifi connectivity. What’s more, they have a large range and are reliable.
e) Mechanical cable releases. They do not work with all kinds of cameras. However, the best part is that these remotes do not need batteries and are easy to use and reliable.
f) Tethered shutter releases: They connect to your camera with a cable or wire. They work with most cameras and are easy to use and reliable. However, tethered shutter releases need batteries and have a limited range.
Drones
Drone photography is a kind of aerial photography that depends on drones (remotely handled devices) to take videos or pictures. Also known as unmanned aerial vehicles, drones can cost anywhere from $300 to $60,000.
The best drones for shooting wild animals should be portable, have zoom capabililities, be reliable, have great battery life, and have very low noise. They can be used to get angles of animals you would never be able to with a handheld camera.
Some drones allow mounting of full size DSLRs underneath them, which gives you camera and lens options. However, a drone will not carry a heavy long lens unless its a large loud one. If you cannot use such a drone where you are going because of hiking etc, look for a small one with zoom capabilities and a decent camera like a Hasselblad.
Some of the best drones for wildlife photography are:
These drones will let you photograph the animals and birds in their natural habitat.
Patience and Quietness
It’s worth knowing that having patience is necessary to capture good wildlife shots. Whether you want to photograph deer or elephants, it can be beneficial to devote some time to studying the animals common to the area. Learning where the subjects are usually found and what time of day they are most active can boost your chances of getting excellent pictures.
Remember to remain still and quiet. Fast movements and unnecessary noise can frighten wildlife easily. You should remain calm to avoid frightening animals when taking their pictures. Once you get settled in and comfortable, do not move. After some moments of stillness is when you will see animals start to come out.
Leave your camera
Sometimes the animal you are attempting to capture is just too smart or shy to be photographed if you are there. Another option is to leave a camera unattended and leave the location, then come back some hours later or next day.
This can be accomplished with motion sensor cameras. Such cameras can be set up to be triggered by various animals and movements, a great invention for animals too shy or dangerous to be photographed in person. They often perform well in the dark which is another plus. Some of these cameras are listed here.
Keep in mind that if you are in an unknown open area where others may come, leaving a $200 camera with less picture resolution is preferable to a $5000 DSLR with a motion sensor.
Dealing with predators
While taking pictures of wildlife, keep in mind that some animals such as cheetahs, tigers, lions, and wolves, are predators, and can be extremely dangerous for you. Hence, you should photograph these predators with the utmost caution.
Keep in mind these valuable tips:
- Do not try to lure the predator with food.
- Stay in a place where you can take pictures of your subject but it cannot see you.
- Stay downwind to prevent these dangerous animals from picking up your presence and smell.
- Always take pictures of a predator from a distance.
Here is a good video on camera settings for wildlife photography:
Take Stunning Wildlife Pictures
Wildlife photography requires patience, dedication, time, commitment, and photographic skills. In addition to this, it also needs equipment and accessories, such as telephoto lenses, zoom lenses, headlamps, binoculars, and more. Above all, you should be ready to devote some time studying animal behavior and tracking them in remote areas. Some animals are active throughout the day. However, dusk and dawn are the best times for spotting several mammals and birds. Last but not least, patience, perseverance, and positivity are essential for success in wildlife photography.
Click here to learn how to get steady shots without a tripod.


