This risky 70s paint trend is going to be everywhere – and we have the secret to making it look incredible
This retro colour’s modern resurgence is one you simply cannot ignore
Shallow depth of field is a popular technique for all types of images because it accentuates a main subject and separates it from the background. This effect can be achieved in the camera with careful focusing and wide aperture settings, but today you’ll see how to get it done in Photoshop with a minimum of work.
Instructor Dave Kelly is a successful professional photographer who is generous about sharing the secrets to his success, with straightforward shooting and editing tutorials for shooters of all skill levels. He says, “I love shallow depth of field, and today I’ll show you how to use Photoshop’s Depth Blur Neural Filter to create shallow depth-of-field effects.”
Kelley uses two photos to show how to get the job done. One is an environmental portrait and the other is a tight nature shot of flowers. He begins with the former by clicking on Filters at the top of the Photoshop screen and choosing Neural Filters from the dropdown menu. He then selects the Depth Blur option in the subsequent window and clicks on the toggle switch to activate the filter.
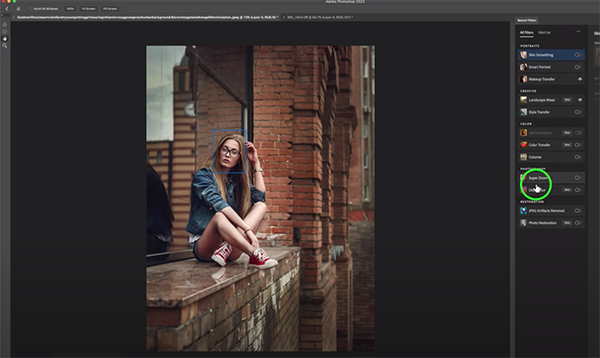
As you’ll see, Photoshop begins processing the image immediately, and the transformation is really fast. His model remains sharp while both the foreground and background are significantly softened. You can also click on a Depth Map button that converts the image to different shades of gray and depict the various levels of focus in the effect that was created.
As you’ll see, there are several sliders available for refining the effect. Smith explains which of these he finds useful and why he tends to ignore the others. He also demonstrates how he employs the sliders to get the exact look he’s after—typically concentrating on the eyes in a portrait shot.
Once he’s happy with the portrait Kelly turns to the floral shot that was photographed with an iPhone. Here too, the image will greatly benefit by carefully limiting the depth of field. By clicking on Focus Subject, the Neural filter immediately focuses on the three flowers closest to the camera, while those further away now have a nice soft appearance.
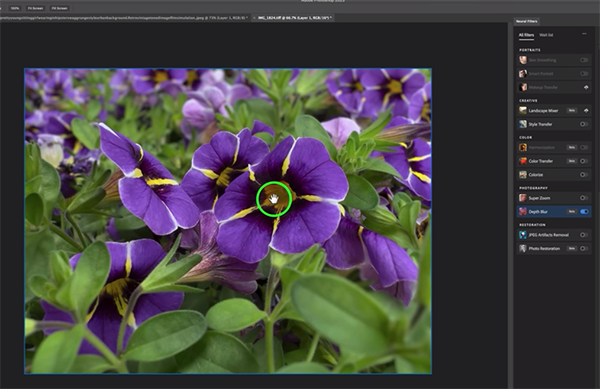
As you’ll see, the Depth Map option makes this really clear. As with his first shot, Kelly demonstrates a few quick adjustments to refine the effect. Bottom line: Photoshop’s Depth Blur Neural Filter works wonders, and it does so really fast
Kelly’s popular YouTube channel has a lot of great tip like these, so make sure to pay a visit when you have time.
And if you want to save some cash, don’t miss a recent video we posted with the best free alternative to Adobe software in 2023.
DSLRs are becoming a rarity these days, for reasons you’ll see in the video below. If you’re already using a mirrorless camera, or plan to get one in the near future, this tutorial is a must see.
Instructor Simon d’Entremont is a professional nature and wildlife photographer based in Eastern Canada who is always up to date on the latest gear. In this episode he explains why mirrorless cameras are so popular and demonstrates a few pro tips for achieving optimum results. You can see a complete list of the gear he prefers in the description beneath the video.
Simon touts the advantages of mirrorless cameras like this: “They have benefits inherent in their design that open up new technology and user interface opportunities that people really like.” He then makes a comparison bwtween these camera and DSLRs, illustrating the key differences in both form and function. This way the tips he provides later make complete sense.
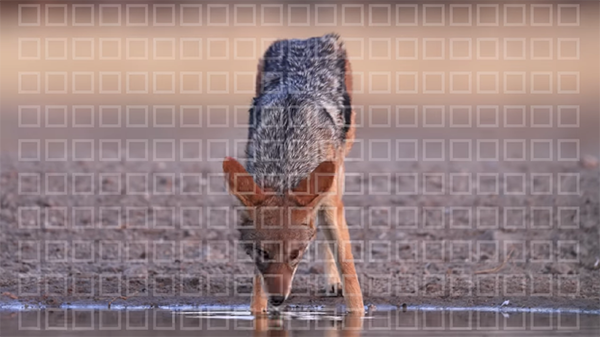
One area in which mirrorless cameras have made great strides is in autofocus capability, with some models using a hybrid of two types of autofocus; Phase Detect and Contrast-based. This combination can result in faster acquisition and greater precision under a wide variety of conditions. Simon says another advantage is how focus points cover the sensor and the field of view.
With the above information in mind, you’ll see how Simon uses the focus system in his mirrorless cameras to nail focus every time. Another feature that’s been popularized in mirrorless cameras is Eye Auto-Detect which locates and locks focus on the eyes of a subject. Simon explains why “this has been a huge win for portrait and wildlife photographers “when 99% of the time getting eyes in focus is what’s critical.”
According to Simon, another important advantage of mirrorless cameras is their ability to display a real-time exposure preview in the electronic viewfinder that, unlike with a DSLR, compensates for your camera settings. This preview allows you to adjust exposure while looking through the viewfinder until you see what you want.

Simon demonstrates several important tips for making the most of this very helpful capability. He also explains how to customize the camera’s display options so that the most important shooting information appears in the viewfinder.
As you’ll see, there are other advantages of mirrorless cameras, and Simon describes those he considers the most important. But the real meat of this lesson are the tips he provides for using these features to maximum advantage.
After watching the video pay a visit to d’Enremont’s popular YouTube channel, where you’ll find much more of interest for shooting in the field. And be sure to check out the tutorial we posted recently from another experienced pro, explaining how to get started in photographing birds with a beginners guide you’ll want to save.
If you ask a bunch of accomplished landscape photographers to name their most difficult challenges, they’ll likely express two key considerations. One is arriving at a correct exposure in scenes with a wide-range of tones from bright highlights to deep shadows. Another is achieving sharp results when there are a number of objects within the frame.
The tutorial below from one of our favorite instructors concentrates on the latter task, explaining the methods he uses to get things right and guide a viewer’s eye through the scene. He demonstrates several tips that factor into the equation, including “proximity,” depth of field, and the aperture setting you choose.
Landscape pro William Patino is based in gorgeous Fiordland, New Zealand, and his imagery display an uncanny knack for perfect composition, with optimum sharpness exactly where it needs to be. By watching this behind-the-scenes episode and looking at the sample images he provides, you’ll be able to take your landscape photography skills to the next level today.
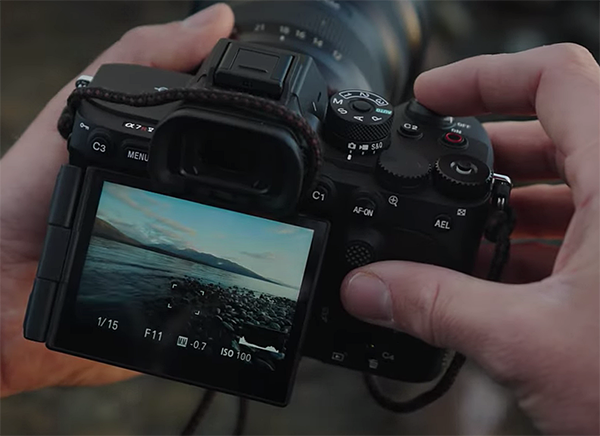
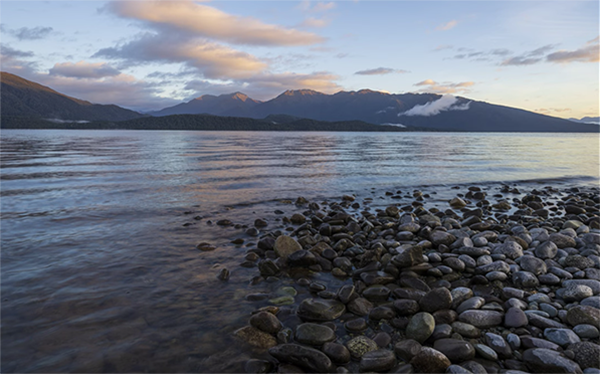
Patino begins shooting from the shore of a lake with mountains in the background. He says there are two key considerations when deciding where to focus, the first being your proximity to the foreground. He demonstrates why “if you’re ultra-close to the foreground you’re going to have to focus on a different point than if you’re further away.
The scene at hand involves a scenario in which Patino is on the shore with interesting rocks in the foreground, and a strong leading line to aid in composition. You’ll what goes into choosing the optimum focus point, but here’s a quick takeaway: For scenes like this you can often achieve sharpness from front to back, simply by focusing on a spot about one-third of the way into the frame.
For the above trick to work, however, a narrow aperture is required so that depth of field provides the necessary sharpness both in front of and behind your point of focus. Patino provides a clear explanation of how your f/stop controls depth of field and how that heavily ties into where you should focus and the range of acceptable sharpness within the image.
As you’ll see in the remainder of the lesson, other types of photos require a totally different approach to choosing a focus point, and Patino walks you through several examples—along with before/after examples illustrating how one approach delivers the goods while others miss the mark.
There’s nothing difficult about the techniques you’ll learn; it’s just a matter of reflecting upon the best method to use depending upon each scene you confront. You can find more helpful tips like these by visiting Patino’s instructional YouTube channel.
And don’t miss the Photoshop tutorial we posted recently from a post-process expert, explaining how to fix landscape photos that are drastically underexposed using a straightforward edit.
