In may be a new year, but it’s still “Tutorial Tuesday” at Park Cameras—a leading retailer in the UK that posts weekly photography lessons for their customers and the rest of us who want to improve our skills. Today’s episode is all about employing exposure bracketing in the conventional way, as well as for other tasks you may not have used it for in the past.
Gareth Evans is lead instructor at the channel, and he’s a favorite among Shutterbug readers because he always combines an exuberant teaching style with practical tips and techniques. Exposure Bracketing is an easy-to-use feature that’s available in just about any modern camera you have.
Bracketing is most commonly used to overcome high contrast situations to balance bright highlights and deep shadows that occur in the same scene. In this six-minute lesson you’ll see how this works, but the main emphasis today is a different approach in which you use this powerful feature to create images with a variety of interesting moods to achieve exactly the effect you envision.
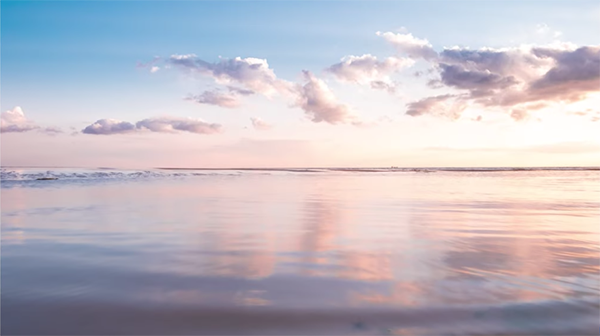
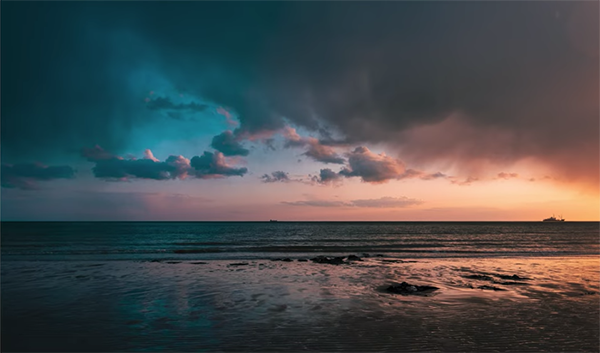
Sometimes a scene can be properly exposed without any extra adjustments at all. But as Evans explains, you may want to bracket your shots to create an intentionally underexposed photo full of drama and mystery. Likewise, intentional overexposure can imbue images with a light, airy, and minimalist feel that conveys the opposite feeling.
By bracketing three exposures in various increments you end up with a number of photos—each with a different look or “feel.” Then you can choose the one that suits your vision, without a lot of additional work during the editing process or combine them in post-processing for maximum dynamic range.
Evans says the method you’ll learn today is particularly useful for landscape and cityscape photography. All that’s required is capturing multiple photos of the same scene, each with different exposure settings. He further explains that this approach works really well in high-contrast situations; namely those containing both very bright highlights and dark shadows.
When used in the typical manner you’ll shoot three images: one that’s underexposed to avoid blown-out highlights, another with a “correct” exposure according to the camera, and a third that’s overexposed to open up the shadows. Then, if one of these shots is just what you want, you’re done. Otherwise a quick merge gets combines the best of all three.
But as you’ll see, this “typical” approach isn’t why Evans uses bracketing so frequently. His interesting technique often overlooks the so-called “correct” exposure and uses with the under- or over-exposed shot as a base image from which to proceed—depending upon the specific mood he wants to convey. It’s a really interesting technique that’s very easy to emulate.
The first thing most landscape photographers do upon reaching a location is pull out their favorite wide-angle lens. In the past we’ve suggested giving telephotos a try to create images with a different look, and in the video below you see how a mid-range zoom lens can also create a unique look.
Instructor Martin Castein is a London-based pro specializing in landscape and portrait photography who often posts tutorials on composition, lighting and other important techniques. In this 10-minute episode he explains how to create a different look by shooting with a mid-range lens like a 24-70mm or 24-105mm zoom.
You’ll learn how lenses in this focal range require a different approach to both camera settings and composition. Castein also demonstrates the benefits of using side lighting whenever possible to “bring shape into the picture.”
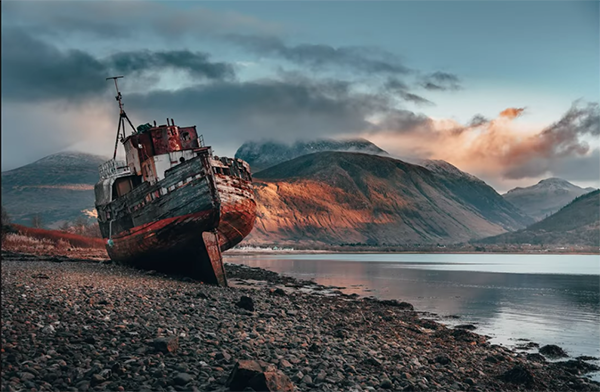
Castein captures several images of a shipwreck on the beach, beginning at 24mm before zooming further and further into the scene while retaining the barren boat as the key object in the shot. You’ll see how focal length alters the look of the scene by dramatically changing compression, the scale of distant objects like mountains in the background, and other key imaging characteristics.
The 24mm focal length results in an expansive view, with the shipwreck appearing rather small within the frame. He then zooms to 35mm and the perspective is significantly different—eliminating some featureless areas of the scene. And the both the boat and distant mountains have appreciably increased in size.
Castein continues to zoom in small increments and by the time he reaches 85mm it a totally different shot that’s far more eye-catching from foreground to background. At this point lens compression adds a very imposing look to the shipwreck. It’s counterproductive to move in any closer with this particular scene, because the top of the boat gets cropped out of the frame.
Now that Castein has illustrated his point, he moves on to a few helpful tricks for refining composition and exposure with whatever focal length you decide to use. As you’ll see, a simple tweak in one direction or the other can make a significant difference in your results.
The last half of the lesson is devoted to the spectacular results you can expect to achieve, regardless of focal length, if you shoot from a camera position in which your key subject is lit from the side. You’ll learn how this approach accentuates the shape of the shipwreck and really separates it from surrounding areas within the frame.
This occurs because one side of the boat is bathed in warm sunlight while the other is in shade. Castein’s instructional YouTube channel is full of tips and tricks for avid landscape photographers, so be sure to pay a visit.
Landscape scenes often contain such a wide range of tones that it’s often difficult (if not impossible) to get the light right in the camera—and underexposed photos are a common result. Today’s Lightroom tutorial from the PHLOG Photography YouTube channel demonstrates an effective restoration,
Bright skies are often the culprit for images that are overly dark in the midrange and foreground of the frame. But as you’ll see, there are other reasons for underexposed shots too. That when it’s time to take advantage of Christian Mohrle’s advice for balancing the tones throughout a scene.
Mohrle is a German landscape photographer with plenty of experience behind the computer, and we encourage you to use the link beneath the video to download his Raw file so you can duplicate his adjustments as they’re explained. The transformation begins with a few basic global adjustments to prepare the image for the powerful selective enhancements that follow.
The first step is changing the profile from Adobe Color to Adobe Landscape which immediately increases Saturation and slightly brightens the darkest portions of the photo. He then uses a slider to increase Exposure until more details appear in the lower portion of the shot.
Other preliminary adjustments include bringing down the highlights because the sky has become even brighter. Mohrle then increases Texture, drops Clarity, and cuts Dehaze to preserve the soft sunset look he has in mind. After increasing Vibrance the base image is significantly improved and it’s time for Masking to adjust two specific area within the frame.
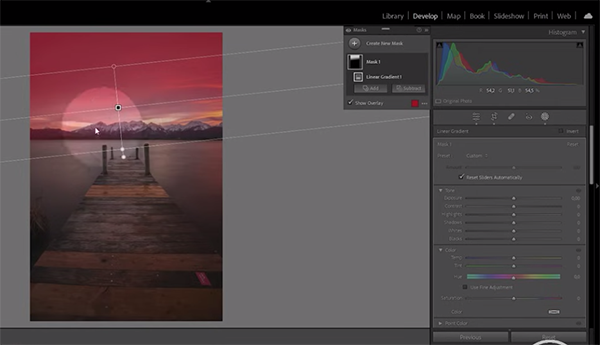
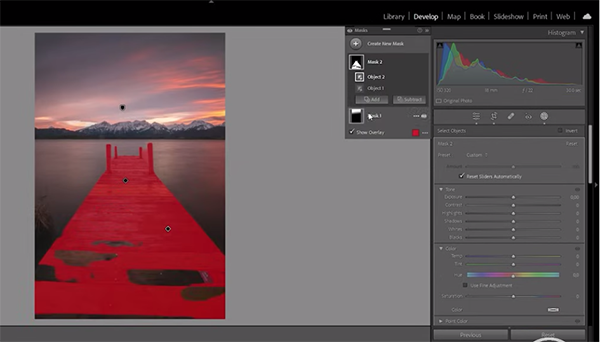
Mohrle places a Linear Gradient over the sky which he uses to make this area more dramatic, while being careful to avoid biasing the mountains in the distance. He then chooses an Objects Mask to select the jetty in the foreground and employs a brush to refine the selection. Now it’s easy to make a few simple adjustments to separate this important element from the surrounding water and create added depth.
The super-simple masking is now complete and color grading is the next step in the process. Here Mohrle uses Lightroom’s Color Mixer to work on the Hue, adding some red tones to the sky while removing an unsightly purple cast in the blues.
The color grading also includes a straightforward split-toning adjustment that tends to work really well when editing sunset photos like this one. Mohrle’s goal is a very warm effect and he walks you through the necessary enhancements.
Mohrle then moves to Lightroom’s Details tab to carefully boost sharpness. He demonstrates a quick tip so it’s easy to see exactly where the sharpening is applied. Now the image looks great except for one noticeable problem: the previous adjustments resulted in unwanted noise. This concern is quickly resolved by turning to AI Denoise.