
6 Keyboard Shortcuts for a Faster Masking Workflow (VIDEO)
We’d all rather be out shooting photos than sitting behind a computer processing our work, and one great way to finish up edits in a hurry is to use simple keyboard shortcuts to streamline the workflow. This tutorial from one of our favorite image-editing instructors, provides his favorite keyboard shortcuts when masking is the task of the day.
Anthony Morganti is an experienced photo educator and retouching specialist based in Buffalo, New York. The use of masks is perhaps the best way even out the tones in complicated outdoor scenes that include a variety of elements within areas of varying brightness and colors. It can be a time-consuming task. So anything that can hasten the process, like the six keyboard shortcuts you’ll learn today, is very welcome news.
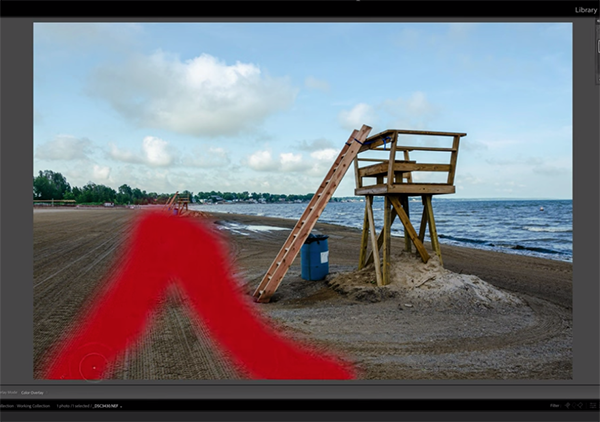
Morganti demonstrates his tricks while editing a seaside photo with a sandy beach in the left portion of the frame, and the blue waters of the ocean on the right. As you can see, one area of the sand is lighter than surrounding areas, and Morganti says this: “what I often like to do when I’m presented with something like this is to make the lighter part even lighter still.” Similarly he often adjusts an image so dark areas are a bit darker.”
Here Morganti does this with the goal of adding both tonal variance and eye appeal to the shot. This involves dodging and burning with a Brush Mask. Instead of opening the Mask panel and choosing the Brush option, here’s a quick keyboard shortcut that will save you some time: Just hit the letter “k” on the keyboard and you’re automatically there in an instant.
While mask selections typically appear in red, what if that area of the scene is red a well, making the masks boundaries difficult to discern? In this instance hold down the Shift key while tapping the letter “o” and you’ll quickly be able to cycle through a variety of other colors for defining the mask.
Morganti also wants to further darken the nearby darker tones which requires a second Brush Mask. The typical approach would involve going to the top of the screen, selecting Create New Mask, and choosing Brush from the dropdown menu. The better way is to hit the “n” key and you’ll get a second blank mask (not a duplicate of the first).

This is just a taste of the time-saving keyboard shortcuts you’ll learn, and you may even want to create a cheat sheet for future reference. There’s also much more to learn by paying a visit to Morganti’s instructional YouTube channel.
And be sure to check out another helpful tutorial we posted recently, explaining how to create attention-grabbing autumn photos with several unique Lightroom editing effects.


