
AI-Powered Editing With Zoner Photo Studio X
The new AI-driven features in Zoner Photo Studio X elevate the platform directly to the professional photographer’s workstation. Even more important, ZPS X puts powerful pro tools into the hands of amateur enthusiasts who want pro results — at prices absolutely everyone can afford. Despite the amazing power, using ZPS X is easy enough even for smartphone-shooters to reap enormous benefits.
Zoner Photo Studio X is frequently upgraded throughout the year to provide users with the latest technological developments. We all know that — it’s one of the many things photographers love about ZPS X. The latest major upgrade in September of this year unleashed the awesome strength of Artificial Intelligence to expand capabilities and deliver the all-important tools needed by skilled amateurs, professionals, fine art photographers and content creators.
Three Key New Features
The multiple new features speed up workflow, enhance output and even help snapshooters get results like never before. The three features we explore today are:
AI-powered automatic Selection of Faces
AI-powered automatic Background Removal
AI-powered automatic Enhanced Portrait Processing
Can’t Wait?
Download the full version of ZPS X for Windows 10 and 11 PCs and try it for 7 days absolutely free with no obligation and no credit card required.
How to Use Key New AI-Powered Features
The following explanations assume you have a basic knowledge of ZPS X. If you need a bit more info before we get into the weeds, scroll to the bottom of this story or visit the official Zoner Photo Studio X website.

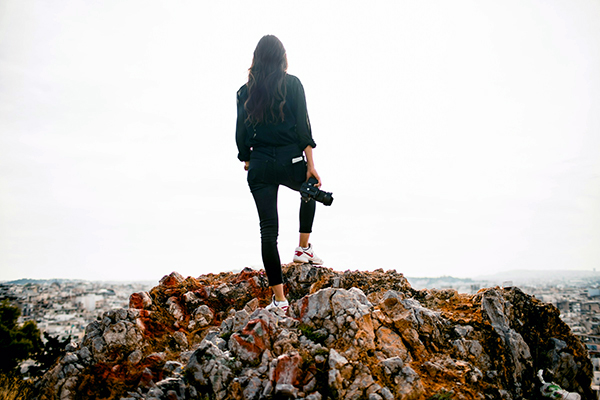
Automatic Face Selection
Zoner Photo Studio X automatically detects and zooms in on faces and displays them next to the photo. You can select multiple images and view enlarged previews to compare sharpness and facial expressions. This allows you to quickly identify which images are best candidates for further processing.
![]()
In the Manager Module, open the folder containing the images you’re ready to process. On the top Menu Bar, select the AI Close-ups icon (magnifying glass with the letters “AI”). Magically, every face in the scene is zoomed in automatically and displayed adjacent to the image. The magnification percentage is adjustable. There’s no longer a need to switch to the magnify tool or scrutinize the faces one-by-one. If you select multiple images, only the faces are displayed.
Time saver? Is it ever. Whether you’re a wedding pro doing final culling of bride/groom shots or a casual amateur reviewing the takes from a family outing, you can save screen time by sidestepping the shots that contains frowns, closed eyes and out-of-focus faces.
View Zoner’s YouTube video for a visual demonstration. You will be amazed.
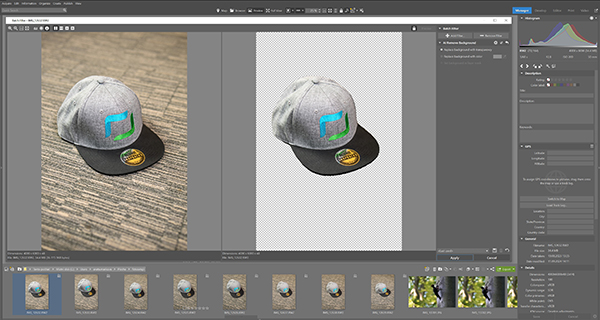
Automatic Background Removal
Probably the biggest gift AI has presented is the ability to remove backgrounds and isolate subjects free of clutter. If you’re photographing products commercially, shooting a few items to sell online, or if you’re a content creator assembling thumbnails, this ability is a priceless timesaver.
This tool is found in the ZPS X Manager Module in the Main Menu under Edit. Likewise it’s in the Editor Module in the same location. All it takes in one click, and you can remove the background cleanly. The default result produces a transparent background that can be saved as a PNG file and added as a layer to another image, but you have the option to add a color to the background before saving.
Note that the one-click approach is a destructive edit process, so perform Background Removal only on duplicate files, not originals. You can, however, perform the same action in a non-destructive way. In the Editor Module, click the Layers tab on the right-side menu and select Adjustments. Then select Set Background as Layer Mask. The result is a fully editable layer.
Watch the YouTube video by clicking here.

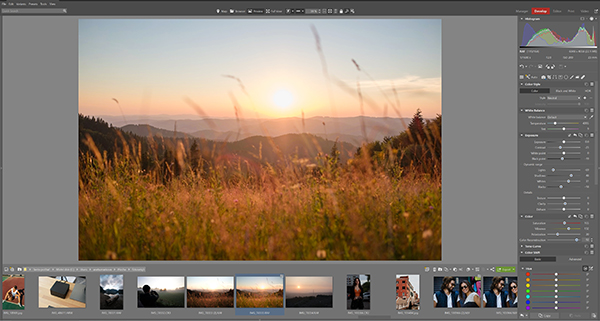
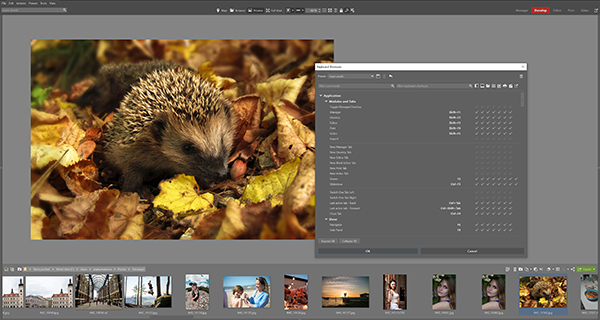
Automatic Enhanced Portrait Processing
In the Develop Module, Zoner Photo Studio X provides Presets that perform various operation with one click. In the latest version of ZPS X, three new AI Radial Filter Presets can automatically create masks that brighten subjects’ faces, enhance their eyes and accentuate their mouths. Presets intelligently detect multiple faces and let you adjust each individually.
Each AI Radial Preset is clearly marked in the Menu, and each enhancement can be invoked with a single click. The effects are intentionally subtle, but you can intensify or make further adjustments from there — or undo them completely.
Watch Zoner’s AI Presets YouTube video.
One More Really Cool New Feature
The Fall 2024 Update of Zoner Photo Studio X included a number of other exciting enhancements in addition to these three. There’s one more that you should definitely know about, especially if, like us, you have lots of old images that were taken with “less than perfect” lenses back in the day before modern lens technology.
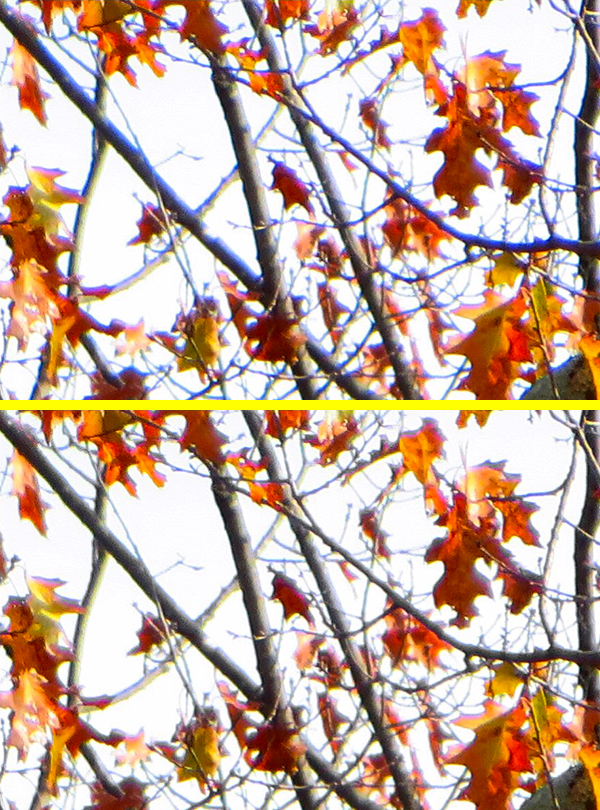
Automatic Removal of Chromatic Aberration
If you’re tired of the purple fringe that sometimes appears along the highlight edges in photos taken with old, under-corrected optics, ZPS X applies image analysis and offers a suitable correction, all without specifying a lens profile. It’s compatible with all formats including JPEG.
In the Develop Module, navigate to the Lens Profile option on the right-side menu. ZPS X will check the lens data so determine if it has a lens profile available. If not you can select Based on Image Analysis and like magic, the purple (or green) aberration is suppressed automatically or under your manual guidance. Watch the YouTube video.
What Exactly is Zoner Photo Studio X?
Zoner Photo Studio X is a powerful multi-purpose photo and video editor for Windows 10 and 11 computers. ZPS X provides everything you need to import, sort, edit, retouch, enhance, catalog and publish photo and video files (including Raw files), plus much, much more.
ZPS X features a unique architecture that’s easy and intuitive to navigate and fun to use. Without leaving the application, users can seamlessly switch between modules labeled Manager, Develop, Editor, Print and Video. There are flexible workspace layout choices, too. And you can select the Browser view and see all images in a specific folder—without leaving the Zoner Photo Studio X workspace.
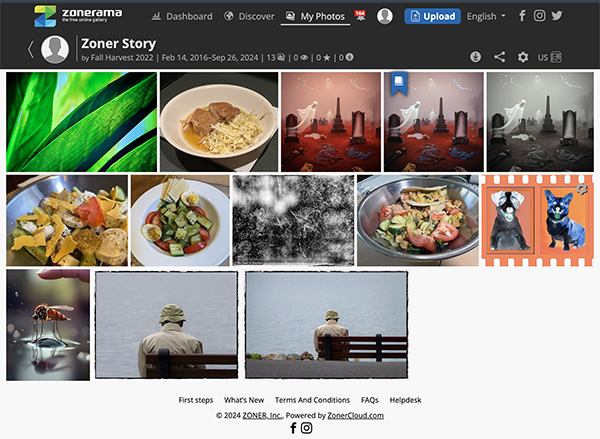
Zonerama Photo/Video Storage/Sharing Platform
Zoner also maintains Zonerama, the free-to-all online platform that provides users unlimited space to upload photos and videos where they’re securely stored and shared. Even if you are not a ZPS X user you can open an account on Zonerama. ZPS X users have free access to the Premium level of Zonerama which offers additional features.
Seasonal Tip: Zonerama is the perfect place for families to privately share holiday images and video with friends and relatives, in a secure, password-protected environment. Click here to begin setting up your own family holiday gallery.
Pricing and What’s Included
Zoner Photo Studio X is available for $59 per year, or $5.99 on a month-to-month basis. There’s also a Family Plan. The subscription includes free, automatic upgrades as new features emerge, access from any PC anywhere, English-language tech support, 15 free 4×6 prints as a gift (every year), 20GB of secure Zoner Cloud Storage, free presets created by the ZPS X community and Premium-level access to Zonerama.
Download Full-Featured Trial Version Now
An affordable alternative to Lightroom and Photoshop, Zonerama Photo Studio X has been downloaded more than 10,000,000 times. Explore the power yourself today. Download the full version of ZPS X for Windows 10 and 11 PCs and try it for 7 days absolutely free with no obligation and no credit card required.
∞ Shutterbug Staff


