When first starting out in photography everyone is bombarded with conventional wisdom about tools and techniques, along with a bunch of long-time “rules” for quickly evolving their shooting and editing skills. Some of this advice can be quite helpful (at least in the beginning) but other “essential” tips may hold you back—or even spoil your work.
Such was the case with today’s instructor Lachlan Garutti, an Austria-born travel and adventure photographer who says that several accepted rules are actually myths that almost derailed his professional career. As he says, “these misconceptions cost me time, money, and a lot of frustration.” His goal for this quick episode is to help you avoid these myths that can save you from repeating the mistakes he encountered.
The first notion Garutti debunks is that “good photographers have the best cameras,” and it’s easy to fall in that trap become most of us are gear nerds at heart. According to Garutti (and many like-minded pros), what you should strive for is a good camera and even better lenses. So keep this in mind the next time you decide to open up your wallet to invest in an expensive new piece of gear, because premium glass is really where it’s at.
And don’t accept the common refrain that “you must compose images using the Rule of Thirds.” In our view this is a very tired notion and there are more sophisticated framing techniques that accomplished photographers employ to break the mold and capture photos with a bit more impact and imagination.
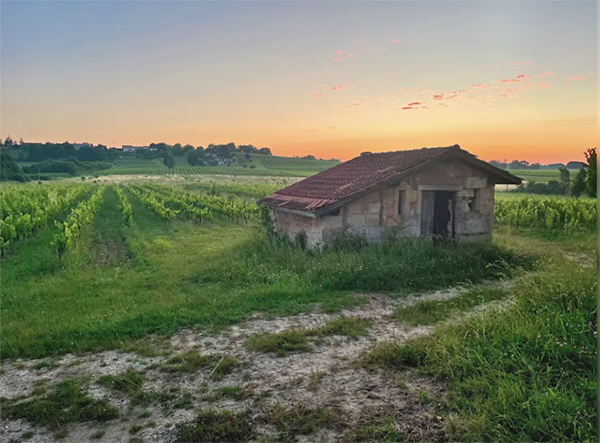
Myth number three provides another antidote to Gear Acquisition Syndrome (GAS) by refuting the claim that “you need all the accessories to take good photos.” Try telling that to an experienced landscape photographer who spends a day in the field and is already burdened with a heavy tripod and a pack full of lenses, a camera or two, and a very few essentials.
Garutti has a few more so-called rules you should ignore, including one that we’ve discussed numerous times in the past; namely, the silly claim that “you must shoot in manual mode.” The bottom line is this: Don’t believe everything you hear (or think)—at least not until you spend five minutes watching this episode
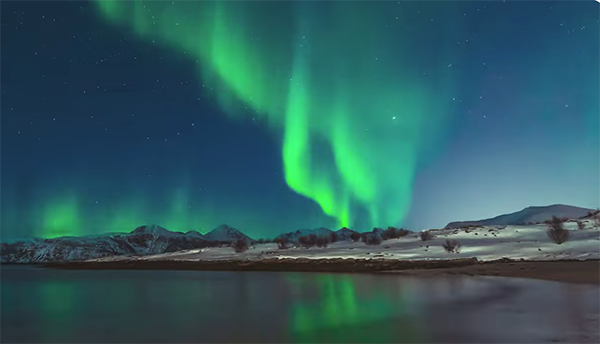
Nighttime is the right time to capture a wide variety of dramatic images, and the Milky Way in the evening sky is one of the most popular and impressive subjects. If you pass up this great opportunity because of a misconception that your gear and skills are insufficient, this video from the PHLOG Photography YouTube channel will change your mind.
Instructor Christian Mohrle is a highly acclaimed German landscape photographer whose expert shooting and editing tutorials are among the most popular we post. This lesson is a combination of the two skills, as he demonstrates both how to capture and process images of the Milky Way for maximum impact.
You may want to take a few notes because this 24-minute tutorial is a bit longer than most. We also suggest downloading the demonstration file with the link beneath the video so that you can follow along and make the editing adjustments yourself as Mohrle explains the steps.
Like with all types of landscape photography it’s essential to choose the best conditions and time to shoot, and this is where Mohrle begins. He considers “prime” time to be between midnight and 5am because “during these hours the Milky Way is at its highest above the horizon and the galactic core is nicely visible.” So plan on missing some sleep if perfect photos are your goal.
When scouting for locations it’s very important to remember that the Milky Way rises in the southeast, crosses the southern horizon, and sets in the southwest. And depending upon where you live, the time of year plays a huge role as well. Obviously, if clouds cover the sky you may as well stay in bed.
Once you have a great location and ideal conditions the next step is choosing the right gear, and Mohrle demonstrates why you don’t need high-end professional equipment to get the job done. And don’t forget to bring a study tripod, because this accessory is an absolute must.
Mohrle moves on to properly configuring the camera, covering all the important settings. Then he suggests several key shooting techniques that are unique to this genre of photography. He concludes the lesson by demonstrating an editing process he recommends for color grading, masking, sharpening, and other critical adjustments.
World Travel Awards (WTA) has unveiled plans to hold its first ever ceremony in the Philippines. Capital Manila will welcome travel and tourism figureheads for the red-carpet WTA Asia & Oceania Gala Ceremony 2024 on 3 September. The red-carpet reception will take place at City of Dreams Luxury Resort.