Spring is in the air in New York, with a series of exciting openings, launches, events and tourism developments taking place across the state. Below is what’s new, what’s happening and what’s coming up for travellers to the Empire State
Over the past year, I’ve frequently been asked the question: “Will public relations be effective for my interior design business?”
Today I’ve enlisted the help of interior design PR expert, Natalie Norcross of A Design Partnership to give you the break down of not only how PR works for interior designers but some valuable tips on how to get the best results for your design business.
Over to Natalie…
If you’re asking this question, you’re either just starting out in business, have had a bad experience with public relations, or really want to take your business to the next level!
In general, a great PR and marketing plan needs to incorporate a public relations strategy. With a good PR campaign and strategy, you will be able to build and maintain relationships with journalists, editors, publishers, and content creators, expand your brand awareness, and reach more of your ideal clients while targeting better quality clients as well.
Credit: Laurey Glenn
Whether you’re a new business or an established brand, public relations is essential to propelling you further in your industry, gaining credibility, and positioning yourself as an expert. And while the right public relations strategy and execution can skyrocket your business, it takes time and patience. Brand awareness, increased press coverage, and relationship-building doesn’t happen overnight. Businesses are too-often expecting mountains to move in the flash of an eye, thus feeling discouraged when “nothing” seems to be happening.
Remember—public relations is about so much more than being published in all of the top magazines and managing crisis communications. With every connection you make, news release you share, email you send—you get the point—you are getting in front of your target audiences and getting your business/brand on their radars. Over time, your audience and others in your industry will remember your name, understand why you deserve recognition, and will know exactly where to go when they need you.
Be patient, stay educated, and don’t get discouraged. Public relations is a process, but a rewarding one at that!
To help you understand the business of PR, where to start, and the impact it can have on your business, we’ve outlined a few key notes for you below.
Credit: Haylei Smith
Humanize Your Business
A common misconception is that PR is strictly for damage control, and this just is not the case. There comes a time where things might seem a bit repetitive and mundane—you’re promoting your brand and business and things are starting to feel stale.
Luckily, public relations can help maintain a relatable and “humanized” feel for your clients and potential business partners/customers. Just as relationships start off as a journey, so do businesses.
Showing a depiction of how the company started, where it came from, and where it’s going can help clients and customers resonate and want to know more. Through public relations, you can figure out the best ways to position your brand/business that will help you stand out amongst competitors, and who doesn’t love a good story?
Boost Your Social Media Presence
Social media is one of the newest and hottest ways to promote your business and stay relevant, especially in regard to working with social media influencers. Influencers are incredible resources for your business and your audience, and a proper public relations strategy can help build these impactful relationships for you.
It’s important to keep an eye on influencers that reach your target audience and staying informed about that industry (design, in this case) will be helpful in building connections in that community.
If you connect with influencers that are relevant to your brand and business, they will become aware of you, which could lead to increased brand awareness through their audiences. You can start building these relationships by liking and commenting on their social media posts, blogs, connecting via email, etc.
Credit: Haylei Smith
Research & Measure Analytics
In any industry, consistent research is key. Research is a broad term, but it can include staying in touch with the latest industry trends and tracking analytics, among other strategies.
Keeping yourself informed about your industry (hot trends and questionable issues, alike) can be a life and business-saver. You can count on other professionals in your industry keeping tabs on these items, too, so it’s bound to come up in conversation.
In business, there are few things as embarrassing as finding yourself in the middle of a conversation with a potential client or partner and they bring up an issue you haven’t heard of or know nothing about—especially when you know it’s a topic you really should have more knowledge about! Save yourself the embarrassment and stay on top of the industry news. We promise, it might take a little time, but knowledge is growth.
Speaking of researching and reviewing analytics, this is crucial to truly understanding how much your business is growing over a particular period of time. By reviewing analytics, you’ll have a better idea of what is working for your brand/business, as well as what’s not.
Credit: Molly Culver
As discouraging as it can be at times, figuring out what is not working is a big eye-opener and can ultimately help you propel your business forward. Brainstorming new strategies and adjusting your efforts in those poorly performing areas will only lead to more growth and success. For example, you might be focusing too much time, effort and resources working on a specific social media platform that hasn’t gained too much traction, despite your hard work.
In this case, the solution would be to allocate your time, efforts and resources into another area that you are performing well in. By focusing on your strengths and understanding what areas you need to improve in, you can learn exactly how to boost your ROI.
Now it’s time for a quick Q&A that will help you tailor your PR strategy for your interior design business…
Which publications, magazines or articles should an interior designer try to get published in?
It really depends on the goals for the designer. If an interior designer is looking for more projects and wants to reach potential clients, then local and regional press publications are going to be best. But, if they have tons of projects and would rather reach the perfect audience and get better quality clients, then a nation-wide focus is more beneficial.
Is it better to do paid magazine ads or be featured in a news story instead?
I really believe in the power of earned media, instead of paid media. Earned media is more personal. It is focused on beautiful content and about telling a story. It is more engaging. Ultimately, you get more for your dollar through earn media. Earned media actually costs less than paid media, and you’ll get better results.
How do you ensure that an interior designer will get good quality leads from Public Relations, magazines and articles?
Earned media can actually be easily tracked to see what is driving the most traffic to the interior designer’s website if it is done online. You can see how many people clicked on an article and went to the interior designer’s website. In fact, we just had one interior designer tell us that a single local article drove nine new client leads, and five of them were highly qualified, ideal clients. From my experience, Public Relations has the capacity to really enable interior design businesses to excel.
Credit: Molly Culver
Can you target local magazines and blogs that are not design related? For instance, if your ideal clients are Doctors, should you try to get published in a magazine exclusively for Doctors?
Absolutely. If an interior designer knows their specific, ideal client, all you need to do is research what types of publications your ideal clients read and target them directly. For instance, I worked with one Architect who knew that all of his clients were business travelers and flew first class, so we got him published in all of the airline magazines. And now his business is huge because of it!
At A Design Partnership we believe in surrounding ourselves with a talented team of content curators and storytellers. We craft content driven communication strategies that grow businesses and build enduring relationships between brands and humans. Marketing your brand is most effective when you work from multiple angles to attract your audience.
Our Public Relations team has an unwavering passion for building brands in the interior design, architecture, lifestyle and consumer markets. Combining our creative vision and editor relationships with the industry’s top publications allows us to drive organic growth, create content marketing strategies and secure powerful press placements with earned media.
There’s nothing more aggravating than capturing what you thought was a great shot, only to discover upon close evaluation that the image isn’t critically sharp. There are a variety of reasons that this may occur, and we’ve discussed many of these in the past, but the video below explores a couple other causes worthy of consideration.
Soft images are typically the result of poor technique, incorrect camera settings, or the failure to use a tripod when shooting in low light when long shutter speeds are the norm. But what about the possibility that your lens is out of alignment or the culprit is a bad filter?
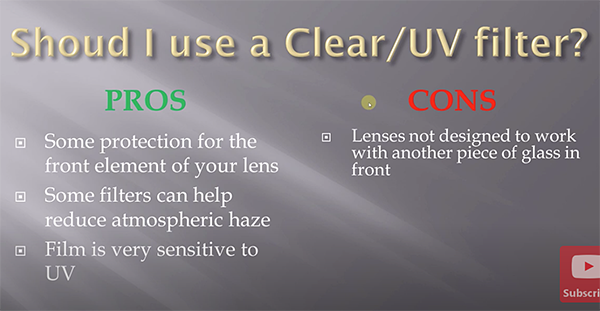
After all, many photographers always use a UV or Skylight filter to protect the front element of their lenses from moisture, scratches, dirt, and other forms of damage. But this practice can be counterproductive if you try to save money by purchasing cheap filters—especially if you if you invest big bucks on premium glass.
On rare occasions unsharp images may be the result of a malfunctioning camera, but we’ll leave that discussion for another time. Today we’ll help you diagnose whether to blame your lens or the filter on the front. Let’s hope it’s the latter because in that case the solution is both obvious and affordable.
Pablo Garcia is an experienced landscape photographer with a background in engineering that he draws upon to identify gear problems that may affect the quality of his images. He recently returned from Bosque del Apache National Wildlife Refuge in new Mexico, and despite his premium camera and lens, he was disappointed that many of his images were unsharp.
As an experienced bird photographer there was no question about the techniques and camera settings he used and he was confident that “I did everything perfectly.” Thus, he was determined to devise a testing procedure to determine exactly what went wrong. He has another big trip coming up soon, so he needed to quickly figure things out in case he had to send his camera and/or lens in for servicing ASAP.
Garcia’s methodology was both thoughtfully controlled and repeatable so he could have faith in the findings, and it’s one you can employ if you confront a similar problem. As you’ll see, he wanted to remove all sources of vibration, so he mounted his camera and lens on a sturdy tripod and disabled image stabilization.
He also relied upon a wireless remote to activate focus and trip the shutter, using ISO 200 at 1/200, and an aperture setting of f/8. Garcia employed a Spyder LensCal target and conducted tests at two different camera-to-subject distances to cover all the bases.
So take a close look, examine his results, and learn what Garcia discovered. It’s a very interesting experiment, and you can find more videos like this one by visiting his instructional YouTube channel.
We also suggest watching a tutorial we posted recently from another pro who demonstrates how to master Lightroom’s Lens Blur tools to create eye-catching nature and wildlife photographs with maximum impact.
Many photographers shoot with vintage lenses on their modern mirrorless cameras (using an affordable adapter) for a number of reasons. Old glass tends to be far less expensive than modern counterparts, and build quality is often superior to today’s plastic wonders.
Another reason for going this route is that some shooters really love the bokeh and other imaging characteristics that many vintage lenses provide. But there’s a catch, because like with all old gear, sometimes these lenses malfunction—with one common issue being stuck aperture blades.
Paris-based photographer Mathieu Stern marches to the beat of a different drummer, often posting videos on interesting photo experiments and weird lenses from yesteryear. In this four-minute episode you’ll learn an easy and effective method for unsticking those aperture blades so that you don’t always have to shoot wide open.
Stern has two vintage Minolta 58mm f/1.4 lenses that are identical except for the fact that one of these fast lenses works perfectly, while the aperture is stuck open on the other. The first step is gaining access to the diaphragm which Stern quickly accomplishes by unscrewing the rear element of his defective lens.
He then uses a pair of tweezers to locate the diaphragm pin and gently push it in to close the blades. The problem is readily apparent as an excess of oil is blocking the retracted blades. Stern then carefully uses a drop or two of lighter fluid to dissolve the unwanted oil. His first test indicates that the blades are still stuck, so he repeats the process with a bit more lighter fluid
It’s important to blow in a bit of air until the fluid evaporates completely. Voila! The blades now move smoothly as they should. All that’s left is to replace the rear element you removed earlier, mount the lens on your camera, and get to work.
Stern admits that this is a very simple solution that may not always work—but it’s definitely worth a try. If this approach isn’t effective you’ll either need to send the lens in for repair or undertake the more complicated procedure of completely disassembling and cleaning the entire diaphragm—a task we don’t recommend unless you really know what you’re doing.
Stern has over 300,000 subscribers to his quirky YouTube channel, and we encourage you to take a look—especially if you’re intrigued by vintage camera gear and unusual photography techniques.