Bright blue featureless may be great for a trip to the beach, going on vacation, taking a bike ride, or hiking in the great outdoors. But when it comes to nature and landscape photography, well, not so much.
Of course it’s always possible to swap skies during the editing process, but many serious shooters hesitate to do that. If that sounds like you, the following tutorial from a notable British landscape photographer is just what you need to get the job done in the camera.
Instructor Henry Turner describes himself like this: “I’m just a normal guy with a child-like desire to explore our beautiful planet with my camera.” Sounds like many of us, right? In this behind-the-scenes tutorial he demonstrates five effective methods for capturing great images when the dramatic, billowing clouds we desire are nowhere in sight.
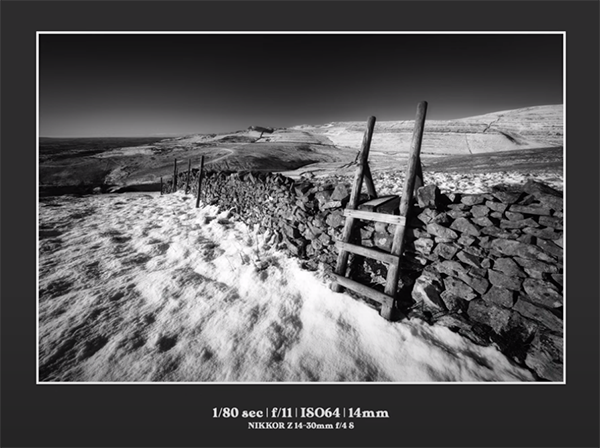
Tip #1 involves setting the camera to capture images in b&w. He explains that “what we’re trying to do is just embrace the contrast—especially when we’re out in the middle of the day.” This a departure from the typical approach when we want to avoid high contrast scenes, in favor of quiet side light or dramatic back light.
When confronted by plain blue skies, however, Turner urges you to not consider high contrast as the enemy. In other words, “don’t let shooting in monochrome be an afterthought.” By doing this, that “uninteresting” blue sky can be rendered jet black. And that makes for some very dramatic imagery. By adding a polarizing filter you really can’t miss when thinking and shooting in b&w.
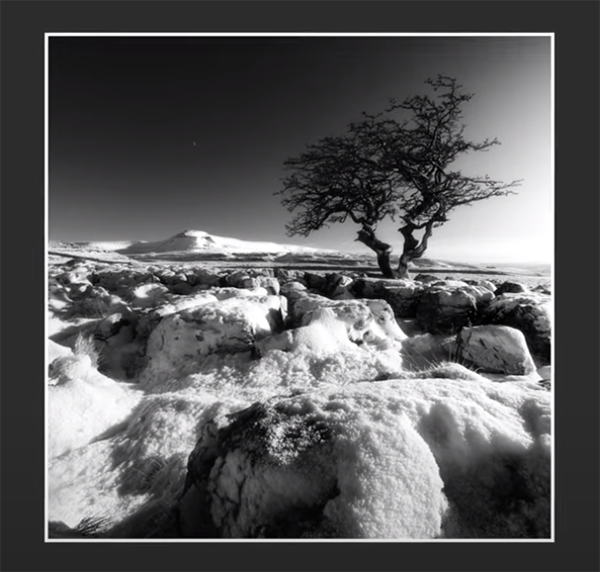
Another approach for deemphasizing featureless skies, particularly when photographing seascapes or other scenes with water, is shooting with long exposures. This isn’t about creating motion in the sky because they aren’t any clouds. Rather, by using slow shutter speeds to smooth out flowing water, and composing accordingly, the viewer tends to ignore a boring sky. This technique can impart a feeling of simplicity or minimalism to an image as well.
In fact, Turner suggests combining the two techniques above to achieve “some really wonderful images.” At this point you’re barely a quarter of the way into this lesson and Turner’s remaining three techniques are just as powerful and easy to achieve. By the time you’re finished watching you’ll smile broadly the next time you confront a blue sky.
There’s much more to learn about landscape photography techniques on Turner’s popular YouTube channel, so be sure to pay a visit and explore everything else he has to offer.
This quick tutorial from the How to Use YouTube channel demonstrates the power of two “crucial” Photoshop tools when editing your portrait photos. The goal is to enhance photos in an alluring, realistic way that that is very flattering to a subject.
This simple technique involves the use of Photoshop’s straightforward White Balance and High Pass Sharpen tools and only take four minutes to explain. Best yet, this method will work wonders for improving just about any portrait photos you shoot, whether they’re head shots, full body images, or group photos of family or friends.
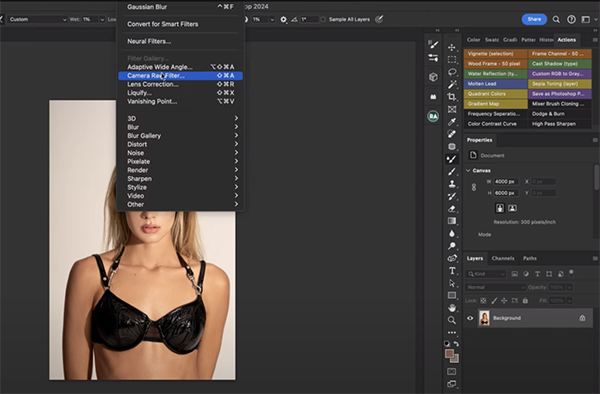
The first step in the process is modifying White Balance by selecting the Filter tab and choosing the Camera Raw filter option from the dropdown menu that appears. The unnamed instructor then uses the Eyedropper to sample the white background to get an initial improvement for what follows.
At this point the color “isn’t quite there,” so a few simple tweaks are required. All it takes is dropping the Temperature slider and modify Tint. These quick adjustments are accomplished by simply moving a couple sliders, and you’ll see how to reset the changes in case you want to start over.
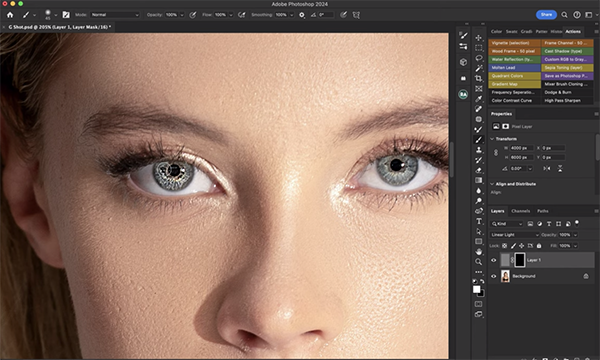
Now that White Balance is properly adjusted the instructor moves on to sharpening. Precise focus on a subject’s eyes is always critical and that’s where the instructor begins. He clicks on High Pass Sharpen, selects a Brush, and reveals the specific settings to use. You’ll also see why it’s important to hit “X” on the keyboard “to make sure we’re working with the background layer.”
It’s easy to refine this adjustment if the eye appears sharper than you want, simply by moving Photoshop’s Opacity slider to the left. In this instance dropping Opacity to 50% provides a sharp but very natural look. You’ll also want to click on Opacity at the top of the screen and change that to 50% as well
Now when you pull back and observe the eyes, you’ll see how much better they look. As the instructor says, “when you sharpen the eyes you’ll get more POP in the photo—it’s that simple.”
Take a look at the original image and compare it to how the portrait looks after sharpening and white-balancing, and you be impressed by the effectiveness of this quick-and-easy technique. After watching the video head over to the How to Use YouTube channel where there are many more tips and tricks.
It’s been apparent for a while that Nikon and Canon have all but killed off the DSLR. Recent reports of Nikon shutting down their F-Mount assembly lines may have been greatly exaggerated, but with each passing year, the odds that we see a new Nikon or Canon DSLR (or even a DSLR lens) are dwindling to zero. Apparently Pentax is still hanging around, and good for them, but the Big Two manufacturers of the DSLR already packed up their suitcases years ago.