Around 100km north-east of Toulouse, Albi stands on the banks of the river Tarn, its UNESCO-listed cathedral visible for miles around. The red brick buildings have a warm glow, even on dull days, but the green of the river banks and surrounding countryside is never far away. With a population of around 75,000, Albi is a compact city easily explored on foot, the perfect spot for a long weekend or as part of a touring holiday.
Visit the world’s largest brick-built cathedral
An iconic landmark, Sainte-Cécile Cathedral looks more like a fortress than a place of worship with its formidable walls and huge tower in the town’s signature red brick. Built in the 13th century, it was a powerful statement from the Roman Catholic Church to anyone still tempted to support the ‘heretic’ Cathar movement, which had gathered support here across south-west France. As I shielded my eyes to gaze up at the soaring brickwork, I half expected to see archers poised on the roof to repel infidels.
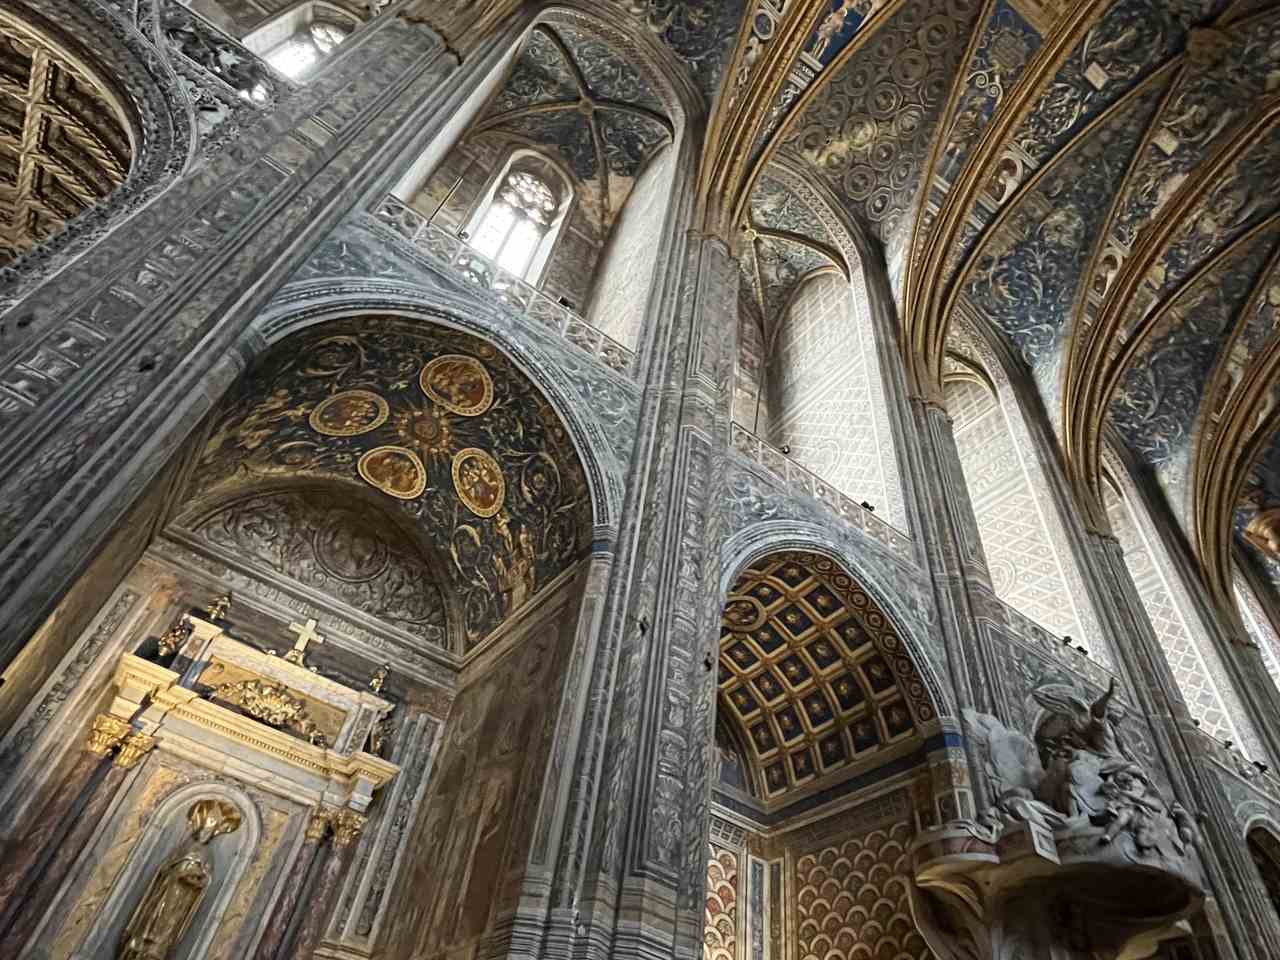
Interior Sainte-Cecile
And the wow-factor ramps up still further as you step through those thick walls into Europe’s largest church with a fully-painted interior. Small sections of the original frescoes have been uncovered, but the full-colour scenes we see today were executed in the 16th century by Renaissance artists from Italy. Expect vibrant blues and golds bursting out of intricate patterns and biblical scenes on every arch, pillar, and ceiling.
Discover the life and work of Henri de Toulouse-Lautrec
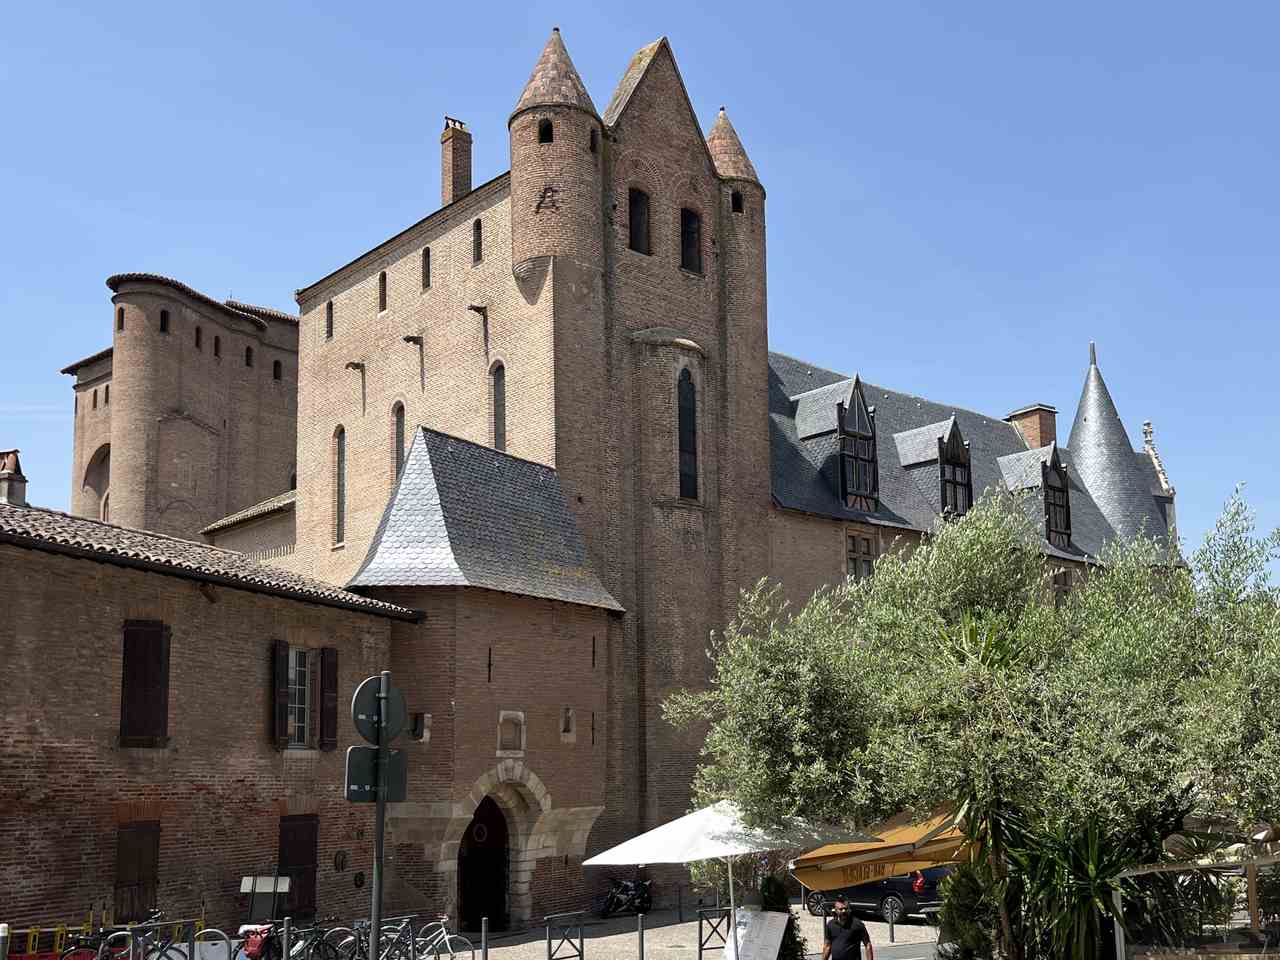
Palais de la Berbie
Adjacent to Sainte-Cécile stands the equally imposing Palais de la Berbie – the word Berbie coming from ‘bisbia’, the Occitan word for Bishop. The whole ecclesiastical complex, La Cité Episcopale, was awarded World Heritage Site status by UNESCO in 2010 and together they form one of the largest brick constructions in the world.
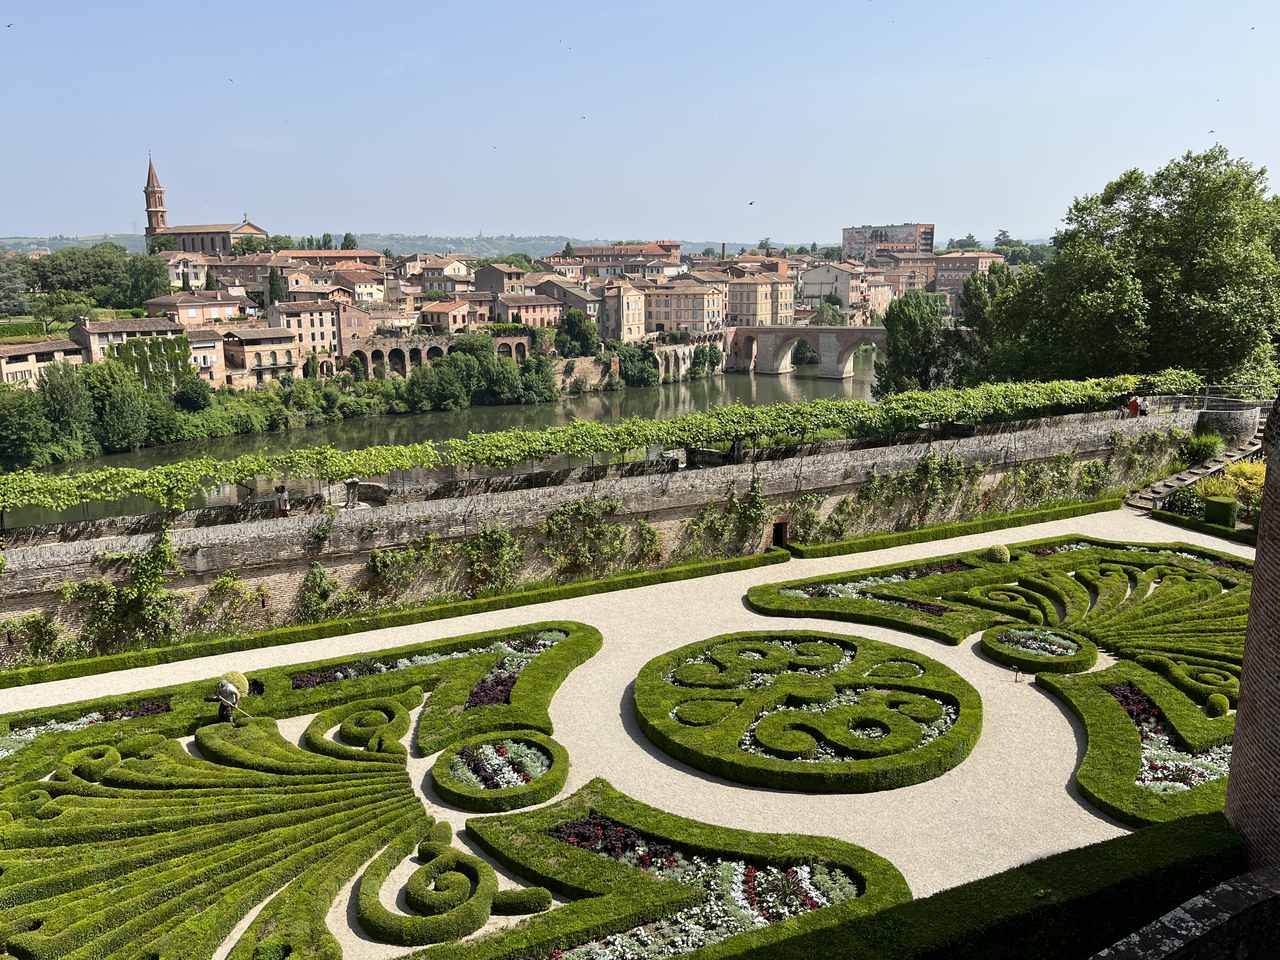
Jardins du Palais des Eveques
The Berbie palace packs quite a punch with its huge rooms, decorated interior, and terraced riverside garden but most visitors come here to tour the unique collection of work by artist Henri de Toulouse-Lautrec who was born in Albi in 1864. I already knew his famous cabaret posters and paintings of Parisian good-time-girls but was fascinated to see his earlier work, especially the equestrian studies carried out whilst young Henri experimented with different styles.
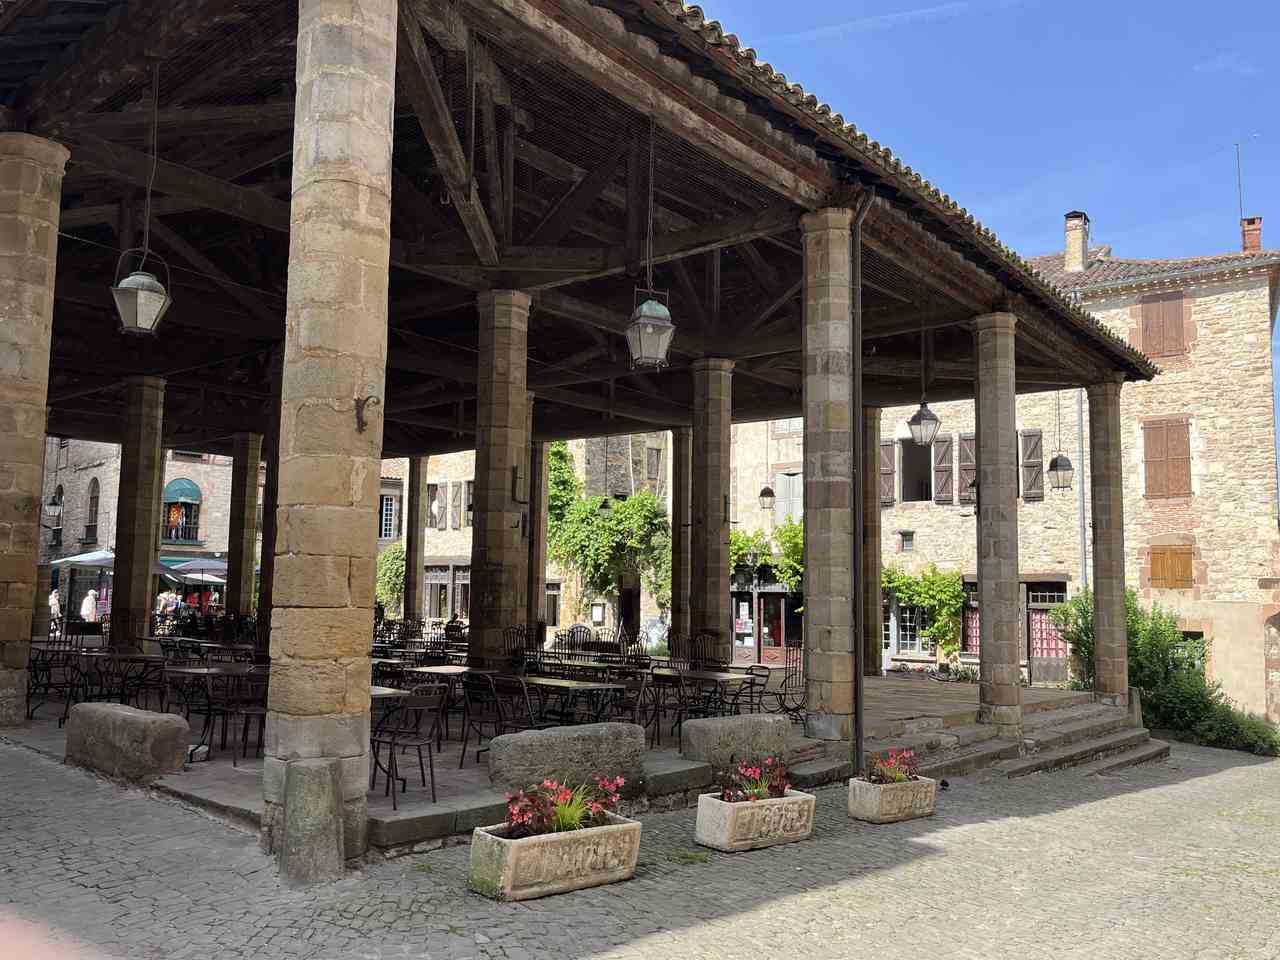
Explore Albi’s historic districts
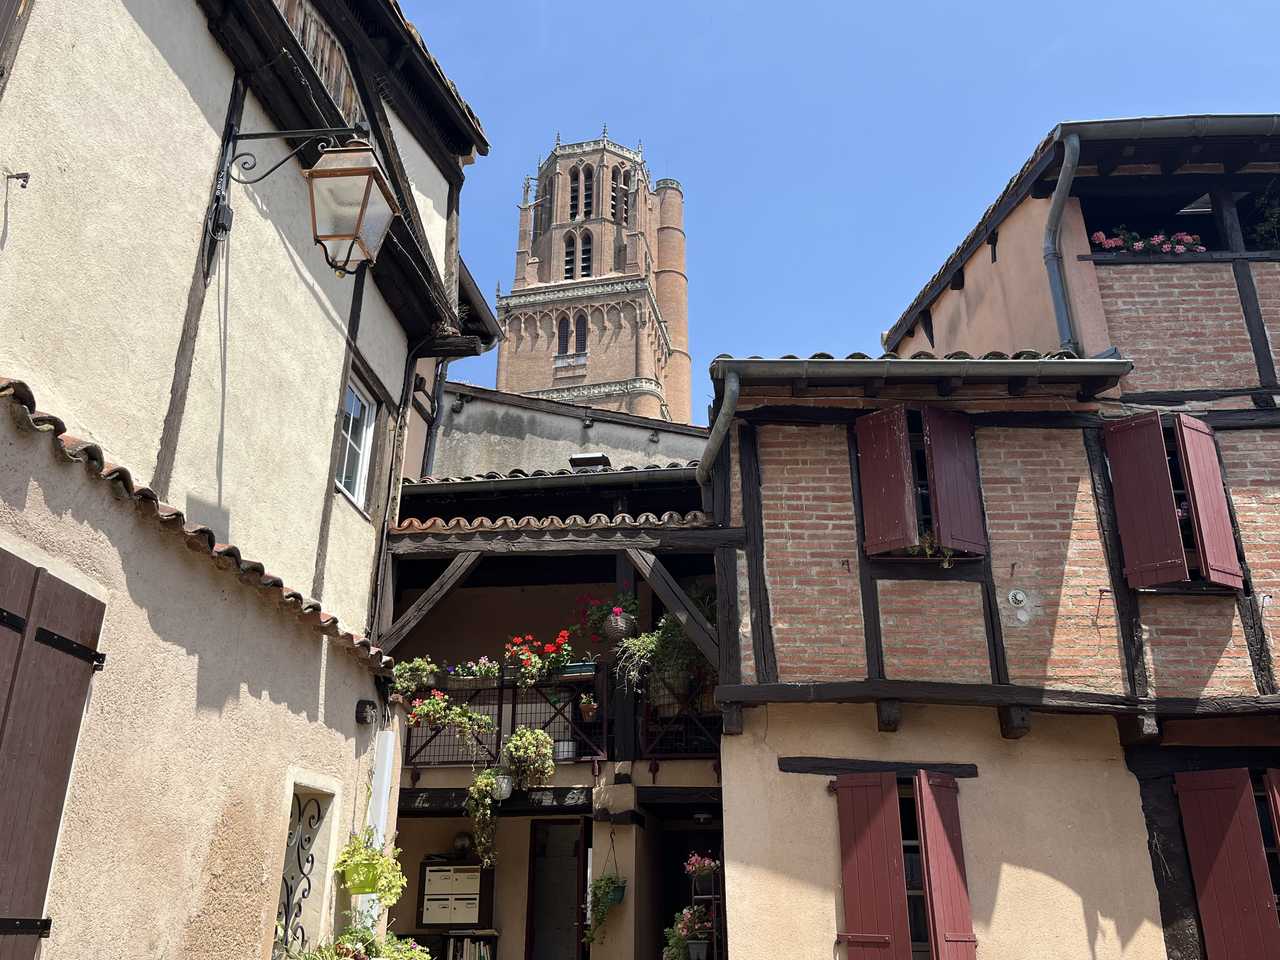
Castelviel
Also included in the UNESCO-listed area are the four historic quarters around the cathedral. Just behind the belltower is Castelviel, a maze of narrow streets with medieval, half-timbered houses that still retain their old village atmosphere. Wander the streets of Castelnau, Saint-Salvi and Les Combes where a buzzing covered market stands amongst historic buildings, 21st century retailers, and a lively restaurant scene.
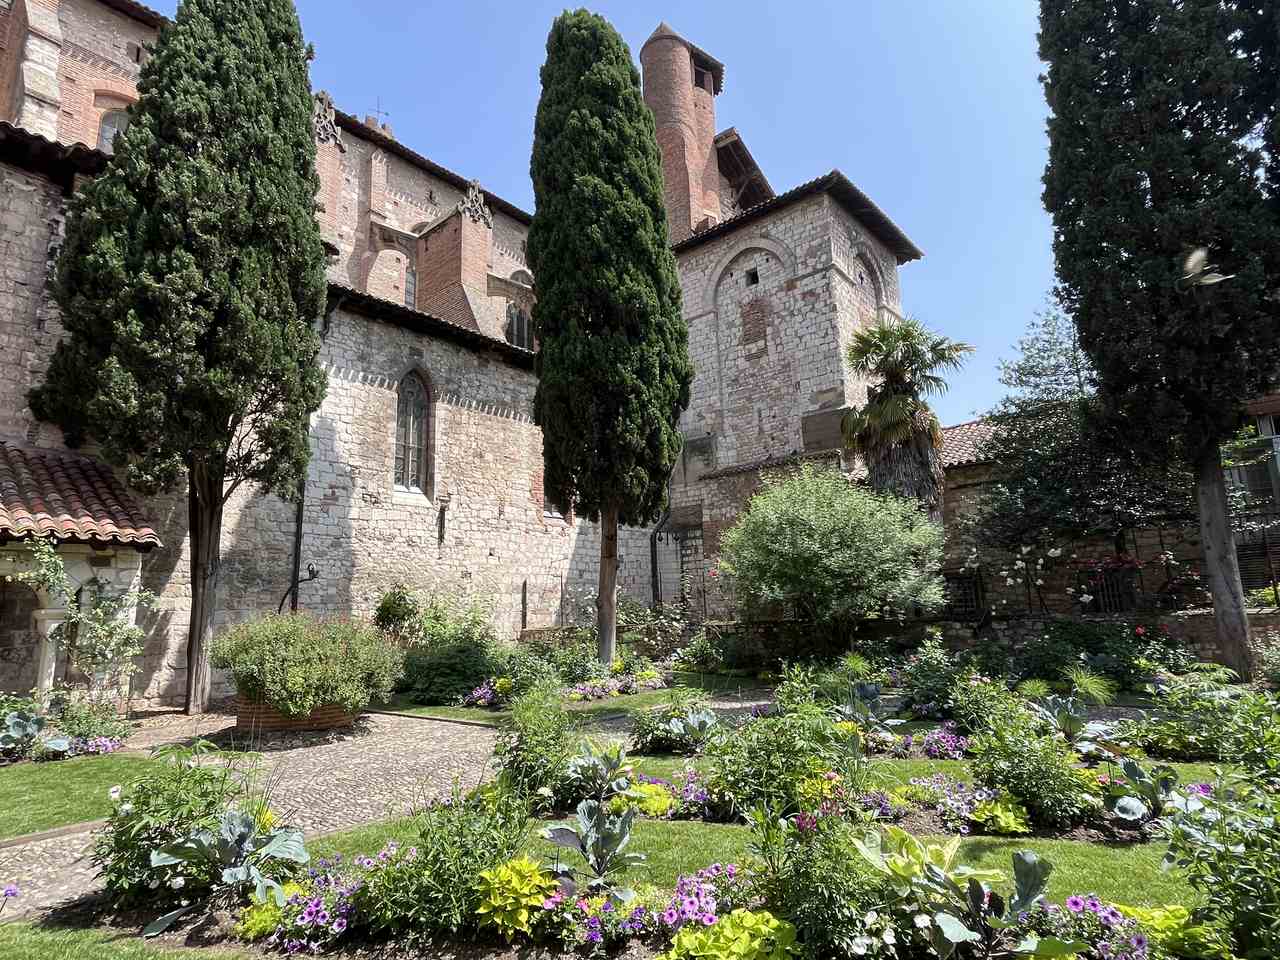
Saint Salvi Cloister
The church of Saint-Salvi owes its name to the town’s first bishop and is the oldest religious building in Albi, dating from the 11th century. Don’t miss the bijou cloister, ruined now but a tranquil spot for a breather with its beds of summer flowers.
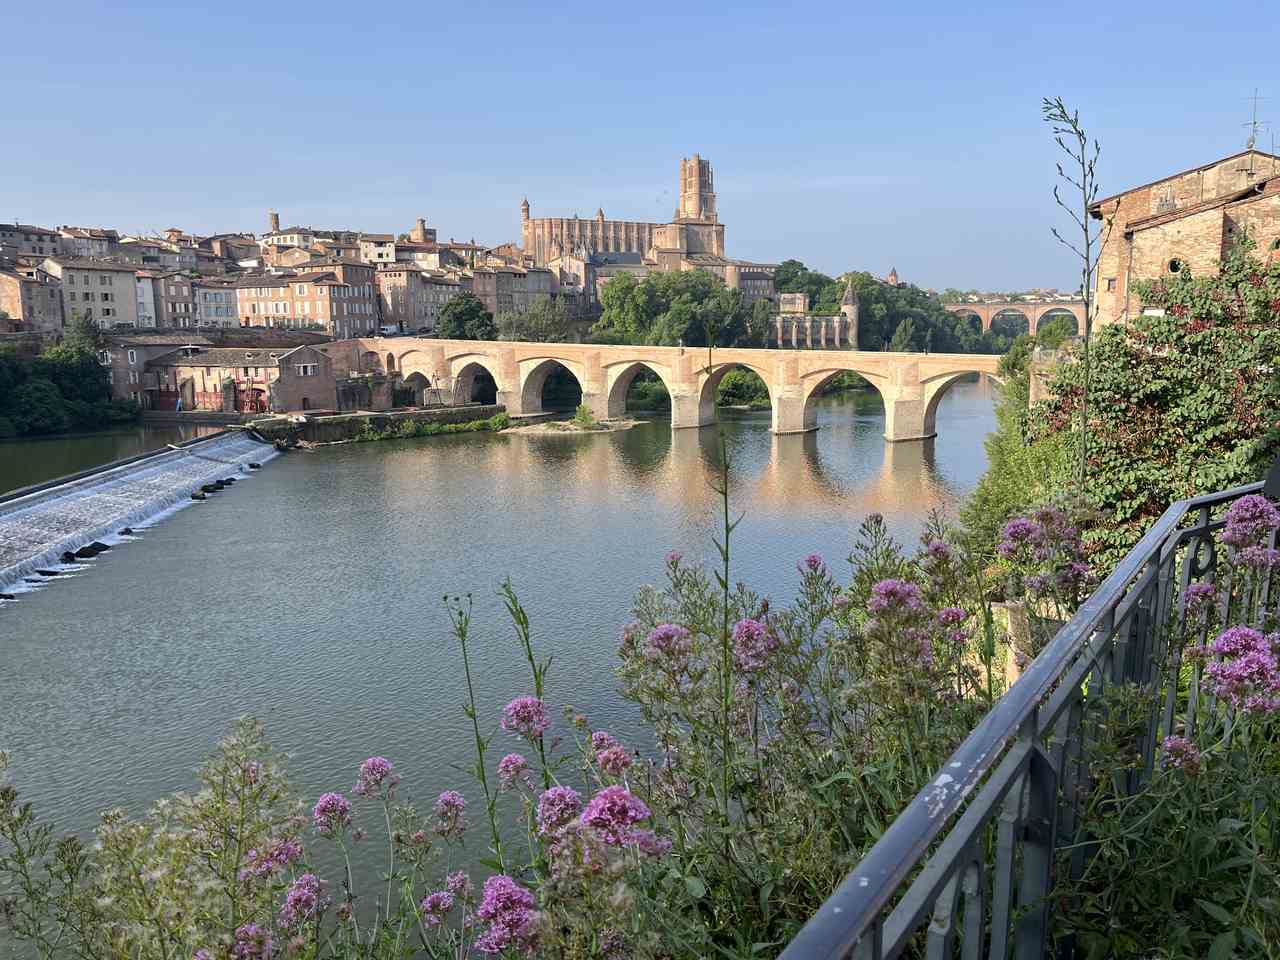
River Tarn
Morning light from Hotel Mercure
The River Tarn slices through the centre of Albi beneath the walls of the Cité Episcopale, and one of the very best views is from the Mercure Hotel Albi Bastides, housed in a former flour mill across the water from the Cathedral. From my riverside room above the weir, I was able to watch the light change throughout the day on the red brick bridges and buildings, and my al fresco table at the hotel’s Vermicellerie restaurant was a magical place to wind down over dinner.
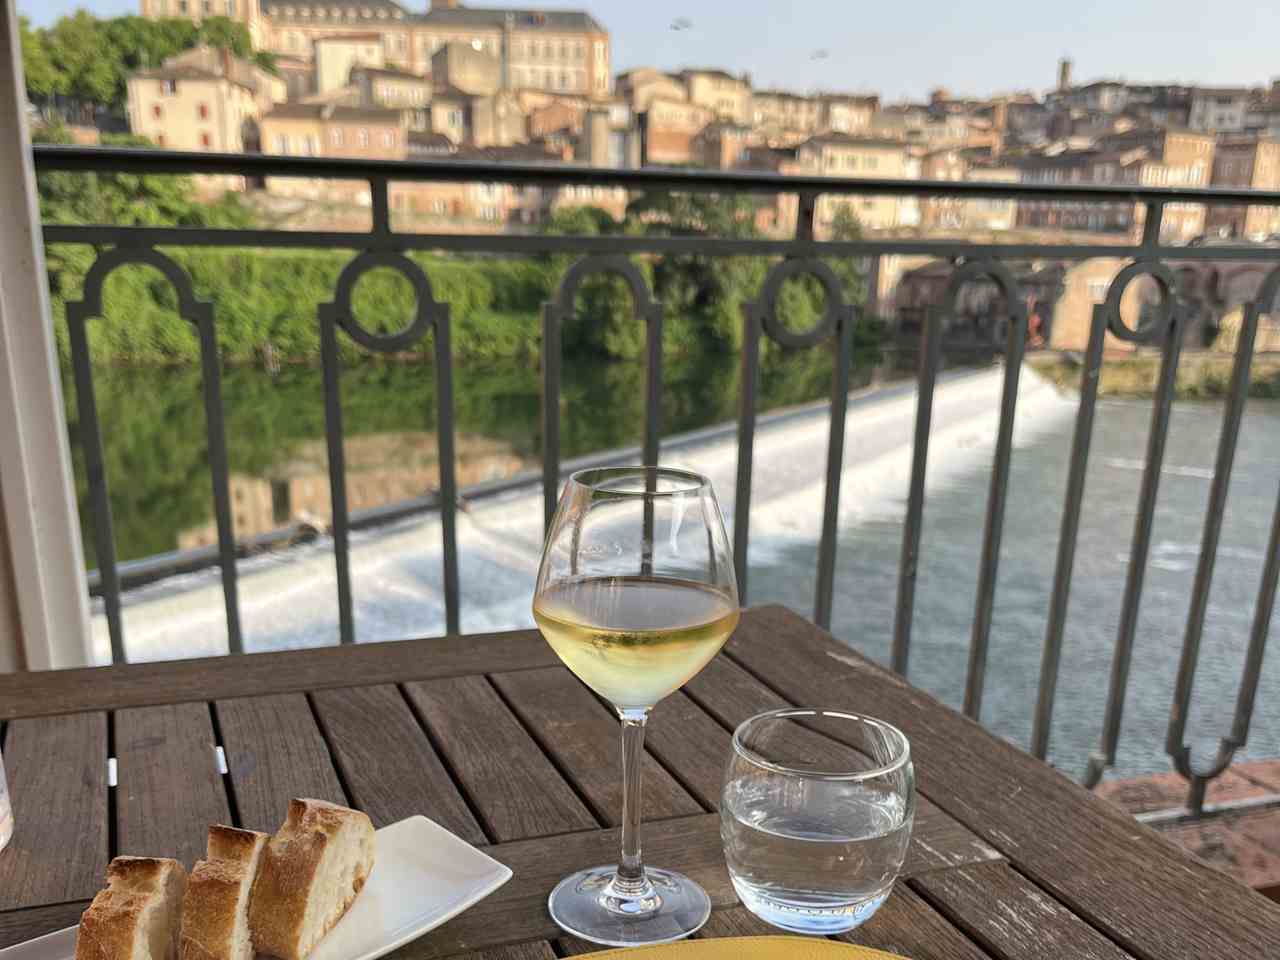
Restaurant view over River Tarn
Pick up the free annotated map from the Tourist Office on Place Sainte-Cécile to follow three colour-coded walking routes. The blue one takes you across one red brick road-bridge and back over another for those panoramic cathedral views.
I was lucky enough to hit town just after the opening of a brand new pedestrian bridge just beneath the 19th century railway bridge that offers yet another perspective on both banks of the river.
And if, like me, you can’t resist getting out on the water, take a short cruise with Albi-Croisières to experience the green side of this delightful city, with a full-on city view as you turn back towards the weir.
Take a day trip to a medieval village
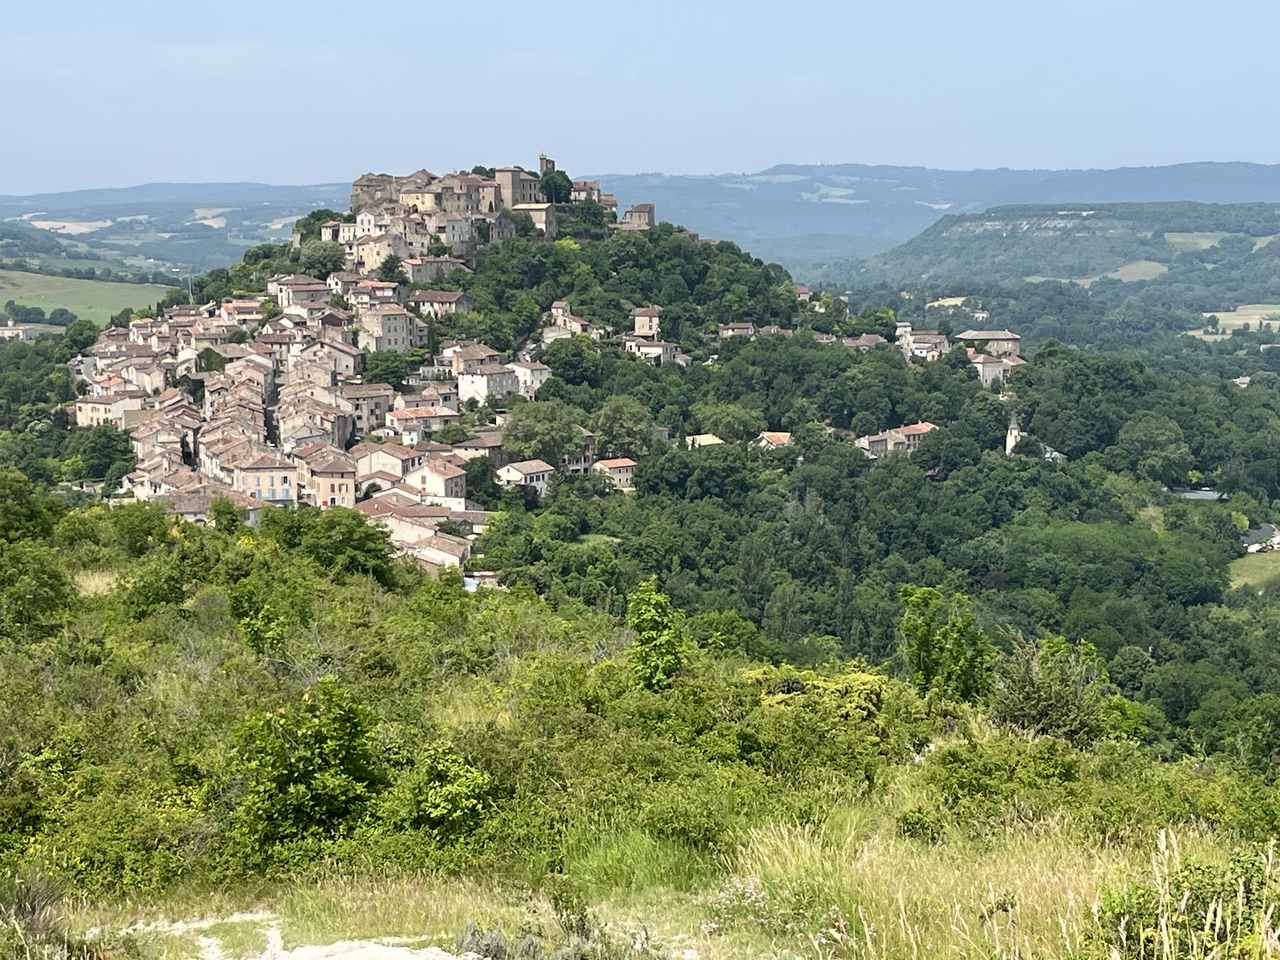
Cordes-sur-Ciel
Just half an hour from Albi by car is Cordes-sur-Ciel, one of the most atmospheric members of Les Plus Beaux Villages de France, an association numbering 180 of France’s Most Beautiful Villages. Applicants must meet stringent criteria with regard to historical interest and protection of their built and natural environment, and are reassessed every few years to ensure they still qualify.
Market place, Cordes-sur-Ciel
Wind steadily up a spiral of cobbled streets to arrive at the covered market place, once buzzing with the activity of tanners and weavers, and spot the symbolism of carved figures on the facades of grand Gothic mansions.
Catch Cordes on a day when mist lingers in the valley below and it really does look like it is hovering sur ciel, above the sky. No independent transport? Then book a private tour to Cordes in an iconic Citroën 2CV with English-speaking guide and long-time Citroën fan Marc Fanals of Le Tacot Cathare. Marc also does tours through the backstreets and secret spots of Albi in his dinky red-and-white vehicle that conveniently fits where modern cars can only dream of going. Classic!
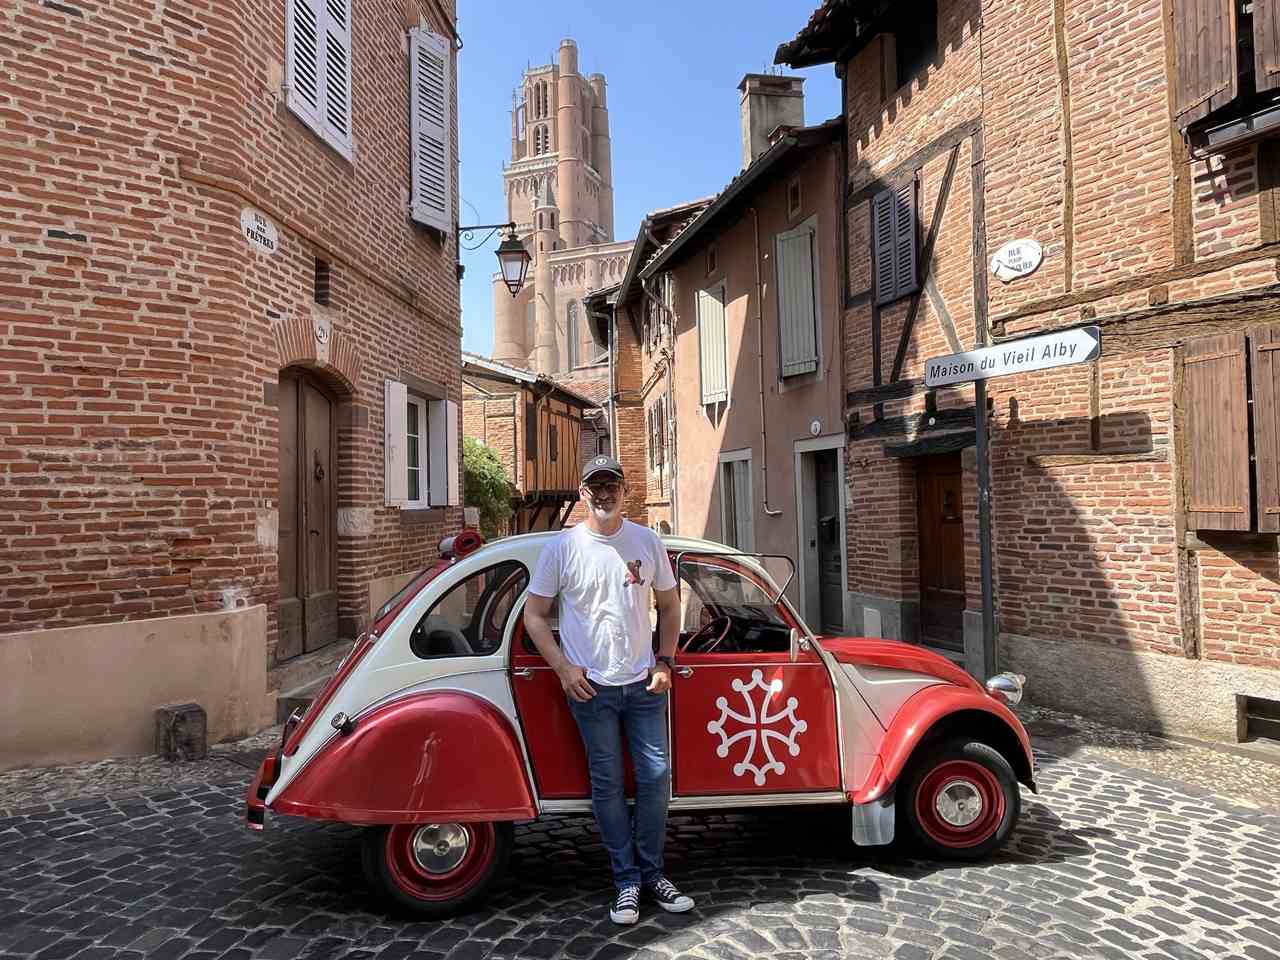
Citroen
Getting there: Fly to Toulouse and take the train from Toulouse-Matabiau station on the Cathedrals Line to Albi-Ville station, a 15-minute walk from the cathedral. Explore the Occitanie region on 19 railway lines at https://www.visit-occitanie.com/en/
Albi tourism: For information on Albi and the surrounding area, visit www.albi-tourisme.fr/en/ Gillian stayed at the Mercure Albi Bastides Hotel, www.all.accor.com. For tours by 2CV, see www.letacotcathare.fr/en/.
You may also like: Guide to the French Ardennes
The post Top Things to do around Albi, Occitanie, France appeared first on The Travel Magazine.


