This weed removal hack is going viral on TikTok – but garden experts warn it will do more harm than good
Salt and vinegar may work for your chippy order, but it should go nowhere near your patio paving slabs
Exposure bracketing is a powerful technique that enables you to achieve a perfect exposure when shooting in difficult light, like complicated outdoor scenes with a wide range of tones from bright highlights to deep shadows. Today’s comprehensive beginners guide comes to us from The School of Photography (TSoP)—an amazing source of online courses and a leading provider of education to schools and colleges in the UK.
This very helpful Guide reminds us of the old days in journalism school when we learned about the “The Four W’s & the H”—namely, what, when, why and how—because that’s exactly the approach taken today by Mac Newton who just happens to be the head honcho at TSoP. In other words, he explains the concept, when, where and why it’s appropriate, and how the simple settings and adjuments are made.
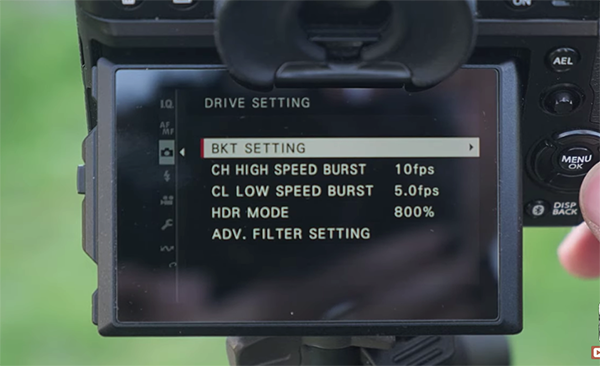
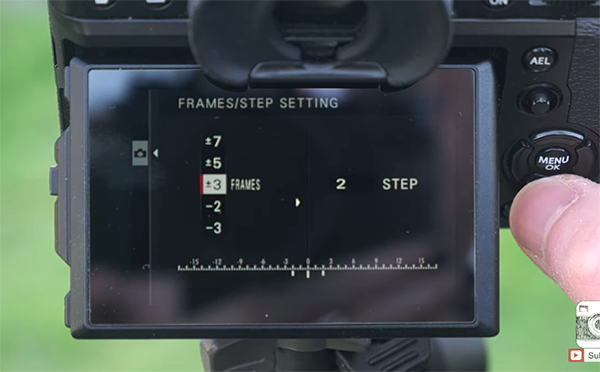
In basic terms Exposure Bracketing works like this: You capture multiple images of the same scene (usually a sequence of three photos will suffice)—each with slightly different exposure. So you’ll make one shot at a “correct” exposure setting, another one-stop underexposed, and a third that’s intentionally overexposed by a stop.

Once you’ve done the foregoing there are a couple choices. You can either use one of the shots is it looks great or blend all three images later during post-processing to achieve exactly the look your after. Put another way, this technique provides helpful options when it comes to the dynamic range in challenging situations.
The process of Exposure Bracketing dates back to film photography when cameras lacked a rear LCD—making it impossible to preview a frame before snapping the shutter. “So you’d take shots of the scene at a series of different exposures to ensure you ended up with a properly exposed image once you got back to the darkroom.”
Bracketing works pretty much the same today with the added benefit of an LCD, in-camera settings, and the great power of the digital darkroom. You may want to jot down a few notes as Newton walks you everything from the A to Z of this transformational technique. Then take advantage of everything you’ve learned for shooting in the field and sitting behind the computer.

Be sure to check out the other instructional videos that are available on The School of Photography YouTube channel.
And don’t miss another explainer we featured earlier with what one of our favorite post-processing instructors says are “five huge photo-editing mistakes that that are easy to fix.”
So you’ve done all your post-processing homework and the results you achieve still leave something to be desired. What’s up with that? According to instructor Steve Arnold, it may be because you’re making five “huge” editing mistakes that are super easy to fix.
Arnold is a notable Australian landscape specialist and educator known for straightforward shooting and editing tutorials for beginners and experienced photographers alike. Today’s eye-opening episode will likely set you free when it comes updating your everyday post-processing workflow to get things right every time.
This handful of errors can sneakily sabotage your results. Arnold begins with a “massive” mistake that can wreck your edits even before you open an image on the computer. It goes like this: “Imagine editing the same photo twice, each time making the same adjustments, yet one result has noticeably higher quality than the other.”

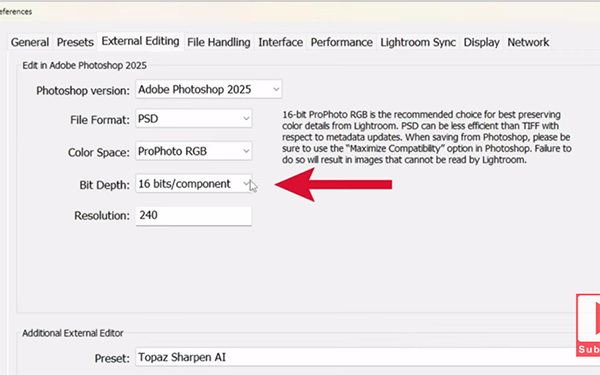
The quick solution involves one tiny setting you may have missed because it’s tucked away in a dark corner of Lightroom and Adobe Camera Raw (ACR). Arnold moves on to mistake #2 that’s particularly insidious because “it literally changes how your photos look after you’ve edited and shared them.” And once again, there’s a magic pill.
Next on the list is a common mistake that makes your edits look Photoshopped rather than beautifully realistic. Arnold uses the analogy of cooking in the kitchen and asks two simple questions: “Do you grab a handful of each ingredient, throw them all into the mix, and hope for the best?” Or do you “add ingredients one at a time, with a quick take taste in between?” It’s clear where he’s going with this one.
Arnold concludes the video with “the one single mistake that’s most responsible for anyone’s photos looking poorly and unprofessionally edited.” This one reveals a problem with making selective adjustments with masks to control color, exposure, contrast, and other key attributes. What you want to prevent is a situation in which your masking becomes visible in the end result.

Each of these mistakes are discussed in detail, as are the necessary step-by-step solutions for doing things right. Once you’re done watching be sure to visit Arnold’s popular YouTube channel where there are many more instructional videos to be found.
We also recommend taking a look at the tutorial we featured with another post-processing expert who demonstrates how to unlock the power of Lightroom’s Dehaze tool for creating stunning cityscapes and other photographs captured outdoors.
