Thames Rockets have been rocketing up and down the River Thames for almost 20 years – the rigid inflatable boat trip regularly voted London’s most exciting tourist treat – but this week launched a new way to take off into the wide-open waters. It’s been a seven-year plan but now a jet-propelled, made-in-Britain, Union Jack-festooned, specially designed boat is about to make waves.
Rocket Rebel
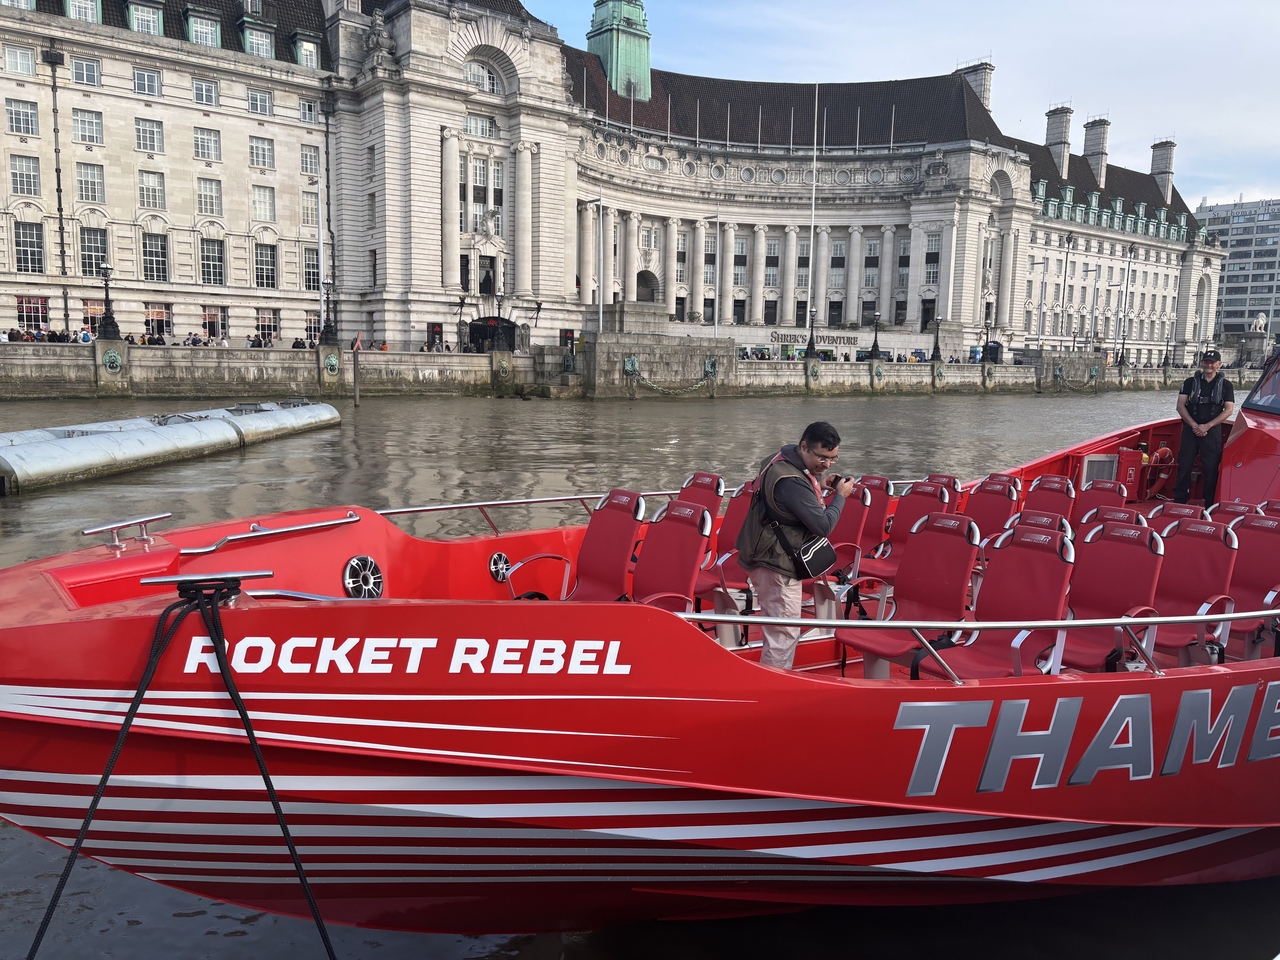
Rocket Rebel docked outside County Hall
Eye-catching in bright red and with wave-splashed Union Jacks painted on twin-fins, Rocket Rebel is 16m long, and has more than twice the capacity of the RIBS (rigid inflatable boats) already in use. That means 26 passengers instead of 12 – an increase in size that has involved long discussions with the river authority and the involvement of maritime barristers before regulation changes allowed the bigger-capacity high-speed craft. Planning started in 2018 and Rocket Rebel, the first of a kind, and a £1.5m investment, has been created by British naval architects Chartwell Marine and built by Diverse Marine, a high-end boatyard in Cowes on the Isle of Wight.
Not only does she look good, she’s environmentally sound. The twin 725hp jet engines (the RIBS have 440hp) are up-to-the-minute fuel efficient and the lightweight aluminium design means a big reduction in emissions per person compared to the other high-speed craft. And, whereas RIBS wear out, the metal hull will go on and on for years.
The adventure
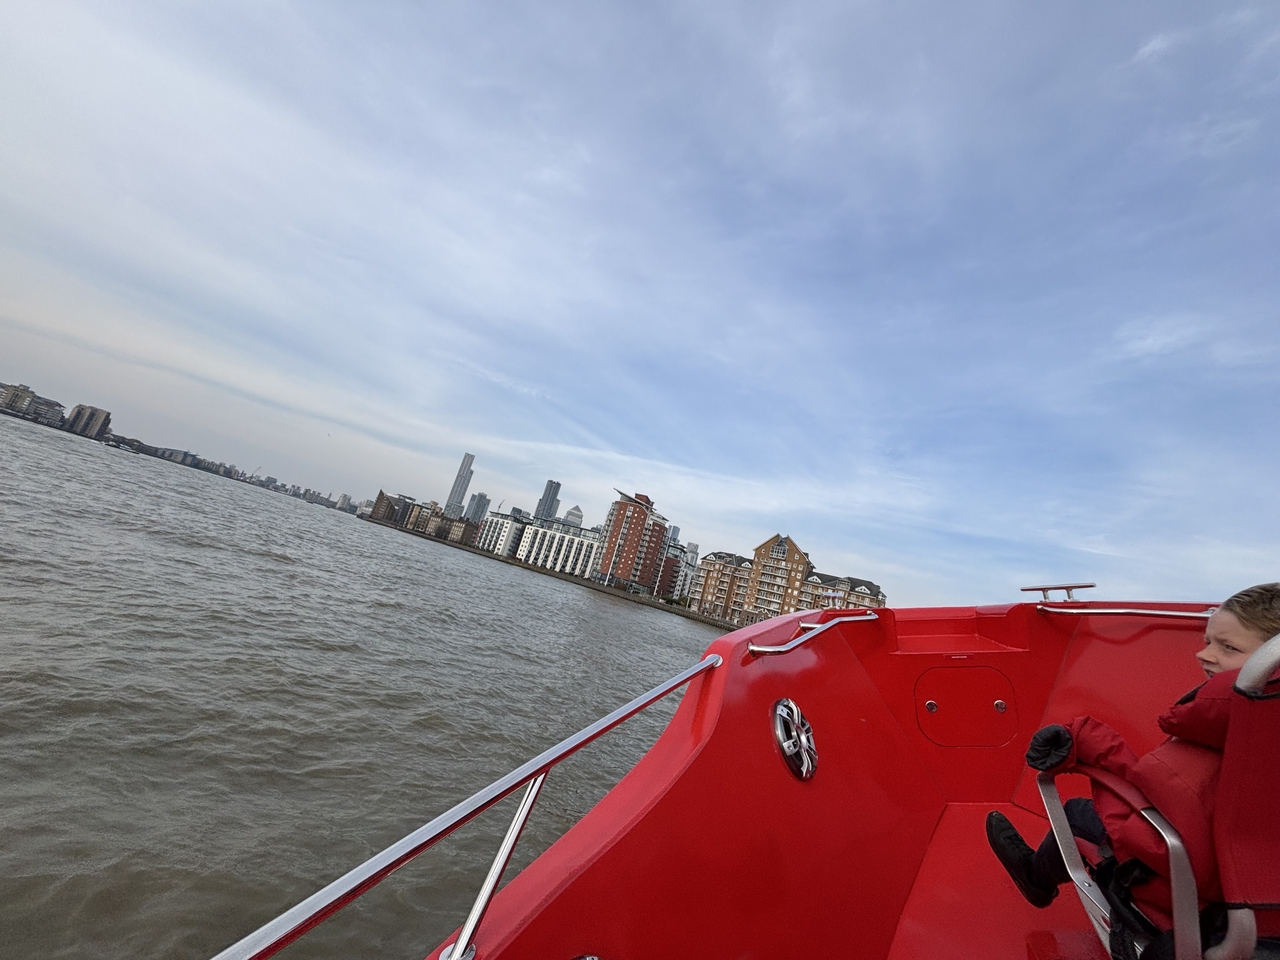
A new angle on the Thames panorama
Breathtaking and hair-raising! Rocket Rebel sails from London Eye Pier in the heart of London. At first the Rocket Rebel Ultimate London Adventure is gentle as we head upriver a short way for a look at Big Ben and the Houses of Parliament, then we turn, and the adrenaline starts quietly pumping even though we’re still at a modest speed.
River regulations mean a 12-knot speed limit on this stretch, but we enjoy the scenery – and the attention as people wave from Thames Clippers, party boats, bridges and even the occasional commercial barge. And we’re not just looking, but listening. Thames Rockets is devoted to ‘history humour’ – its guide/announcers are all young actors or comedians. Ours, Max, who we’re told has been in both theatre and on the TV, stands at the front (only during the slower section, mind you, he’s not that mad), gesticulating wildly and jabbering about the sights and telling corny jokes.
 Sailing through Tower Bridge (we’re easily small enough to slip under the roadway), we start to speed up… the speed limit is now 30 knots (about 35mph for landlubbers). As we head towards docklands, Canary Wharf looms and the breeze starts to buffet our face while Max still chats, albeit over the microphone while strapped into his padded seat like the rest of us.
Although we’re in a boat, we’re close enough to the choppy waves that we bounce constantly. Although bound by the speed limit, meaning top speed doesn’t exceed that of the RIBS, the extra power means acceleration is vastly better. Our skipper, Charlene Peck, a Thames Clipper veteran, starts to really have fun with her new toy, and we swoop one way, then another, looking at the sights from 45-degree angles to a power-pumping soundtrack… the James Bond theme, of course, but there’s also the Clash’s thunderous London Calling and (in homage to Rocket Rebel) Elton John’s Rocket Man and David Bowie’s Rebel Rebel).
We’re all giggling and laughing, lurching from side to side as we twist and turn, heading almost to Greenwich, then turning eventually for a full-blooded whoosh past Canary Wharf, past docks and high-rises with Tower Bridge and the Shard growing ever closer until the engines calm and we’re relaxing as be bob past the Globe theatre and the South Bank, returning to our berth. It’s been an hour long trip An amazing experience!
How to do it
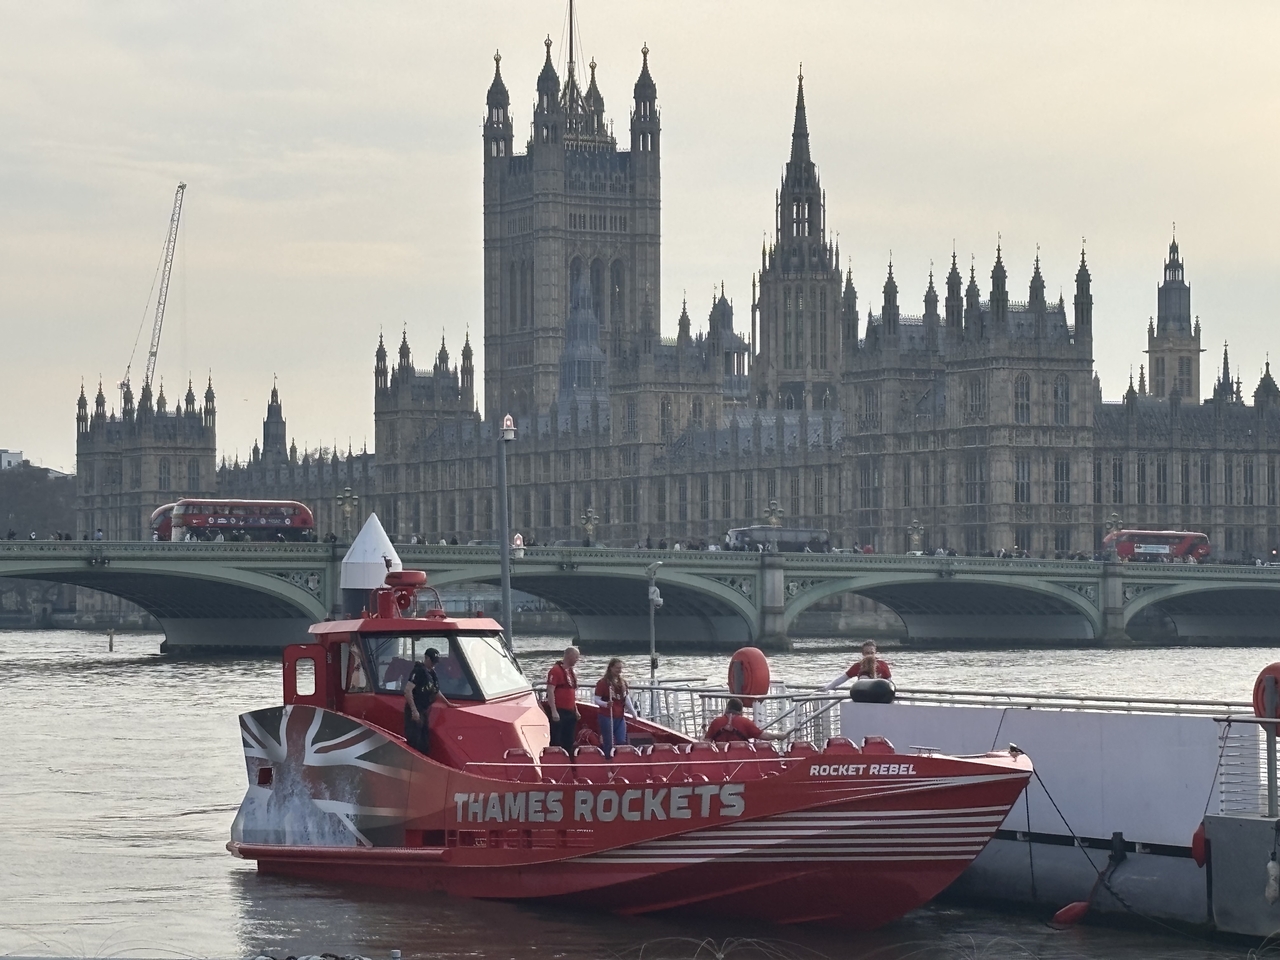
Backing Britain… Rocket Rebel takes a well-earned rest across from Parliament
Rocket Rebel launches for the public on Thursday, April 10, just in time for the Easter holidays. A special launch price (£54.95, children under 15 £49.95. From May 1, £69.95 (no child rate). Schedule tba but there should be about six sailings each day, while there are half a dozen RIBS, meaning many more options. Tickets online and from London Eye ticket office. Also to come are Rebel Rocket Break The Barrier trips, a 45-minute whizz from Bankside Pier (by the Globe theatre) down and through the Thames Barrier and back. www.thamesrockets.com
You might also like: London’s attractions
The post Thames Rockets’ £1.5m power boat brings new edge to London’s thrill ride appeared first on The Travel Magazine.


