
Editing Complex Nature Scenes for Photos with Optimum Light (VIDEO)
We often discuss the challenge of shooting and editing landscapes scenes with a wide range wide range of tones from bright highlights to deep shadows. But there’s another problem you may encounter, and that’s what you’ll learn how to handle in today’s tutorial below from the popular PHLOG Photography YouTube channel.
Instructor Christian Mohrle is a German landscape specialist and a favorite among Shutterbug readers who appreciate his straightforward lessons. The topic of today’s episode is editing landscape scenes with flat dull light and transforming them into something special with a few effects in Lightroom.
Mohrle begins with a seaside shot that has a lot of potential, despite the gray, uninspiring light. His goal for this transformation is to add drama, impact, and a compelling moody look. You can download the Raw file in the description beneath the video and follow along as he describes the process.

The edit begins with a few basic adjustments to create a sold base image for the important steps that follow. He first crops the shot to with skewed lines in mind, and then turns to several simple global enhancements. These include carefully bumping up highlights with a close eye on the histogram to avoid overexposing the photo.
Mohrle also drops shadows quite a bit, increases blacks, brings up whites, and pumps up contrast to give the photo more “punch.” Lastly, he adds texture for more sharpness in smaller details—while dropping Clarity and Dehaze. At this point, the image is looking good.
It’s now time for several selective adjustments to various portions of the scene, which in when the magic occurs. This means masking is next on the list, beginning with a Linear Gradient that Mohrle uses to darken the top right corner of the sky. He also employs a Radial Gradient over the mountain in the middle of the frame—this time to introduce added detail by adding Texture.
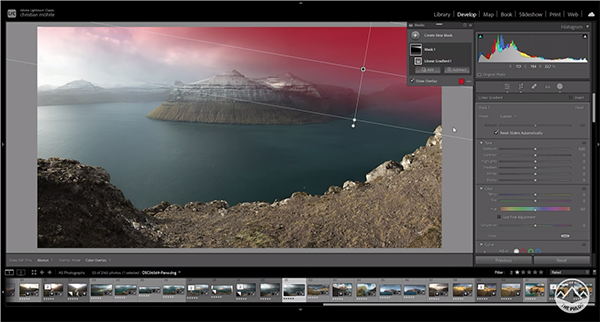
The transformation continues with a bit more masking, including an unusual thin-and-wide Radial Gradient on the left side of the horizon to create an interesting “light beam” effect. Importantly, he carefully rotates the mask to match the direction of the light.
Mohrle turns to color grading enhancements once the masking is complete. As you’ll see, the adjustments he makes are really simple, but the result is significant. All that’s left to finish the job is a bit of sharpening and a quick trip to Photoshop to fix the distortion mentioned above.
After watching the video pay a visit to Mohrle’s YouTube channel where you’ll find much more of interest—especially if landscape photography is your thing. On a related note, don’t miss the earlier tutorial we posted explaining why you should use “local adjustments” for the best edits possible.


