
Focus-Stacking Basics: Sharp Photographs from Here to There (VIDEO)
We featured a tutorial not long ago explaining how to make the sharpest photos possible in the camera when shooting nature and landscape subjects. Today’s tutorial from Camera Focus—a new YouTube channel based in France—takes things further with a method that relies upon both shooting and editing tricks to get the job done with perfection.
The unnamed instructor is a landscape pro who says, “My mission is to help you capture the world with passion and creativity.” He does this by regularly posting very helpful shooting and editing lessons designed for photographers of all skill levels.
Today’s episode explains how to unlock the power of “focus stacking” (also known as focus bracketing). It’s a particularly helpful technique for landscape photographers who consistently struggle to get everything they want sharp when shooting photos with important subjects throughout an image.
The idea is to capture multiple photos of the same scene—three shots is usually sufficient—each with a different point of focus. Once you’ve done that it’s a relatively simple matter to merge the images in Photoshop. The result is a single shot with a sharp background, foreground, and everything in between.
As you’ll see, this technique is not only for landscapes, but works great with macro and other close-up work when depth of field is at a premium. In these situations, “You can use focusing stacking to get everything super sharp.”
The video begins with a very simple approach to shooting the preliminary images—each focused on a different portion of the frame—concentrating on key areas in which precise focus will make or break the shot. Here, thoughtful composition can greatly simplify post-processing.
Now it’s time to merging the images, and the basic technique you’ll learn is designed for both simplicity and effectiveness. One you get the hang of it you can move on to a more involved approach. But even this easy method will give your images sharpness from here to there.
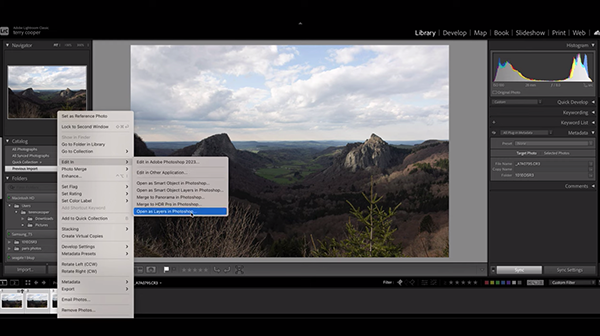
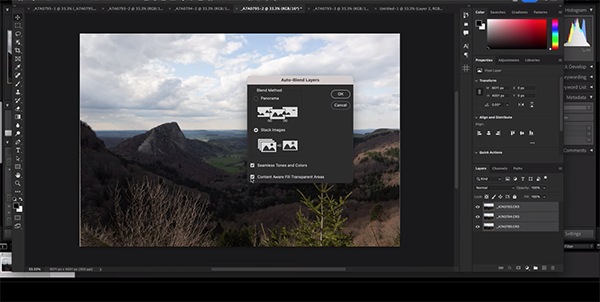
The instructor starts with the images in Lightroom, highlights all three, and selects “Open as Layers in Photoshop” from the dropdown menu on the left. With Photoshop now open you’ll notice the images in the panel on the right. Next, you’ll want to choose the “Auto Align Layers” option, just in case any of the photos shifted slightly as you modified the focus point.
Now that you have everything set up properly it’s time to blend the layers, and you’ll be surprised at how fast an easy this is to do by following the technique explained. The final step is to sit back and marvel at your result, and what you learned how to do in just five minutes!
You can find more great advice on the Capture Focus instructional YouTube channel. And don’t forget to check out the tutorial mentioned above, explaining several in-camera techniques for the sharpest possible nature photos.


