Essential Guide: How to Do Surf Photography Like a Pro
Wave riders and shutterbugs alike, gather around. Mastering surf photography is a bit like surfing itself—it’s all about balance, timing, and having the right gear. I remember when I first waded into the ocean with my camera; each breaking wave was an invitation to capture something epic.
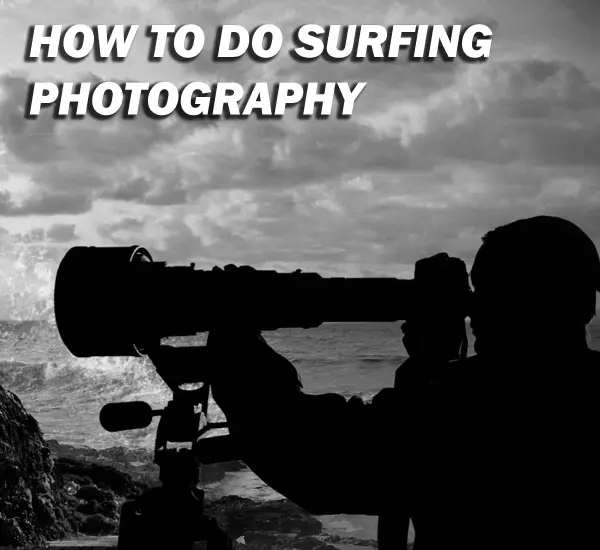
We’ll dive into picking cameras that won’t buckle under the saltwater spray and lenses that bring distant surfers up close. Think high-speed chases—you need a fast shutter speed for those action-packed moments where every droplet counts.
You’re set to discover composition tips that make viewers feel they’re riding along and advanced techniques for shots so sharp they cut through your viewer’s attention span. By the end of our journey together, you’ll be snapping surf photos worthy of magazine covers or at least some serious bragging rights.
Choosing the Right Camera and Lens for Surf Photography
If you’re looking to capture the raw power of a barreling wave or the finesse of a surfer shot, having top-notch gear is key. So, let’s talk about surf photography equipment.
Cropped Sensor vs. Full Frame Cameras
For starters, sensor size matters in this game. Cropped sensors are like binoculars for your camera—they give that extra zoom punch which can be handy when shooting from shore but remember they also tend to add noise faster as light drops. On the flip side, full frame cameras are low-light champs; they suck up more light than their cropped cousins and generally produce cleaner images as Mother Nature dims the lights.
A quick fact—cropped sensor cameras add that multiplication factor we mentioned earlier to lenses used; it makes your 200mm lens feel more like a 300mm on some models. Meanwhile, those who shoot with full frames know these bad boys excel at capturing quality photos even when sun angles get tricky during dawn patrols or sunset sessions.
Mirrorless or DSLR for Wave Shooting?
The age-old debate: mirrorless versus DSLR? When you’re staring down a great surf photo opportunity with salt spray in the air and wind whipping past you need gear that keeps pace. Mirrorless cameras have made waves lately due to their compact size—making them easier to handle in challenging environments—and real-time previews via electronic viewfinders which help examine light effects before pressing that shutter button.

But don’t count out DSLRs just yet. These trusty workhorses offer robust builds perfect for braving sandy beaches and rogue splashes while providing an extensive range of lenses suitable for all kinds of shooting spots—from close-up action shots using fast shutter speeds (think 1/640 or above) with high shutter precision—to captivating landscape captures showcasing surrounding landscapes using mid-range apertures such as f/8-f/11.
No matter if it’s a mighty wave surfing moment frozen in time by high-speed shutters or magazine covers worthy scenery encompassing intense action within its frame—the choice between mirrorless and DSLRs boils down mostly to personal preference considering both types meet essential requirements like interchangeable lenses vital for versatility.
Mastering Camera Settings for Dynamic Surf Shots
You need to unlock the full potential of your photography camera with manual mode to capture the essence of great surf. By tweaking shutter speed, aperture, ISO, and exposure compensation, you’ll be well on your way to creating magazine covers worthy of any surf photographer’s portfolio.
Freezing the Action with High Shutter Speeds
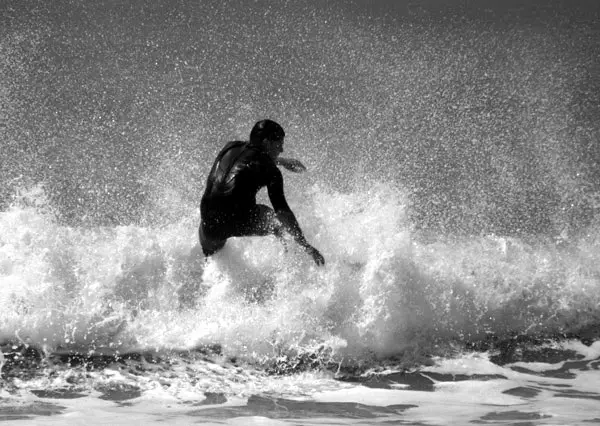
To truly grasp surfing’s intense action in a single frame, it all comes down to mastering high shutter speeds. Imagine trying to freeze a breaking wave at its peak; anything less than lightning-fast will just not cut it. With recommendations pointing towards 1/640 or above for sharp images, this is where fast shutter becomes non-negotiable.
The reason? At these speeds, even rapid movements are captured without blur—essential when photographing surfers carving up the wave face or tucked into a barreling wave. A high shutter speed lets you seize that split-second drama where every water droplet stands still against time—a true showcase of incredible surf photography.
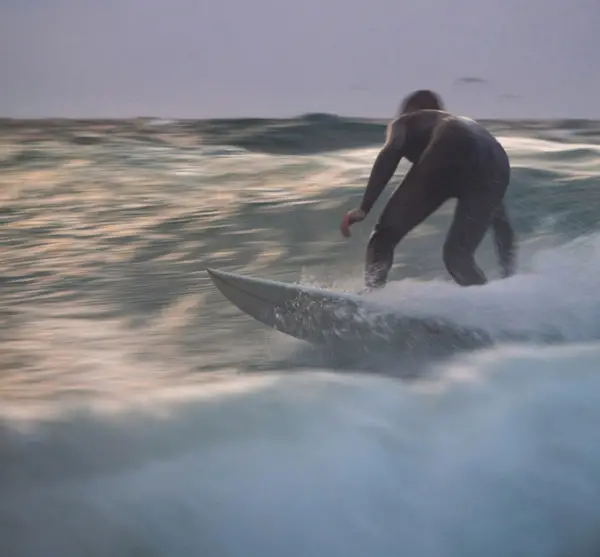
You could slow down the shutter speed down a bit and move your camera following the surfer keeping them in frame for that blurred background effect for variety but be careful not to go too slow on the shutter speed, ¼ of a second is the absolute slowest you should go. As always experiment with different speeds.
Shooting in Manual Mode for Full Control
Taking control over your settings means stepping away from auto modes and embracing manual mode—an absolute game-changer for capturing good quality photos under changing conditions Mother Nature throws at us. It gives you leverage over light effects caused by sun angles and allows you to adjust on-the-fly as lighting shifts throughout the day—the key here is flexibility paired with knowledge.
Dialing in precise settings might sound daunting but think about this: being able to dictate exactly how much light hits your sensor (ISO), which slice of space remains tack-sharp (aperture), and how long each moment lingers before being immortalized (shutter speed). This kind of precision ensures quality images no matter what surfing scenario unfolds before you.
Adjusting Shutter Speed for Capturing Action
If shooting surfer action has taught me one thing—it’s that timing is everything. The difference between an okay shot and an edge-of-your-seat image often lies within milliseconds fast decision-making enabled by quick adjustments in shutter speed. Whether anticipating a surfer shot during aerial maneuvers or waiting for them to ride out from inside a tube—the ability to tweak settings swiftly creates great shots that convey movement while maintaining clarity so vital for underwater photography too.
There’s always more room to perfect the craft we call shooting waves – both technically and artistically alike.
The Art of Composition in Surf Photography
Capturing the essence of surf action isn’t just about snapping a surfer riding a wave; it’s an art that requires thought-out composition. To get magazine covers-worthy shots, every surf photographer needs to play with elements like the rule of thirds and leading lines.
Keeping It Level – The Horizon Line
A horizon line as straight as mother nature intended is crucial for professional-looking photos. When you’re framing surfers dynamically, keep an eye on that horizon—especially when they are cutting across the wave face or getting barreled inside a breaking wave. If your photo has more tilt than a barreling wave, no amount of good quality will save it from looking amateurish.
Including surfers in the frame can make your shots pop but remember to balance them within your composition. Placing them according to the rule of thirds creates captivating surf imagery because this technique anchors their position within the vast ocean landscape. So while you’re shooting surfer action, let these compositional guides lead your viewer’s eyes through each thrilling moment captured.
Rule of Thirds and Leading Lines
To master incredible surf photography compositions, envisioning your viewfinder split into nine equal segments helps place key elements along those intersecting lines—or at strategic points for maximum impact—a classic case where less really can be more.
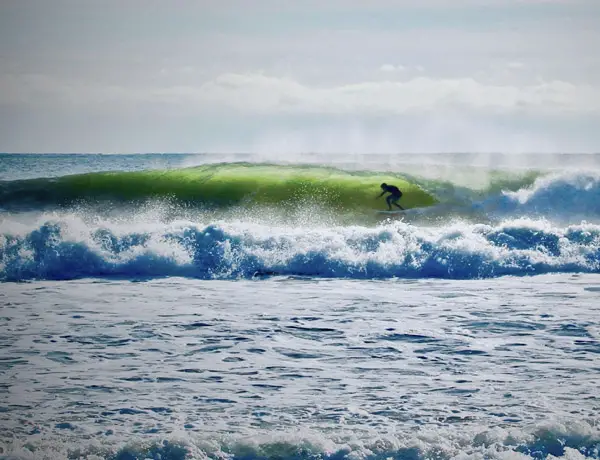
If you’ve got some intense action going down with aerial photography or water surfing maneuvers, don’t just shoot a surfer smack dab in center-frame. Let those leading lines draw viewers directly towards all that raw energy—an edge-of-your-seat experience neatly packed into one still image.
Including Surfers in the Frame for Dynamic Shots
Dynamic doesn’t even begin to describe what happens when you throw some serious shutter speed magic into mixing great shots with sharp images—a high shutter speed is what separates blurred chaos from frozen perfection.
We’re not saying slow things down—that slower shutter might work wonders elsewhere—but here? You need lightning-fast reflexes (and settings) so dial up that fast shutter speed. And if there’s any doubt about why we emphasize manual mode over letting our cameras call all shots: freedom means nailing exposure without sacrificing creative control—and who wouldn’t want that?
Remember folks: waves aren’t waiting around and neither should we—the right combo gives us quality images capturing Mother Nature’s power paired perfectly alongside human agility.
Lighting Techniques That Make Waves Stand Out
Mother Nature is the ultimate lighting director when it comes to surf photography. But catching her best work means you’ve got to be in tune with sun angles and ready for a bit of backlighting drama. Think of it like capturing the moodiness of a breaking wave just as the sunlight decides to play along.
Using Filters to Enhance Water’s Glimmer
A circular polarizing filter should be your new best friend if you want those water glimmers popping in your shots. It cuts through glare faster than a surfer carving up a wave face, enhancing colors so that every photo feels like it’s straight off a magazine cover. Just remember, while these filters are fantastic at giving water surfaces that silky look, they’re not one-size-fits-all—experimentation is key.
The dance between light and waves doesn’t stop there though; sometimes the sparkle on top isn’t enough—you’ve got to examine light effects beneath the surface too. And let’s talk about timing: shoot during golden hours when sun angles make everything look its most epic—but don’t shy away from midday shooting either because intense action under harsh sun can create some pretty sharp images too.
Understanding how surfers move helps big time with predicting where all that captivating surf action’s going down.
So what do we do when Mother Nature throws us curveballs? Say hello to backlighting—a tricky beast but oh-so-rewarding when tamed right. You’ll need patience thicker than waterproof housing because getting illuminated spray against dark stormy skies requires balancing exposure like you’re walking on tightrope made from camera straps. With proper settings dialed in though (keeping an eye on shutter speed.), backlit barreling waves transform into ethereal subjects worthy of wall space any day.
Last pro tip: keep an aperture wide open around f/4 for shallow depth but still crisp edges—the sweet spot where magic happens without losing detail even if Mother Nature hasn’t had her morning coffee yet and sends uneven lighting our way.
Techniques Beyond Basics – Advanced Approaches
When you’re ready to take your surf photography from cool snapshots to magazine cover-worthy art, it’s time to push the envelope with some advanced techniques. We’re not just talking about a pretty picture of a breaking wave here; we mean capturing dreamy long exposures and creating panoramic shots that make viewers feel like they’re riding the crest.
Aerial Photography: Unique Perspectives From Above
Sometimes, good surf photography is all about gaining new perspectives. Aerial shots are game-changers because they offer an angle most beach-goers never see. You don’t need to be buddies with Mother Nature or hang from a helicopter—today’s drones can do the trick. With these flying wonders, photographers create captivating surf images that showcase both intense action and the surrounding landscape.
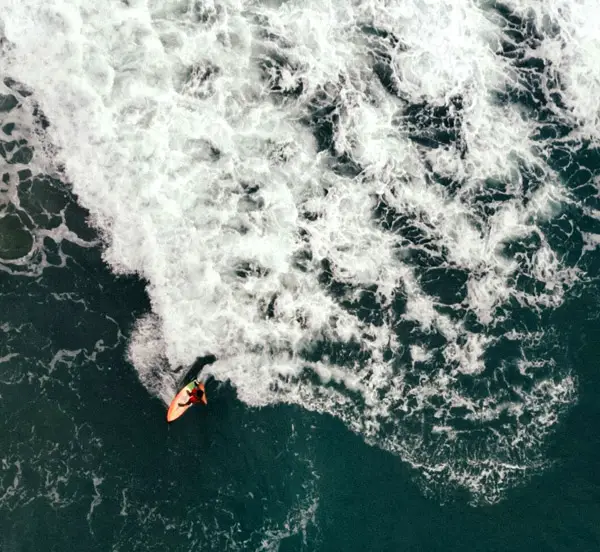
Just check out what the newest next generation drones from DJI can do. They have longer battery life, smaller size, obstacle avoidance, higher wind tolerance and better stabilization, not to mention improved cameras.
But remember, aerial surfing photos aren’t just about altitude—it’s also choosing correct size settings for your drone camera so every surfer shot comes out crisp and clear against vast blue canvases.
Dreamy Effects Through Long Exposure Techniques
The ocean is in constant motion which makes long exposure techniques perfect for turning those chaotic waters into silky smooth masterpieces. Imagine water as soft as clouds brushing against sharp-edged rocks—a contrast only possible when you let shutter speeds drop low but keep your aperture wide enough to maintain clarity on stationary subjects like jutting cliffs or waiting surfers.
This method might require lugging around more gear (think sturdy tripods) and battling longer setup times while keeping salty spray at bay—but trust me, nailing one of those ethereal sea scenes feels downright magical.
Panoramic Views That Tell Bigger Stories
Gone are days when panorama meant awkwardly stitching together side-by-side pictures taken by hand. Modern cameras come equipped with panorama modes—and if yours doesn’t have it, photo editing software has got you covered too. Panoramas allow us to stretch beyond traditional frames and capture environments in their entirety—from sprawling beaches filled with sunbathers up through towering waves poised mid-crash down onto expectant surfers below—all without sacrificing image quality along edges where multiple images merge into one seamless vista.
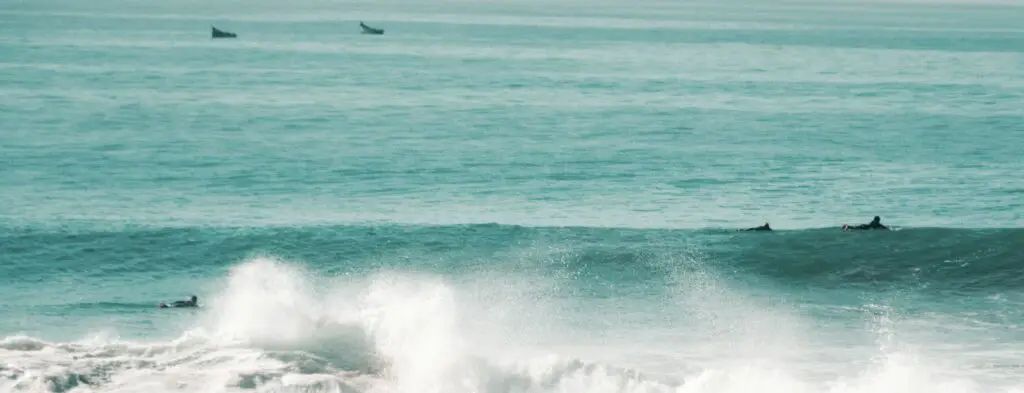
Embracing unique angles isn’t just fun; it lets viewers experience familiar spots through fresh eyes while challenging our own creativity behind lenses—literally broadening horizons both figuratively and literally speaking.
Incorporating innovative approaches such as exploring different shooting directions can breathe life back into old shooting spots that felt played out after hundreds of visits before—an exciting prospect indeed for any dedicated photographer looking to make sure his or her work remain distinctive yet timeless among an ever-growing sea of images.
Editing: Polishing Your Images in Post-Processing
The magic doesn’t stop once you’ve captured the wave; it’s just getting started. With a good camera and sharp shooting skills, surf photographers create captivating surf photos that could grace magazine covers. But even the most breathtaking wave riding shot can benefit from a little post-shoot TLC.
Choosing Right Software for Editing Photos
Selecting the right software is like picking your best surfing buddy—it has to match your vibe and style. Whether it’s Adobe Lightroom or Capture One, go with what feels intuitive because you’ll be spending lots of time together tweaking those great shots into masterpieces.
You want something that will give you full control over enhancing colors and contrast while also allowing for detailed cropping without losing quality in your images. The correct size matters here—cropping too much can lead to pixelation which is not a good look.
Enhancing Colors & Contrast Post-Processing
We all know Mother Nature doesn’t always cooperate with our photography plans. That’s where color enhancement comes in handy. Bumping up saturation makes blues bluer and whites whiter, so every breaking wave pops off the screen or page. Play around with contrast as well; sometimes darkening shadows adds depth to barreling waves making them appear more dramatic.
Cropping & Straightening Photos
An off-kilter horizon line on an otherwise epic surfer shot? Fixable. Cropping isn’t just about trimming edges; it’s about composing your image post-shot to keep viewers’ eyes on the prize—the action-packed center of gravity that is a surfer carving up a massive wave face.
Straighten out those lines using grid tools within your editing software—and remember, symmetry often sells but don’t be afraid to break rules if it creates great drama.
Removing Distractions & Imperfections
Your perfect shot got photobombed by some seaweed or there’s an unsightly blemish on water housing lens? This happens even when we have everything dialed in perfectly before hitting the shutter button.
With cloning or healing tools available in most photo editing platforms, get rid of any unwanted elements faster than telling someone they dropped-in uninvited on your wave.
To reach that level of perfection, you need the right techniques and a keen eye for those serendipitous moments when all elements align perfectly. It’s about being in the water with your camera, ready to capture surfing’s raw energy and grace under just the right light.
Building Portfolio Showcasing Surf Work Offline and Online
Your portfolio is your visual symphony, a curated collection of your best shots that scream ‘I know good surf when I see it.’ But there’s an art to selecting and curating the best photos. It’s not just about slapping images together; it’s about telling a story, setting a mood, and capturing the essence of great surf photography.
Selecting Best Photos
Picking out top-tier work for your portfolio can feel like finding pearls in an ocean. Look for those captivating surf moments that made you hold your breath – maybe it was shooting surfer action as they carved up a barreling wave or the sun casting golden hues over churning water. A sharp image with intense action can communicate more than words ever could.
Once you’ve got potential picks, think quality over quantity. Good quality photos are clear winners against stacks of mediocre ones. And remember, even Mother Nature has her off days; so if some pics aren’t showing her at her finest, let them go.
Printing and Submitting to Magazines or Contests
The tactility of print makes every pixel pop and color sing. When printing your selected works for display or contest submissions, make sure each piece is reflective of great surf photography standards – magazine covers don’t feature fuzzy waves. If submitting to magazines or contests seems daunting because hey – competition is stiff – take heart in knowing each submission hones your craft further.
Displaying prints offline gives viewers texture and depth digital screens can’t match but also consider this: nothing beats seeing someone stop dead in their tracks before one of your framed shots.
Building Online Portfolio Website- Engaging Community
A killer online portfolio website showcases work far beyond local shores allowing people worldwide to dive into what you’ve captured from behind the lens. Use engaging community platforms where feedback flows freely like saltwater currents pushing creativity forward while building reputation among both peers and clients alike — crucial when everyone’s fighting for attention on social media swells.
Note: Be smart with SEO keywords throughout all content within web pages including titles, descriptions, and blog posts which help increase visibility in search engines thereby drawing more eyes towards incredible pieces showcased.
TIPS:
- An online presence lets others discover new facets to surfing scenes through panoramic views, dreamy long exposuresm and aerial perspectives unseen from beach level
- Incorporate testimonials and collaborations stories behind shoots adding layers of intrigue and personal touch often missing from solely image-based portfolios
- With digital tools at your fingertips, you can take good photos and turn them into unforgettable memories. They let you edit and polish up those stellar captures through post-processing to truly make them shine.
Safety Ethics While Capturing Ocean’s Beauty
When you’re out there shooting water, chasing the perfect surf photo, it’s like riding a wave yourself – thrilling but also risky. The ocean is a force to be reckoned with, and as photographers we must respect its power while minimizing our environmental impact.
Safety Tips for Shooting in Water
Before you even dip your toes into the saltwater world of surf photography, make sure safety is part of your prep work. Gear up with a quality waterproof housing to protect your camera from rogue waves and unexpected plunges. Mother Nature doesn’t care if you’ve got an expensive piece of equipment in hand; she’ll soak it without thinking twice. Speaking of protection – never underestimate the value of strapping on fins or wearing a wetsuit when capturing that barreling wave shot.
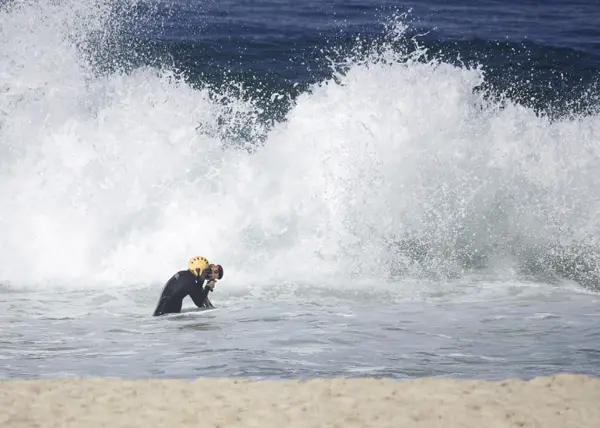
The buddy system isn’t just for kids swimming at the beach – having someone watch your back while you focus through the lens can keep both parties safe from unpredictable currents or wildlife encounters. And let’s face it, no one wants their last selfie to be with a shark.
Ethical Considerations in Surf Photography
Your camera might not disturb marine life directly like some grumpy fisherman’s hook could, but ethics play huge here too. If photographing near reefs or sea creatures’ habitats – tread lightly and shoot surfer action without disturbing them.
Moreover, don’t forget about ethical interactions with fellow humans either. Always ask before snapping pictures if people are around; consent is king even when they’re shredding gnarly waves under golden sunsets fit for magazine covers.
Protecting Marine Life & Minimizing Environmental Impact
We all want those epic shots where every droplet sparkles against an aerial backdrop making each surfer look heroic—but remember: this planet needs heroes who safeguard its oceans more than ones who merely pose above them on boards. Use longer focal lengths instead of getting too close physically which might scare off wildlife—letting animals have their space keeps things cool between us land-dwellers and our finned friends below.
Leave only footprints (or fin prints) behind so future generations can experience surfing paradise too.
To sum up these tidbits on doing right by earth’s most beautiful playground? When aiming for incredible surf photography ensure everyone stays safe—from subject matter experts navigating killer swells down to tiny critters minding their own business underwater—and always think green because ultimately protecting what we love ensures endless great shots.
Gear Maintenance: Protection Elements for Your Camera Bag
Your camera bag is like a superhero’s utility belt. It needs to be packed not only with the right tools but also knowledge and strategy to keep your gear in tip-top shape, especially when you’re dealing with mother nature at her most unpredictable.
Understanding Gear Longevity
Maintaining your photography equipment is key if you want it ready for action when great shots present themselves. Saltwater and sand are archenemies of good quality photos—trust me, I’ve seen too many sad cameras corroded by neglect. So make sure that every piece of kit from lenses to memory cards gets a thorough clean after each encounter with wave surfing thrills.
Better yet, preemptive protection goes a long way; using clear lens filters which have no effect on image quality can shield delicate glass from abrasive elements while shooting surfers carving up waves. And remember—a dry microfiber lens cloth should become as essential in your camera bag as an extra battery or memory card.
Building a Reliable Camera Bag
To create incredible surf photography, start by assembling a reliable camera bag equipped for the challenges posed by water surf photography. That means having waterproof housing or covers on hand because let’s face it—you’re going into battle against Poseidon himself. Waterproof casings not just save your precious gear but also give you peace of mind so that you can focus on capturing those barreling waves without fretting over potential damage.
A smart move would be including silica gel packets in your pack—they’re like little guardians warding off moisture buildup inside cases and bags where dampness could otherwise spell disaster for sensitive electronics during intense action shoots.
Communicating & Collaborating With Surfers For Better Shots
Sometimes getting good surf photos isn’t just about battling the elements—it’s also about teamwork between photographer and surfer shot subjects. Knowing their plan allows you to anticipate movements better which results in captivating images—and they’ll appreciate being part of this symbiotic relationship.
The conversation beforehand doesn’t need complex jargon either; simple terms do wonders ensuring both parties are on the same page (or wave.). A shared understanding translates into well-timed maneuvers captured through high shutter speeds—leaving both photographer ride high on success afterward.
Caring properly for equipment shouldn’t feel daunting—it’s essentially showing respect towards these tools that help photographers create such vivid portrayals of sea adventures. Keep them cleaned, protected, informed, engaged…and watch how longevity pairs perfectly with performance out there among rolling tides and gleaming sunsets.
Finding Inspiration: Creative Exploration in the Surf World
When it comes to surf photography, pushing creativity is not just about capturing the perfect surfer shot; it’s also about embarking on a relentless quest for new angles and fresh perspectives. Researching and scouting spots often lead photographers to uncharted waters where mother nature showcases her raw power through breaking waves.
Researching and Scouting Spots
The search for great surf photos begins with thorough research. Photographers create their best work by immersing themselves in the environment they wish to capture. This means examining the effects of light at different times of the day and understanding how wave surfing conditions affect the subject matter. You don’t need a PhD in surfing knowledge, but getting familiar with local shooting spots can be as simple as chatting up seasoned surf photographers. These interactions may provide insights into hidden coves that frame perfect barreling waves or unveil high vantage points that lend themselves well to aerial photography.
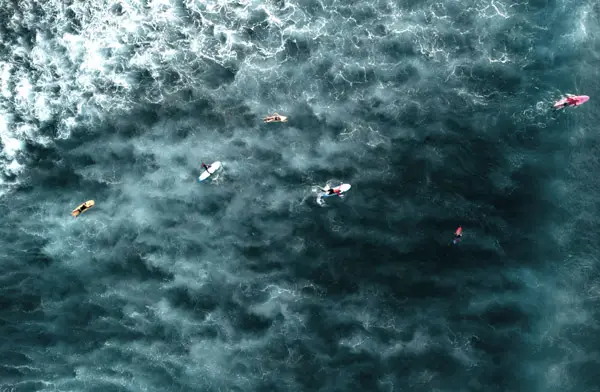
In this realm, experimenting with new ideas could mean swapping your trusty 50mm lens for something wider—a wide-angle lens lets you encompass more of the surrounding landscape, creating an immersive image that gives context to the intense action unfolding on the water’s stage.
Pushing Creativity through Experimentation and New Ideas
A good camera coupled with daring experimentation is what separates good quality photos from captivating surf imagery. Consider playing around with shutter speed: while fast shutter speeds freeze spray mid-air against a clear sky, slower shutters add motion blur that conveys movement in still photographs—an art form all its own within water surf photography.
Sometimes being creative means going back to basics—use manual mode and tweak the aperture wide open or closed down based on whether you want crisp detail across every drop of sea foam (think high f-stops) or want to focus solely on the rider carving up the wave face (aperture wide open). It’s like being a chef: know when each ingredient enhances your dish.
Experimenting with New Ideas
Beyond traditional techniques lies innovation born from necessity—and sometimes accidents. Perhaps one day Mother Nature throws curveballs so wild they force you into underwater photography despite your original plans; these serendipitous shifts can yield some seriously stellar shots if embraced rather than shunned away due to a lack of comfort zone familiarity.
So, don’t shy away from those tricky lighting situations. They can open up new opportunities for capturing the ocean’s beauty in a way that stands out. The light dances on the waves in these spots, creating scenes you won’t find anywhere else—let them inspire your photography and help you craft images that truly resonate.
FAQs
How do you take pictures when surfing?
To snap surfers, get a waterproof camera setup, stay stable in the water, and track the action closely. Timing is everything.
What shutter speed for surf photography?
Aim for 1/1000th of a second to freeze those epic wave rides sharp as glass.
What is the best way to photograph waves?
Catch waves head-on from shore or paddle out; use burst mode so you don’t miss that perfect swell.
What lens is best for surf photography?
A telephoto lens nails it – something like a 70-200mm lets you zoom in on distant shredders without getting drenched.
Conclusion
Lock in your settings, scope out the scene, and wait for Mother Nature to cue the action. That’s how to do surf photography with a pro touch. Remember: high shutter speed is key; it freezes those intense moments on water like magic. Catch every barrel with your lens choice—wide-angle for drama up close or a zoom to snatch distant splashes. Balance aperture wisely; let each wave’s story unfold crisply against its backdrop.
Compose shots that speak of power and grace. The rule of thirds isn’t just a guideline—it’s your ticket to captivating surf narratives framed by surging seas. Predict moves, track triumphs, press burst mode at the peak thrill—your gallery will grow as rich as the ocean itself. Click the following link to learn how to shoot family beach photos like a pro.


