
Here’s a 5-Step Recipe for Cooking Up Tasty Wildlife & Nature Photographs (VIDEO)
There’s no better source of wildlife photography techniques than the Pangolin Photography YouTube Channel, a group of experienced safari guides and imaging experts based in Northern Botswana. The images used to illustrate their tutorials often depict big cats and other exotic species, but the advice they provide is also valuable for photographing birds at your neighborhood park, or a “photo safari” at the zoo.
Instructor Janine Krayer spends much of her time teaching workshops and photographing animals in the wilds of Africa. In this 14-minute episode she demonstrates the “foolproof” method she uses to edit her beautiful imagery in Lightroom or Photoshop. Her five-step workflow is appropriate for photographers of all skill levels and will elevate your photography to a whole new level.
Krayer’s post-production process includes everything from cropping and adjusting color and exposure, to sharpening, masking, and other local adjustments. Her advice is very helpful for editing images with conventional exposures, but she also discusses some tricks for creative effects.
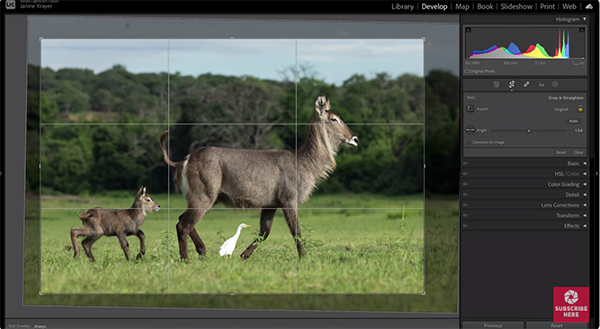
The tutorial begins with a few simple cropping tips for well-composed photos with a compelling sense of balance that emphasize the beauty or imposing stature of a subject. You’ll see how to tighten up a shot by eliminating unnecessary elements at the edges of the frame, and how to rotate an image to straighten a crooked horizon.
She also demonstrates how to determine the best aspect ratio for the image at hand, and why making use of the ruler simplifies these tasks. When it comes to perfecting exposure Krayer turns to the Basics tab to work on the tone of a photo. One of her goals is to “create the largest amount of contrast without clipping the White Point on the right side of the histogram or crushing the blacks on the left.”
Krayer moves on to color grading, with helpful suggestions for fixing images shot at Golden Hour (when animals can be most active) that look a bit too warm. Here you’ll see the advantage of shooting in Raw because Jpegs tend to be more difficult to adjust for a natural look. That’s because these files “simply don’t have enough data left to alter your image in terms of color tones, hues and luminance.”
The tutorial concludes with some great advice for correctly sharpening images without making them look too “crispy,” and a very helpful discussion of masking and other local adjustments to enhance specific portions of a scene. Be sure to check out the Pangolin Wildlife Photography YouTube channel, for more great shooting and editing tips.
We also suggest watching a tutorial we posted recently from another accomplished pro, explaining seven effective tips for shooting awe-inspiring macro photographs.


